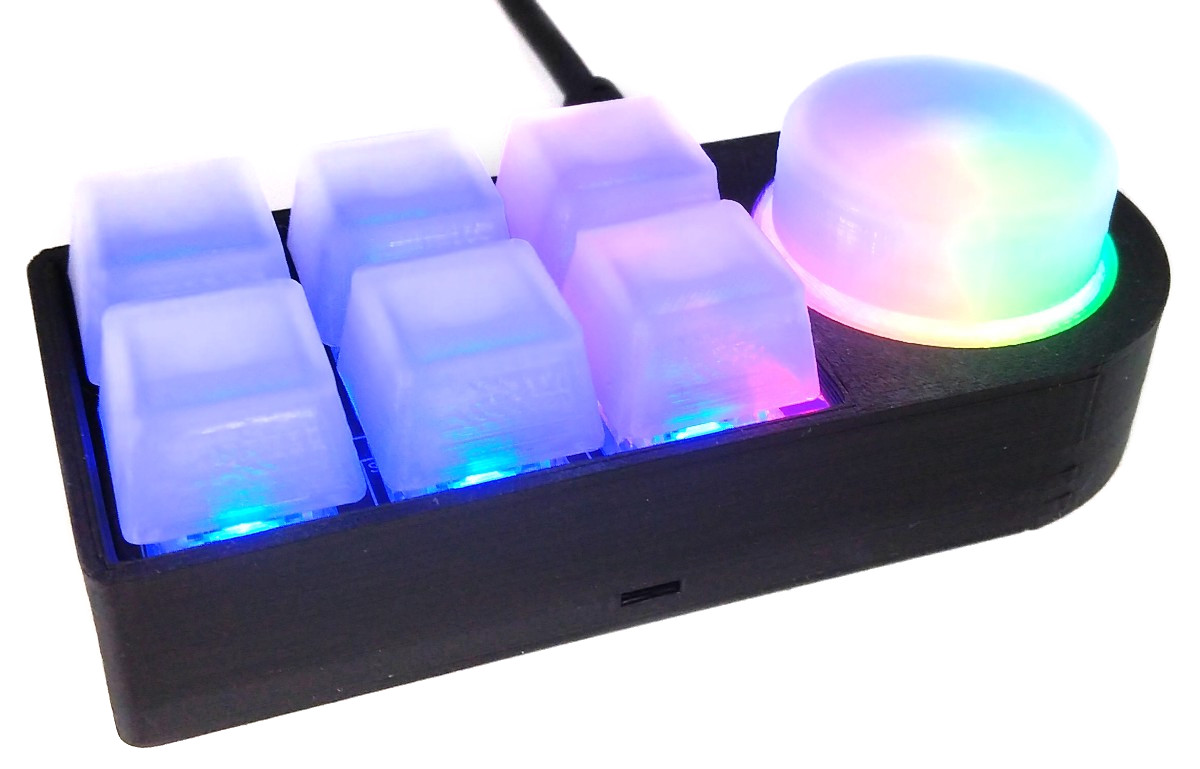
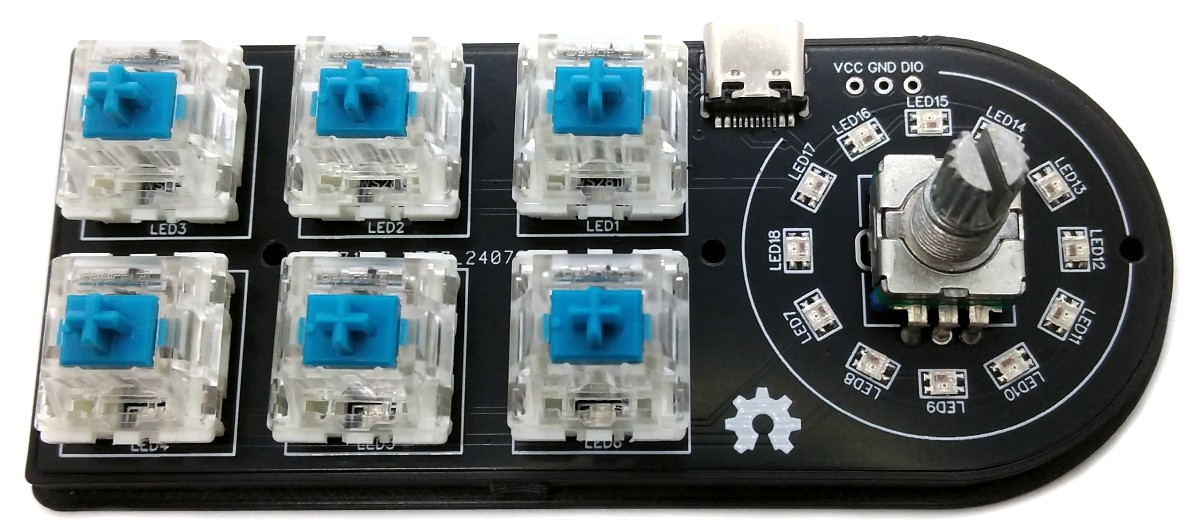
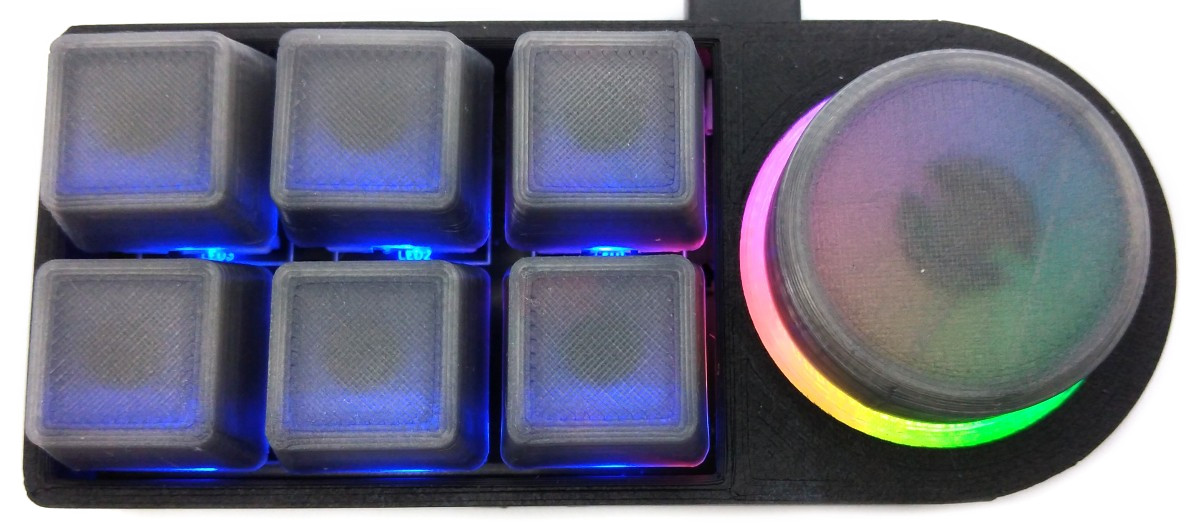
The MacroPad plus is a versatile extension for your keyboard that has six programmable keys and a rotary encoder knob. These buttons and the knob can be configured to perform a variety of actions, such as triggering specific key combinations or mouse movements. You can easily modify the firmware used to operate the MacroPad to suit your needs.
Each button and knob on the MacroPad also has addressable LEDs (NeoPixels), which can be programmed in the same way as the keys. This lets you customize the colors, patterns, or animations of your device.
Connecting the MacroPad to your PC is easy - simply plug it in via USB. It's immediately recognized by your PC as an HID composite device, so no special drivers are needed. This makes the MacroPad a user-friendly and accessible option for anyone looking to enhance their keyboard's capabilities.
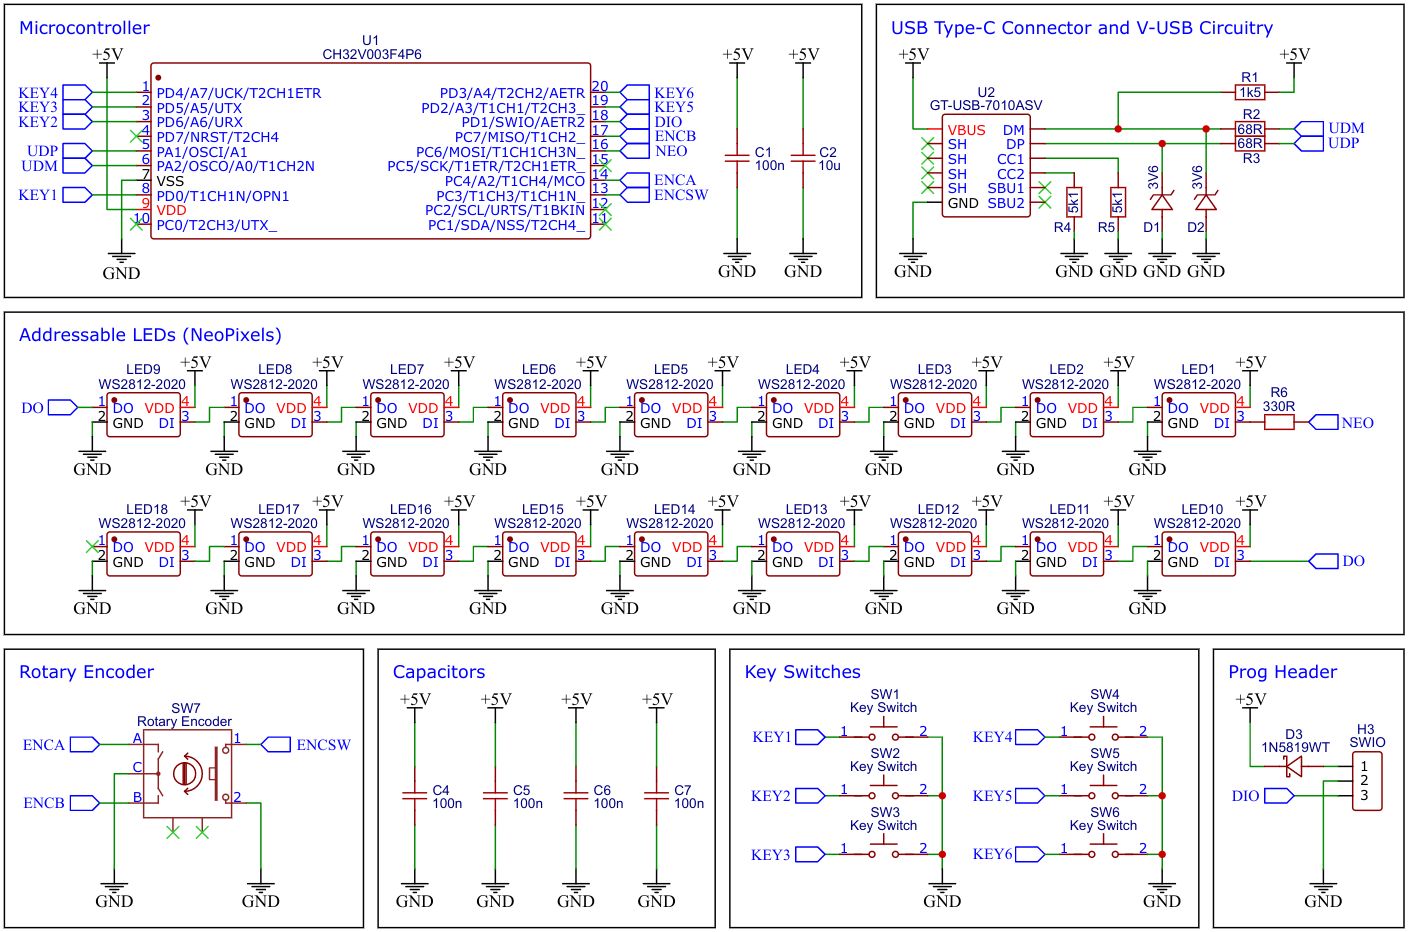
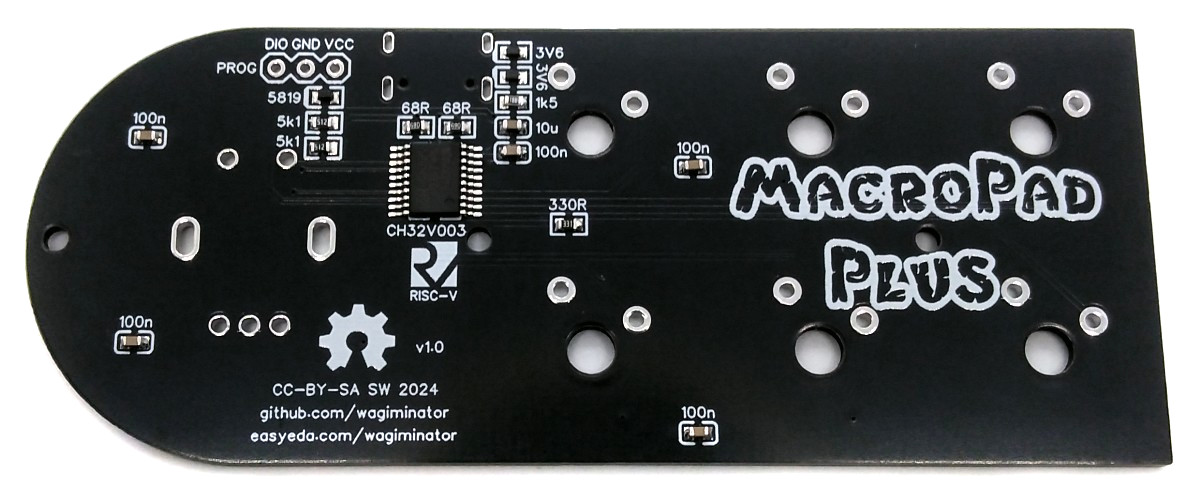
The CH32V003 series is a collection of industrial-grade general-purpose microcontrollers that utilize the QingKe RISC-V2A core design supporting the RV32EC instruction set. These microcontrollers are equipped with various features such as a 48MHz system main frequency, 16KB flash, 2KB SRAM, 2.7V - 5.5V supply voltage support, a single-wire serial debug interface, low power consumption, and an ultra-small package. Additionally, the CH32V003 series includes a built-in set of components including a DMA controller, a 10-bit ADC, op-amp comparators, multiple timers, and standard communication interfaces such as USART, I2C, and SPI.
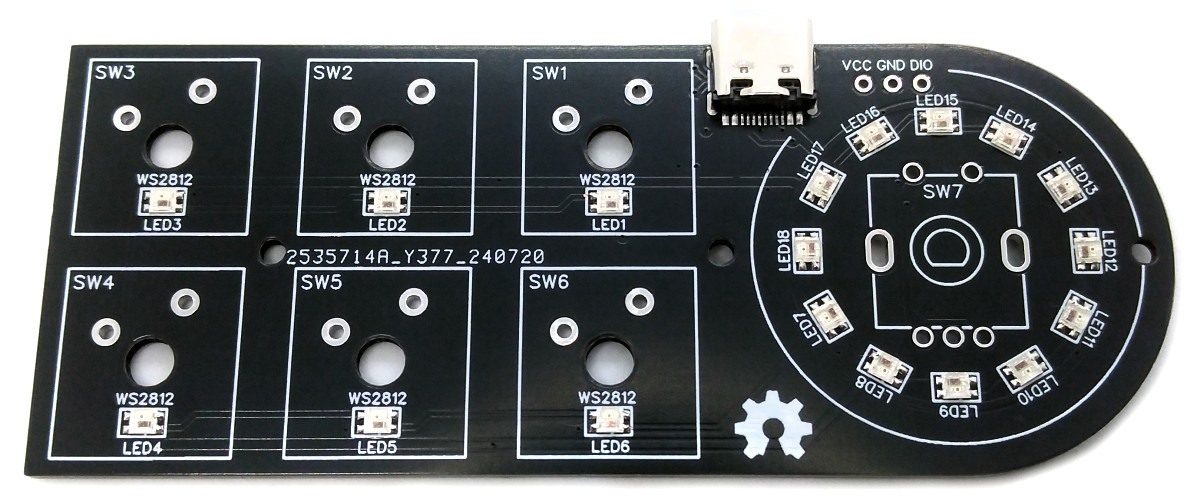
- Take the Gerber files (the zip file inside the hardware folder) and upload them to a PCB (printed circuit board) manufacturer of your choice (e.g., JLCPCB). They will use these files to create the circuit board for your device and send it to you.
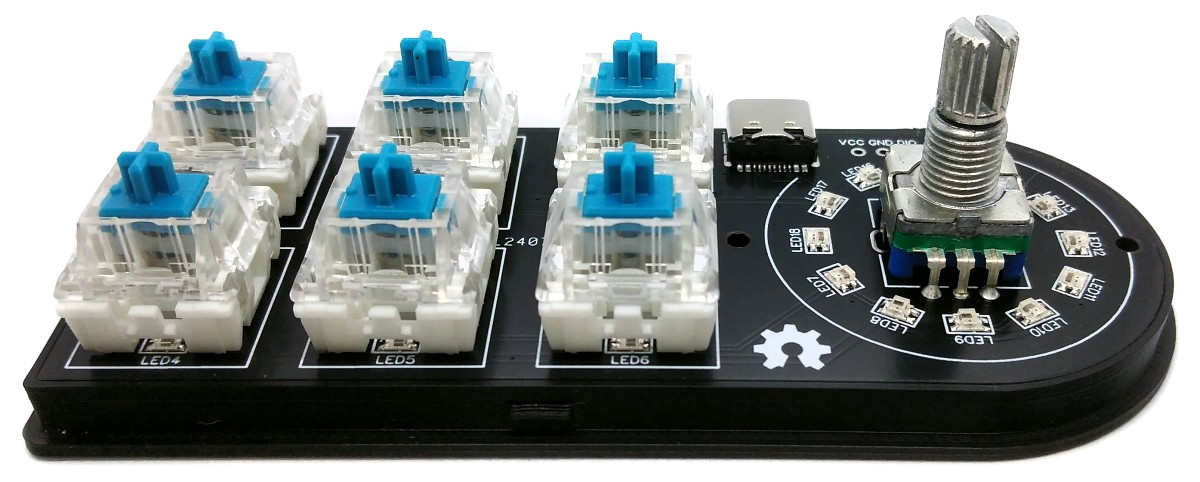
- Once you have the PCB, you can start soldering the components onto it. Use the BOM (bill of materials) and schematic as a guide to make sure everything is connected correctly. You can find the corresponding files in the hardware folder.
- Upload the firmware by following the instructions in the next section (see below).
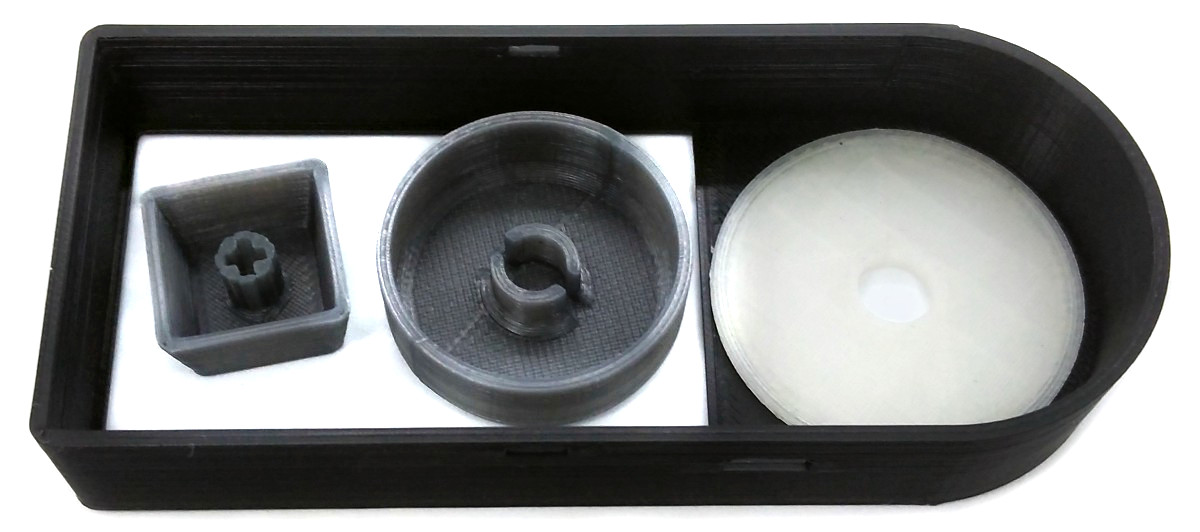
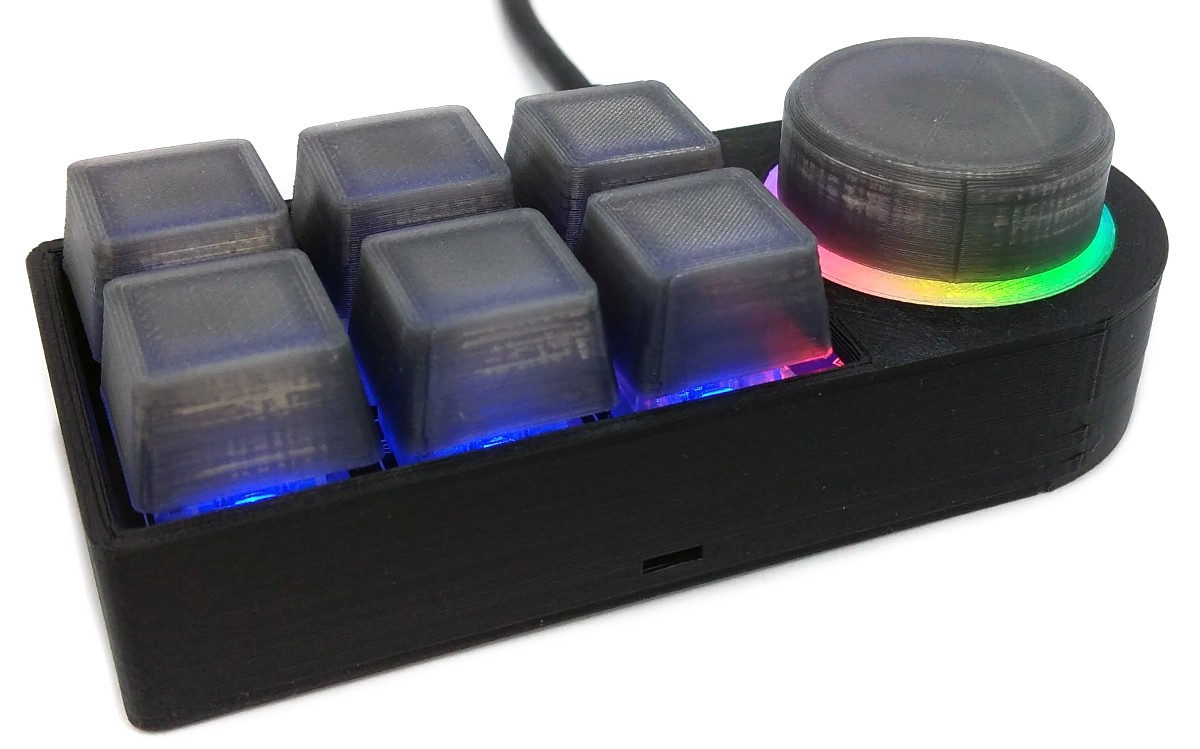
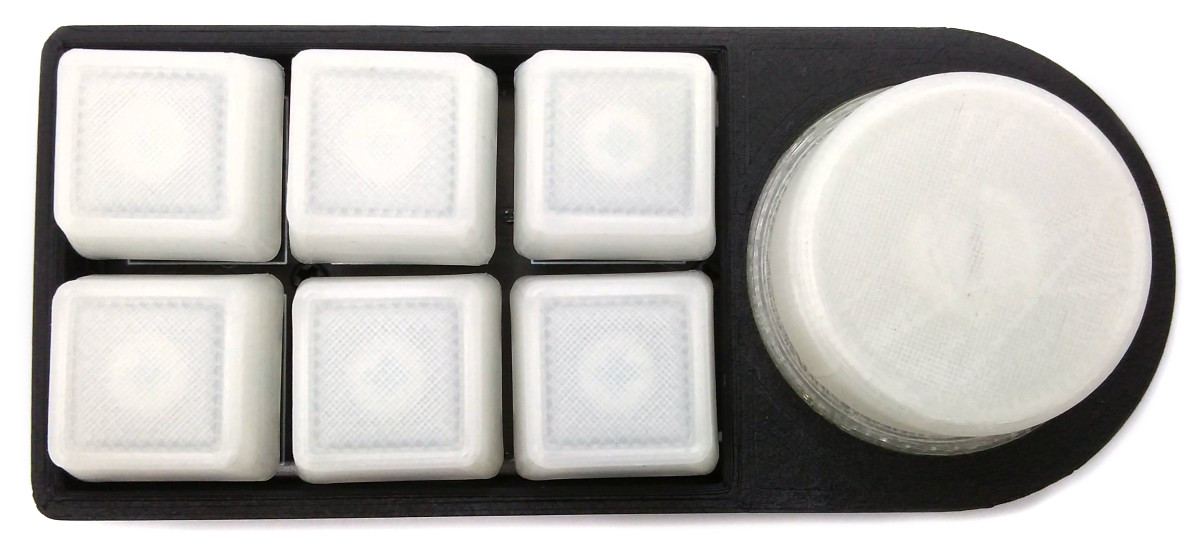
- To create the case for your device, use the stl files in the 3dprint folder with your 3D printer. Make sure to use transparent filament for the keycaps, knob, and ring.
- After printing, secure the PCB to the bottom of the case using three self-tapping M2x5mm screws.
- Next, glue the ring from the bottom into the circular recess in the top of the case.
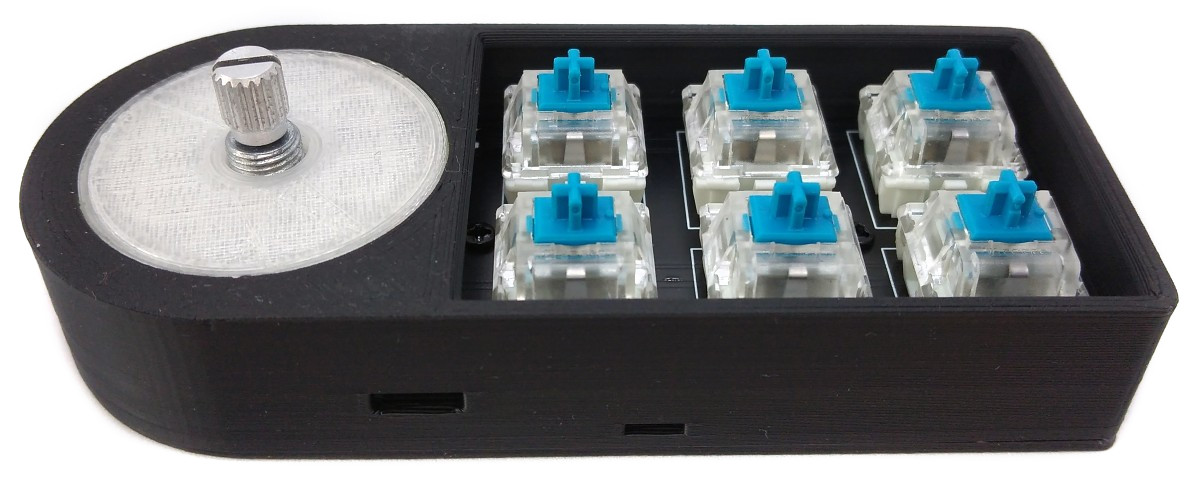
- Finally, assemble the case. Place the keycaps onto the switches and the knob onto the rotary encoder. Your device is now ready to use!
Since the CH32V003 lacks a hardware USB peripheral, USB functionality is handled in software. Charles Lohr's excellent implementation, RV003USB, is used for this. It emulates a USB low-speed device using pin-change interrupts and bit-banging, with assembly code for the low-level protocol and some C code for higher-level functionality.
The definition of the macros and their assignment to individual key events is done by editing the macros.h accordingly, which allows maximum freedom and flexibility. This file is commented in such a way that it should be possible to make adjustments even with basic programming skills.
To program the CH32V003 microcontroller, you will need a special programming device which utilizes the proprietary single-wire serial debug interface (SDI). The WCH-LinkE (pay attention to the "E" in the name) is a suitable device for this purpose and can be purchased commercially for around $4. This debugging tool is not only compatible with the CH32V003 but also with other WCH RISC-V and ARM-based microcontrollers.

To use the WCH-LinkE on Linux, you need to grant access permissions beforehand by executing the following commands:
echo 'SUBSYSTEM=="usb", ATTR{idVendor}=="1a86", ATTR{idProduct}=="8010", MODE="666"' | sudo tee /etc/udev/rules.d/99-WCH-LinkE.rules
echo 'SUBSYSTEM=="usb", ATTR{idVendor}=="1a86", ATTR{idProduct}=="8012", MODE="666"' | sudo tee -a /etc/udev/rules.d/99-WCH-LinkE.rules
sudo udevadm control --reload-rules
On Windows, if you need to you can install the WinUSB driver over the WCH interface 1 using the Zadig tool.
To upload the firmware, you need to ensure that the MacoPad is disconnected from USB. Then, you should make the following connections to the WCH-LinkE:
WCH-LinkE      MacroPad
+-------+      +------+
|  SWDIO| <--> |DIO   |
|    GND| ---> |GND   |
|    3V3| ---> |VCC   |
+-------+      +------+
If the blue LED on the WCH-LinkE remains illuminated once it is connected to the USB port, it means that the device is currently in ARM mode and must be switched to RISC-V mode initially. There are a few ways to accomplish this:
- You can utilize the Python command-line tool rvprog (with -v option).
- Alternatively, you can select "WCH-LinkRV" in the software provided by WCH, such as MounRiver Studio or WCH-LinkUtility.
- Another option is to hold down the ModeS button on the device while plugging it into the USB port.
More information can be found in the WCH-Link User Manual.
Install the toolchain (GCC compiler, Python3, and rvprog):
sudo apt install build-essential libnewlib-dev gcc-riscv64-unknown-elf
sudo apt install python3 python3-pip
pip install rvprog
Disconnect the USB cable from the MacroPad. Connect the MacroPad via the 3-pin PROG header to the WCH-LinkE programming device. Open a terminal and navigate to the folder with the makefile. Run the following command to compile and upload:
make flash
Follow the instructions on CNLohr's ch32v003fun page to set up the toolchain on your respective operating system (for Windows, use WSL). Also, install Python3 and rvprog. Compile and upload with "make flash". Note that I only have Debian-based Linux and have not tested it on other operating systems.
WCH offers the free but closed-source software WCH-LinkUtility to upload the precompiled hex-file with Windows. Select the "WCH-LinkRV" mode in the software, open the .hex file in the bin folder and upload it to the microcontroller.
Alternatively, there is an open-source tool called minichlink developed by Charles Lohr (CNLohr). It can be used with Windows, Linux and Mac.
If you have installed Python3 on your system, you can also use the platform-independent open-source command-line tool rvprog for uploading:
rvprog -f bin/macropad_plus.bin
- EasyEDA Design Files
- CNLohr: rv003usb
- MCU Templates
- MCU Flash Tools
- CH32V003 Datasheets
- CH32V003 USB Knob
- CH32V003 USB Joystick
- CH552E USB Knob
- CH552E MacroPad mini
- CH552G MacroPad plus
- ATtiny85 TinyKnob

This work is licensed under Creative Commons Attribution-ShareAlike 3.0 Unported License. (http://creativecommons.org/licenses/by-sa/3.0/)