VM_Generic_Setup
This page details how to attach an ISO image to the virtual CD and how to add Host-Only Networking to the existing NAT networking. These instructions should work for any recent Linux distribution. We'll use the Ubuntu 20.04 Focal Fossa (beta) Server Version as an example.
That iso available here http://releases.ubuntu.com/20.04/ubuntu-20.04-beta-live-server-amd64.iso
Note this is a beta release. Once the official release happens this link will no longer work. Also note this is the server version.
Starting from the VirtualBox Manager:

Click on New.

Fill in the blanks to suit.

Click on Create. The next screen concerns creating the hard disk.

The default values are fine. Click on Create.
At this point we have a working virtual machine that, were we to fire it up, would discover that no bootable media was available. So let's attach some. We start off on this screen:

Click on Settings.

Click on Storage.

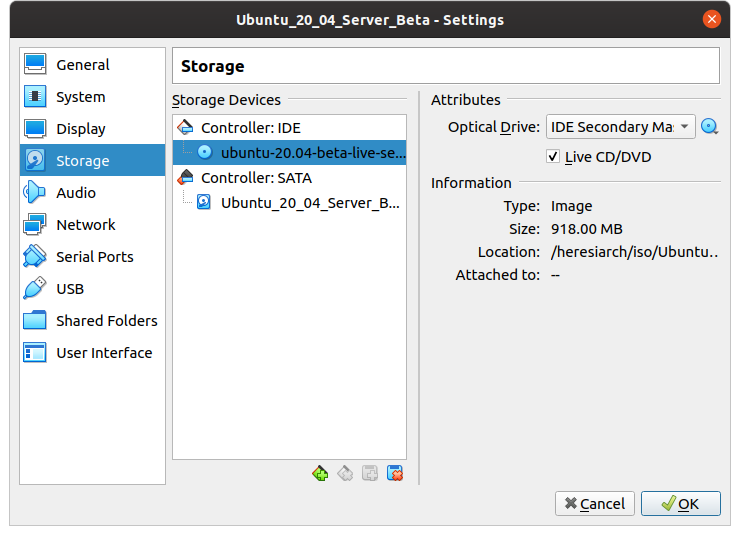
Under "Controller:IDE" there should be a CD-ROM icon labelled "Empty". Click on that. Its attributes appear on the right. Click on the CDROM icon in Attributes and choose the appropriate ISO file. That information will replace the "Empty" in the Storage Device column. Next, check the "Live CD/DVD" box in the Attributes column. Then click Ok. The screen should look like this just prior to clicking on Ok.
Click on Settings again (as clicking on OK above closes the window) and then click on Network.
Adapter 1 defaults to NAT and being enabled. That's what we want. Click on the Adapter 2 tab and then click on the "Enable Network Adapter" checkbox. Select "Host-only Adapter" from the "Attached to:" drop-down menu. The "Name" field will be populated with the named Host Adapter we set up earlier.

Click ok. At this point we're ready to boot the machine from our virtual CD-ROM. Click on Start.