- Data Stax - Its product Astra DB is a cloud database-as-a-service based on Apache Cassandra.
- Graphql - We connect to DataStax db using graphql with Pagination & Infinite Scrolling.
- React.js
- Netlify serverless functions
- Netflix Clone using DataStax & GraphQl,bootstrapped with React.js
- Tech Stack
- Table of content
- 1. Prerequisites
- 2. Create Astra Instance
- 3. Create a security token
- 4. Create table genre with GraphQL
- 5. Insert data in the Table with GraphQL
- 6. Retrieving list of values
- 7. Creating a Movies Table
- 8. Insert Values in Movie table
- 9. Retrieve values from Movie tables
- 10. SetUp Netlify Serverless Functions
- Make sure to install Netlify CLI
npm install netlify-cli -g
ASTRA is the simplest way to run Cassandra with zero operations at all - just push the button and get your cluster.
- Create the database. Review all the fields to make sure they are as shown, and click the
Create Databasebutton. Leveraging Database creation guide create a database. Right-Click the following button and Open in a new TAB.

You will see your new database pending in the Dashboard.
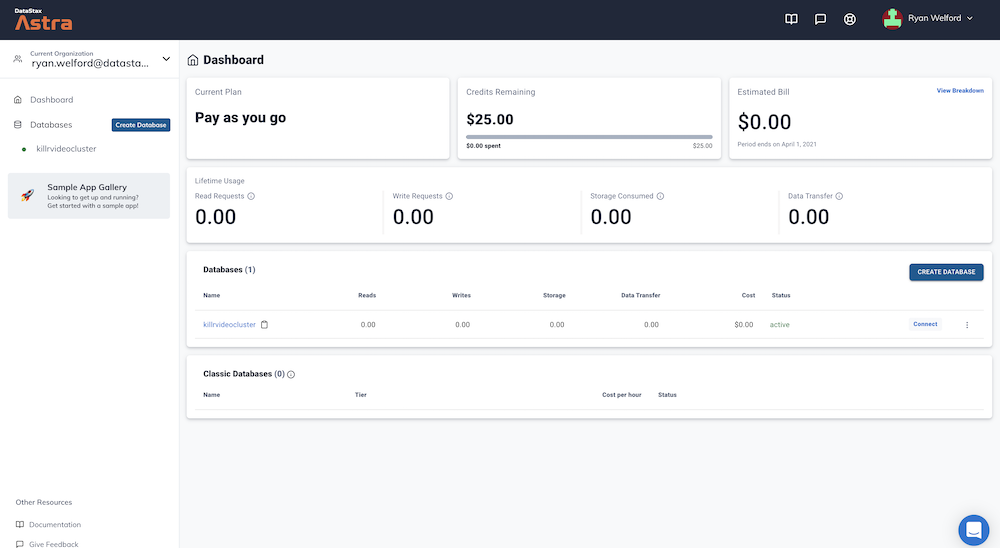
The status will change to Active when the database is ready, this will only take 2-3 minutes. You will also receive an email when it is ready.
Note: this step is very important, as the token generated automatically for you with the database lacks some permissions.
Create a token for your app, using the "Database Administrator" role.
Keep it handy for later use (best to download it in CSV format, as the values
will not be visible afterward).
This will provide authentication later when interacting with the database.
Today, in particular, you'll need the string labeled "token" (the one starting with AstraCS:...).
✅ Open GraphQL Playground by
- Click on your active database
- Click
ConnectTAB - Click
GRAPHQL API - Click link to you playground.
as show on the picture below

✅ Populate HTTP HEADER variable x-cassandra-token on the bottom of the page with your token as shown below

✅ In GraphQL Playground, create a table with the following mutation, making sure to replace netflix:
mutation {
  reference_list: createTable(
    keyspaceName:"netflix",
    tableName:"reference_list",
    ifNotExists:true
    partitionKeys: [
      { name: "label", type: {basic: TEXT} }
    ]
    clusteringKeys: [
      { name: "value", type: {basic: TEXT}, order: "ASC" }
    ]
  )
}✅ In graphQL playground, change tab to now use graphql. Edit the end of the URl to change from system to the name of your keyspace: netflix
✅ Populate HTTP HEADER variable x-cassandra-token on the bottom of the page with your token as shown below (again !! yes this is not the same tab)

✅ In GraphQL Playground,populate the reference_list table with the following values:
mutation insertGenres {
  action: insertreference_list(value: {label:"genre", value:"Action"}) {
    value{value}
  }
  anime: insertreference_list(value: {label:"genre", value:"Anime"}) {
     value{value}
  }
  award: insertreference_list(value: {label:"genre", value:"Award-Winning"}) {
     value{value}
  }
  children: insertreference_list(value: {label:"genre", value:"Children & Family"}) {
     value{value}
  }
  comedies: insertreference_list(value: {label:"genre", value:"Comedies"}) {
     value{value}
  }
  documentaries: insertreference_list(value: {label:"genre", value:"Documentaries"}) {
     value{value}
  }
  drama: insertreference_list(value: {label:"genre", value:"Dramas"}) {
     value{value}
  }
  fantasy: insertreference_list(value: {label:"genre", value:"Fantasy"}) {
     value{value}
  }
  french: insertreference_list(value: {label:"genre", value:"French"}) {
     value{value}
  }
  horror: insertreference_list(value: {label:"genre", value:"Horror"}) {
     value{value}
  }
  independent: insertreference_list(value: {label:"genre", value:"Independent"}) {
     value{value}
  }
  music: insertreference_list(value: {label:"genre", value:"Music"}) {
     value{value}
  }
  romance: insertreference_list(value: {label:"genre", value:"Romance"}) {
     value{value}
  }
  scifi: insertreference_list(value: {label:"genre", value:"Sci-Fi"}) {
     value{value}
  }
  thriller: insertreference_list(value: {label:"genre", value:"Thriller"}) {
     value{value}
  }
}✅ In GraphQL Playground, not changing tab (yeah) list values from the table with the following command.
query getAllGenre {
    reference_list (value: {label:"genre"}) {
      values {
      	value
      }
    }
}
👁️ Expected output

✅ Move to tab GRAPHQL-SCHEMA, everything should be set, use the following mutation to create a new table:
mutation {
  movies_by_genre: createTable(
    keyspaceName:"netflix",
    tableName:"movies_by_genre",
    ifNotExists: true,
    partitionKeys: [
      { name: "genre", type: {basic: TEXT} }
    ]
    clusteringKeys: [
      { name: "year", type: {basic: INT}, order: "DESC" },
      { name: "title", type: {basic: TEXT}, order: "ASC" }
    ]
    values: [
      { name: "synopsis", type: {basic: TEXT} },
      { name: "duration", type: {basic: INT} },
      { name: "thumbnail", type: {basic: TEXT} }
    ]
  )
}✅ Move to tab GRAPHQL, everything should be set, use the following mutation to populate movies table:
mutation insertMovies {
  inception: insertmovies_by_genre(
    value: {
      genre:"Sci-Fi",
      year:2010,
      title:"Inception",
      synopsis:"Cobb steals information from his targets by entering their dreams.",
      duration:121,
      thumbnail:"https://i.imgur.com/RPa4UdO.mp4"}) {
    value{title}
    }

  prometheus: insertmovies_by_genre(value: {
      genre:"Sci-Fi",
      year:2012,
      title:"Prometheus",
      synopsis:"After a clue to mankind's origins is discovered, explorers are sent to the darkest corner of the universe.",
      duration:134,
      thumbnail:"https://i.imgur.com/L8k6Bau.mp4"}) {
    value{title}
   }

  aliens: insertmovies_by_genre(value: {
      genre:"Sci-Fi",
      year:1986,
      title:"Aliens",
      synopsis:"Ellen Ripley is sent back to the planet LV-426 to establish contact with a terraforming colony.",
      duration:134,
      thumbnail:"https://i.imgur.com/QvkrnyZ.mp4"}) {
    value{title}
   }

   bladeRunner: insertmovies_by_genre(value: {
      genre:"Sci-Fi",
      year:1982,
      title:"Blade Runner",
      synopsis:"Young Blade Runner K's discovery of a long-buried secret leads him to track down former Blade Runner Rick Deckard.",
      duration:145,
      thumbnail:"https://i.imgur.com/xhhvmj1.mp4"}) {
    value{title}
   }
}✅ In GraphQL Playground, not changing tab (yeah) list values from the table with the following command.
query getMovieAction {
    movies_by_genre (
      value: {genre:"Sci-Fi"},
       orderBy: [year_DESC]) {
      values {
      	year,
        title,
        duration,
        synopsis,
        thumbnail
      }
    }
}
What are serverless functions?
Serverless functionsopen a world of possibilities for running on-demand, server-side code without having to run a dedicated server. In our case we use it to send graphql queries to Astra DB we setup earlier.
- In root, make a netlify.toml file which contains the configuration for the Netlify functions. In our case, have defined the build command and location of netlify functions. Apart from this, we have also set a redirect path. In our case, whenever a user hits
/api/:splatthey are redirected to the specified netlify function file for that url. - In root, make a directory which we specified in above file as location for our netlify functions. Here simply make a js file with our backend logic.