![]()


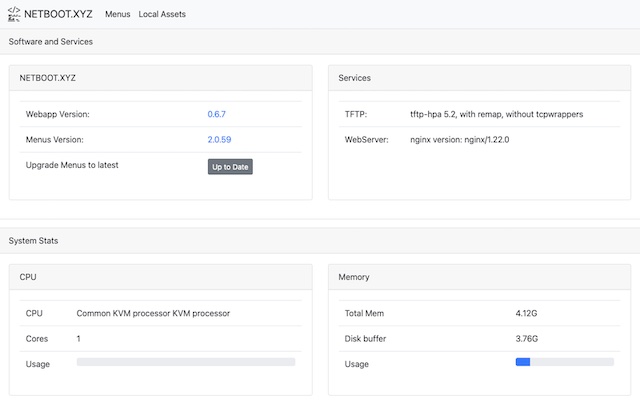
The netboot.xyz docker image allows you to easily set up a local instance of netboot.xyz. The container is a small helper application written in node.js. It provides a simple web interface for editing menus on the fly, retrieving the latest menu release of netboot.xyz, and enables mirroring the downloadable assets from Github to your location machine for faster booting of assets.
It is a great tool for developing and testing custom changes to the menus. If you have a machine without an optical drive that cannot boot from USB then having a local netboot server provides a way to install an OS. If you are looking to get started with netboot.xyz and don't want to manage iPXE menus, you should use the boot media instead of setting up a container.
The container is built upon Alpine Linux and contains several components:
- netboot.xyz webapp
- Nginx for hosting local assets from the container
- tftp-hpa
- syslog for providing tftp activity logs
Services are managed in the container by supervisord.
The container runs fine under ARM-based hosts as well as x86-64.
The netboot.xyz docker image requires an existing DHCP server to be setup and running in order to boot from it. The image does not contain a DHCP server service. Please see the DHCP configuration setup near the end of this document for ideas on how to enable your environment to talk to the container. In most cases, you will need to specify the next-server and boot file name in the DHCP configuration. Your DHCP server will need to be assigned a static IP.
To install docker under Debian and Ubuntu run:
sudo apt install docker.iodocker pull ghcr.io/netbootxyz/netbootxyzdocker pull netbootxyz/netbootxyzThe following snippets are examples of starting up the container.
docker run -d \
  --name=netbootxyz \
  -e MENU_VERSION=2.0.84             `# optional` \
  -e NGINX_PORT=80                   `# optional` \
  -e WEB_APP_PORT=3000               `# optional` \
  -p 3000:3000                       `# sets web configuration interface port, destination should match ${WEB_APP_PORT} variable above.` \
  -p 69:69/udp                       `# sets tftp port` \
  -p 8080:80                         `# optional, destination should match ${NGINX_PORT} variable above.` \
  -v /local/path/to/config:/config   `# optional` \
  -v /local/path/to/assets:/assets   `# optional` \
  --restart unless-stopped \
ghcr.io/netbootxyz/netbootxyzdocker pull ghcr.io/netbootxyz/netbootxyz # pull the latest image down
docker stop netbootxyz # stop the existing container
docker rm netbootxyz # remove the image
docker run -d ... # previously ran start commandStart the container with the same parameters used above. If the same folders are used your settings will remain. If you want to start fresh, you can remove the paths and start over.
- Copy docker-compose.yml.example to docker-compose.yml
- Edit as needed
- Run
docker compose up -d netbootxyzto start containers in the background
docker compose pull netbootxyz     # pull the latest image down
docker compose up -d netbootxyz # start containers in the backgroundOnce the container is started, the netboot.xyz web application can be accessed by the web configuration interface at http://localhost:3000 or via the specified port.
Downloaded web assets will be available at http://localhost:8080 or the specified port. If you have specified the assets volume, the assets will be available at http://localhost:8080.
If you wish to start over from scratch, you can remove the local configuration folders and upon restart of the container, it will load the default configurations.
If you want to pull the Live Images images down from your own mirror, modify the boot.cfg file and override the default live_endpoint setting from https://github.com/netbootxyz and set it to your deployment IP or domain, e.g. http://192.168.0.50:8080. It will then redirect asset download to the local location you set for assets on port 8080 and you can download the assets by using the local assets menu down to your local server. This can result in a much faster boot and load time.
Container images are configured using parameters passed at runtime (such as those above). These parameters are separated by a colon and indicate <external>:<internal> respectively. For example, -p 8080:80 would expose port 80 from inside the container to be accessible from the host's IP on port 8080 outside the container.
| Parameter | Function |
|---|---|
-p 3000 |
Web configuration interface. |
-p 69/udp |
TFTP Port. |
-p 80 |
NGINX server for hosting assets. |
-e WEB_APP_PORT=3000 |
Specify a different port for the web configuration interface to listen on. |
-e NGINX_PORT=80 |
Specify a different port for NGINX service to listen on. |
-e MENU_VERSION=2.0.76 |
Specify a specific version of boot files you want to use from netboot.xyz (unset pulls latest) |
-e TFTPD_OPTS='--tftp-single-port' |
Specify arguments for the TFTP server (this example makes TFTP send all data over port 69) |
-v /config |
Storage for boot menu files and web application config |
-v /assets |
Storage for netboot.xyz bootable assets (live CDs and other files) |
The netboot.xyz Docker image requires the usage of a DHCP server in order to function properly. If you have an existing DHCP server, usually you will need to make some small adjustments to make your DHCP server forward requests to the netboot.xyz container. The main settings in your DHCP or router that you will typically need to set are:
tftp-serveralso known asnext-server, this option tells the client where to look for the boot fileboot-file-name, this option tells the client which boot file to load
The following are some configuration examples for setting up a DHCP server to get started. The main configuration you will need to change are SERVER_IP_ADDRESS so that DHCP can direct the client to the server running the netboot.xyz Docker container. Because the Docker image is hosting a dnsmasq TFTP server, the boot files are pulled from it and then it will attempt to load the iPXE configs directly from the host. You can then modify and adjust them to your needs. See booting from TFTP for more information.
To install dnsmasq as your DHCP server for Debian and Ubuntu, run:
sudo apt install dnsmasqFor Redhat-based systems, run:
sudo dnf install dnsmasqSet up your configuration file /etc/dnsmasq.conf with the following settings:
# /etc/dnsmasq.conf

# Set the DHCP Range and lease time
dhcp-range=192.168.1.100,192.168.1.200,255.255.255.0,12h

# Set the default gateway
dhcp-option=option:router,192.168.1.1

# Set tne DNS servers
dhcp-option=option:dns-server,8.8.8.8,8.8.4.4

# Standard PC BIOS
dhcp-match=set:bios,60,PXEClient:Arch:00000
dhcp-boot=tag:bios,netboot.xyz.kpxe,,SERVER_IP_ADDRESS

# 64-bit x86 EFI
dhcp-match=set:efi64,60,PXEClient:Arch:00007
dhcp-boot=tag:efi64,netboot.xyz.efi,,SERVER_IP_ADDRESS

# 64-bit x86 EFI (obsolete)
dhcp-match=set:efi64-2,60,PXEClient:Arch:00009
dhcp-boot=tag:efi64-2,netboot.xyz.efi,,SERVER_IP_ADDRESS

# 64-bit UEFI for arm64
dhcp-match=set:efi64-3,60,PXEClient:Arch:0000B
dhcp-boot=tag:efi64-3,netboot.xyz-arm64.efi,,SERVER_IP_ADDRESS
A breakdown of the configuration:
dhcp-rangesets the range of IP addresses and lease times that will be assigned to clients.dhcp-optionsets the default gateway and DNS servers.dhcp-bootsets the boot file for different architectures, theSERVER_IP_ADDRESSshould be replaced with the IP address of the host running the Docker container.dhcp-matchsets the match criteria for different architectures.
Once the dnsmasq configuration is set, you can enable and start the service:
sudo systemctl enable dnsmasq
sudo systemctl start dnsmasqThe following bootfile names can be set as the boot file in the DHCP configuration. They are baked into the Docker image:
| bootfile name | description |
|---|---|
netboot.xyz.kpxe |
Legacy DHCP boot image file, uses built-in iPXE NIC drivers |
netboot.xyz-undionly.kpxe |
Legacy DHCP boot image file, use if you have NIC issues |
netboot.xyz.efi |
UEFI boot image file, uses built-in UEFI NIC drivers |
netboot.xyz-snp.efi |
UEFI w/ Simple Network Protocol, attempts to boot all net devices |
netboot.xyz-snponly.efi |
UEFI w/ Simple Network Protocol, only boots from device chained from |
netboot.xyz-arm64.efi |
DHCP EFI boot image file, uses built-in iPXE NIC drivers |
netboot.xyz-arm64-snp.efi |
UEFI w/ Simple Network Protocol, attempts to boot all net devices |
netboot.xyz-arm64-snponly.efi |
UEFI w/ Simple Network Protocol, only boots from device chained from |
netboot.xyz-rpi4-snp.efi |
UEFI for Raspberry Pi 4, attempts to boot all net devices |