GeekTool
- Make sure Mining Visualizer is running. The first time it runs, it creates the folder
$HOME/.config/MiningVisualizer. Confirm that this folder contains a subfolder namedGeekTool, which should contain some .html files. - Download and install the latest version of GeekTool, and start it up.
- In the Geeklets section, click on the Web icon and drag it to your desktop. This creates a new, blank geeklet.

- A Properties window should appear. In the Name field, enter
MVis_Network.
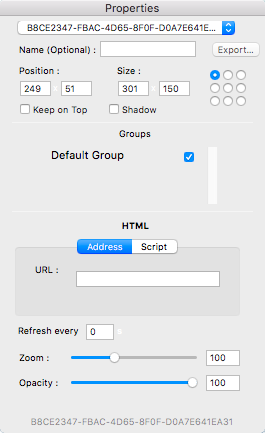
- In the URL field, enter
/Users/[USER]/.config/MiningVisualizer/GeekTool/network.html - Drag three more Web geeklets onto your desktop and fill in the fields as follows:
 NAME               URL
 ----               ---
 MVis_Activity      /Users/[USER]/.config/MiningVisualizer/GeekTool/activity.html
 MVis_CloseHits     /Users/[USER]/.config/MiningVisualizer/GeekTool/closehits.html
 MVis_Miners        /Users/[USER]/.config/MiningVisualizer/GeekTool/miners.html
- You can size and position each geeklet using the mouse, but only when the GeekTool program window has the focus.
- Close GeekTool. It should still be running in the background, though. You can see its icon at the top-right of the screen.
- For general information on the data items presented in the widgets, please visit the Desktop Widets page.
Geeklets are represented by normal .HTML files, which can be edited if you wish. However, do not try to edit the ones in .config/MiningVisualizer/GeekTool, as they are constantly being overwritten. The ones you need to modify are in the MiningVisualizer.app. Right-click on the .app file and select Show Package Contents to find the GeekTool subfolder containing the .HTML files.