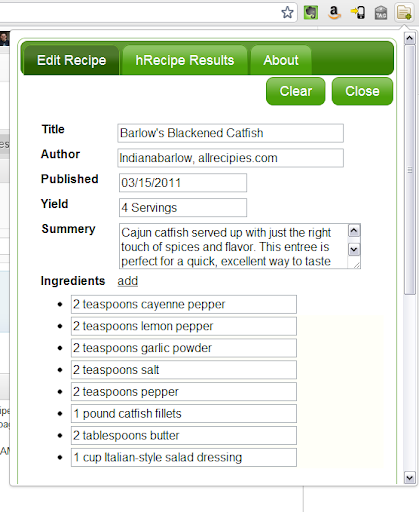
Creating a Recipe
The input form is where the action is, just fill it in as much or as little as you want! The hRecipe v0.22 specification currently requires that your recipe has a Title as well as at least one ingredient but the more info you enter the better it will be for Google as well as those who want to give your recipe a try.
- Title - Just the Title here.
- Author - You or whoever gets the credit.
- Published -Date, just have to pick one from the calendar.
- Yield - a number and the measure (serving, cups whatever it is).
- Summery - Just a short sentence or two describing how yummy this recipe is.
- Ingredients - just keep clicking add to display another field and enter one ingredient per field.
- Instructions - Here you can include additional html to help format the instructions, I suggest
- for the steps.
- Prep Time - how many hour and/or minutes for prep time, enter in the hh:mm format.
- Cook Time - how many hour and/or minutes for cook time, enter in the hh:mm format.
- Photo - a link to a picture of the dish.
- Nutrition - just need to enter a value and select a unit of measurement from the drop-downs.y enter
- Tags - tags for the recipe can be entered separated by commas.
Once your done just click the hRecipe Result tag to get the results and copy them into your blog! Only 2 more things to know..
- You can go back to the other tab if you decide you need to change something.
- The data is saved until you click Clear so if you notice you missed something just come back to the Helper.

You data is saved until your done with it, to start fresh just click the Clear button.