fwd-edu-breakout=github:climate-action-kits/pxt-fwd-edu/fwd-breakout
sonar=github:climate-action-kits/pxt-fwd-edu
datalogger=datalogger
let animalCount = 0
input.onButtonPressed(Button.A, function () {
    fwdMotors.rightServo.fwdSetAngle(90)
})
input.onButtonPressed(Button.B, function () {
    fwdMotors.rightServo.fwdSetAngle(0)
})
input.onButtonPressed(Button.AB, function () {
    animalCount += 1
})
basic.forever(function () {
    basic.showNumber(animalCount)
})
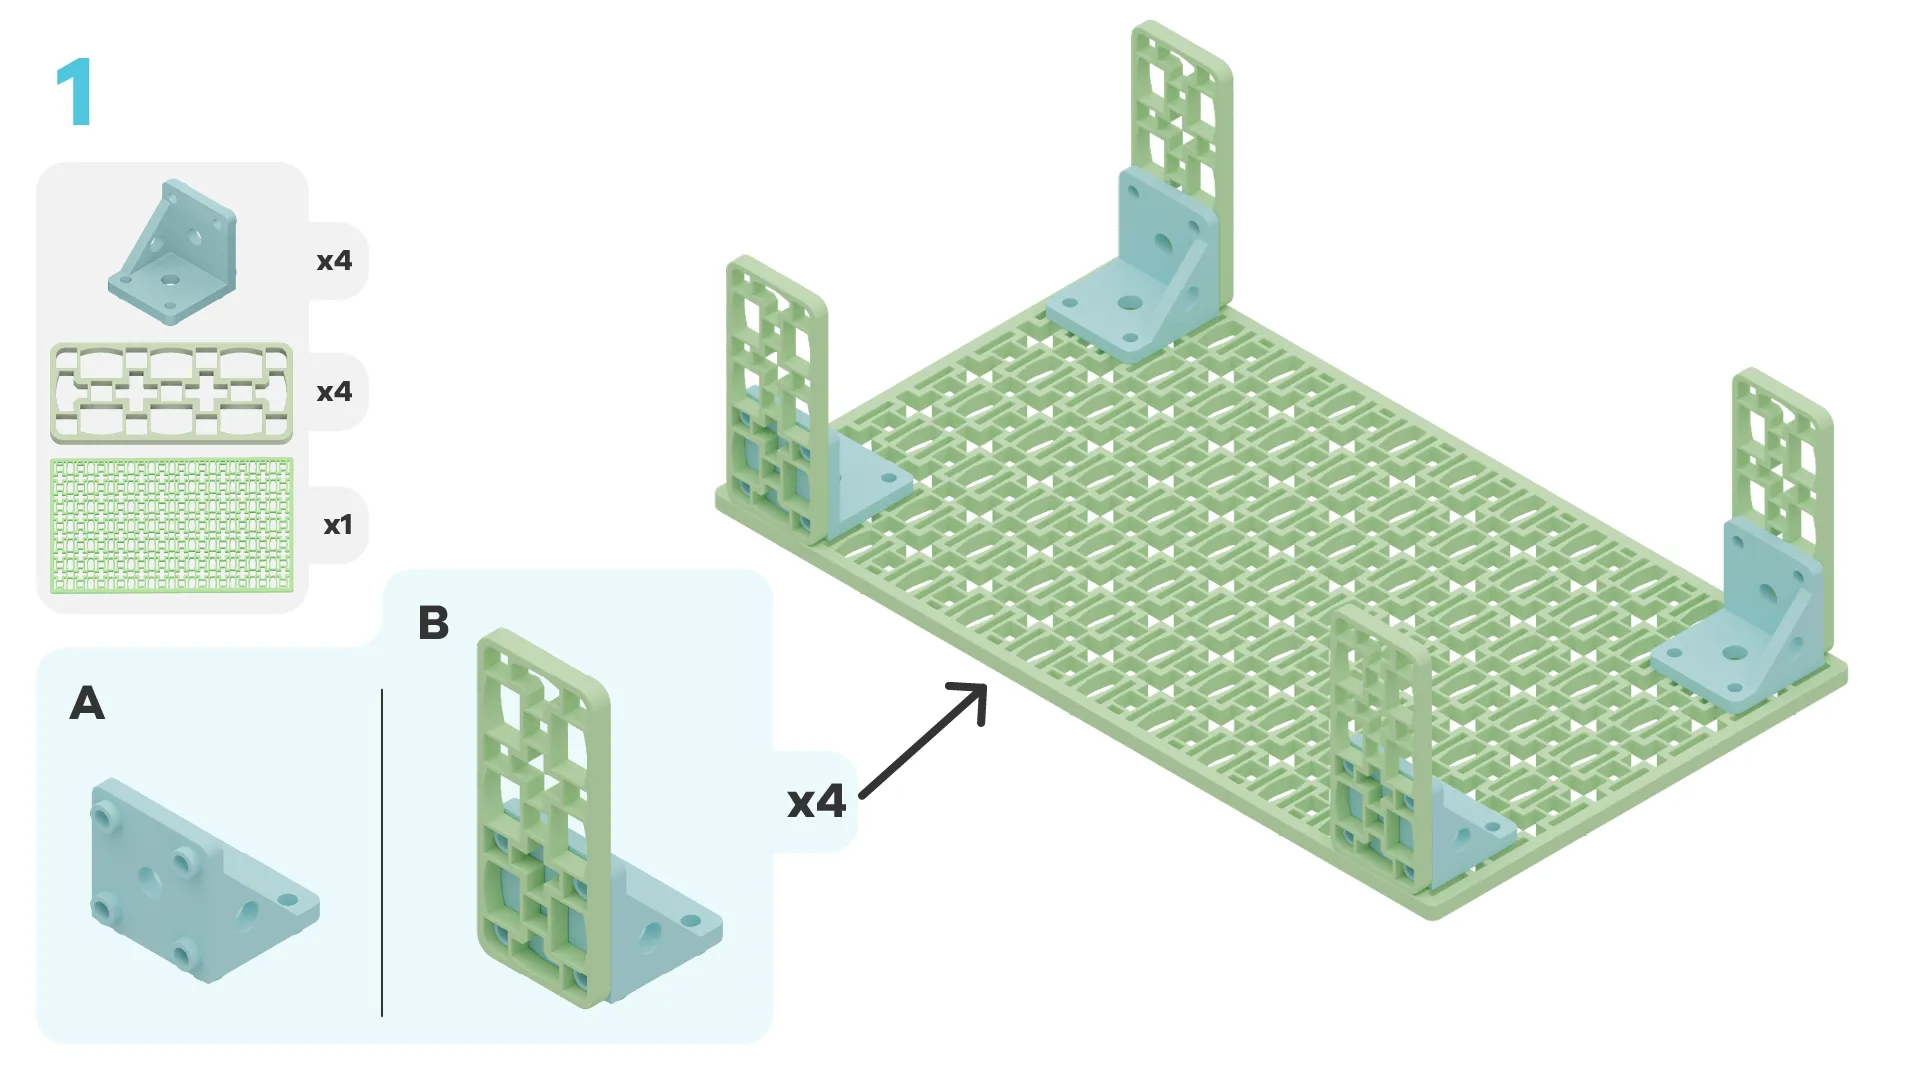
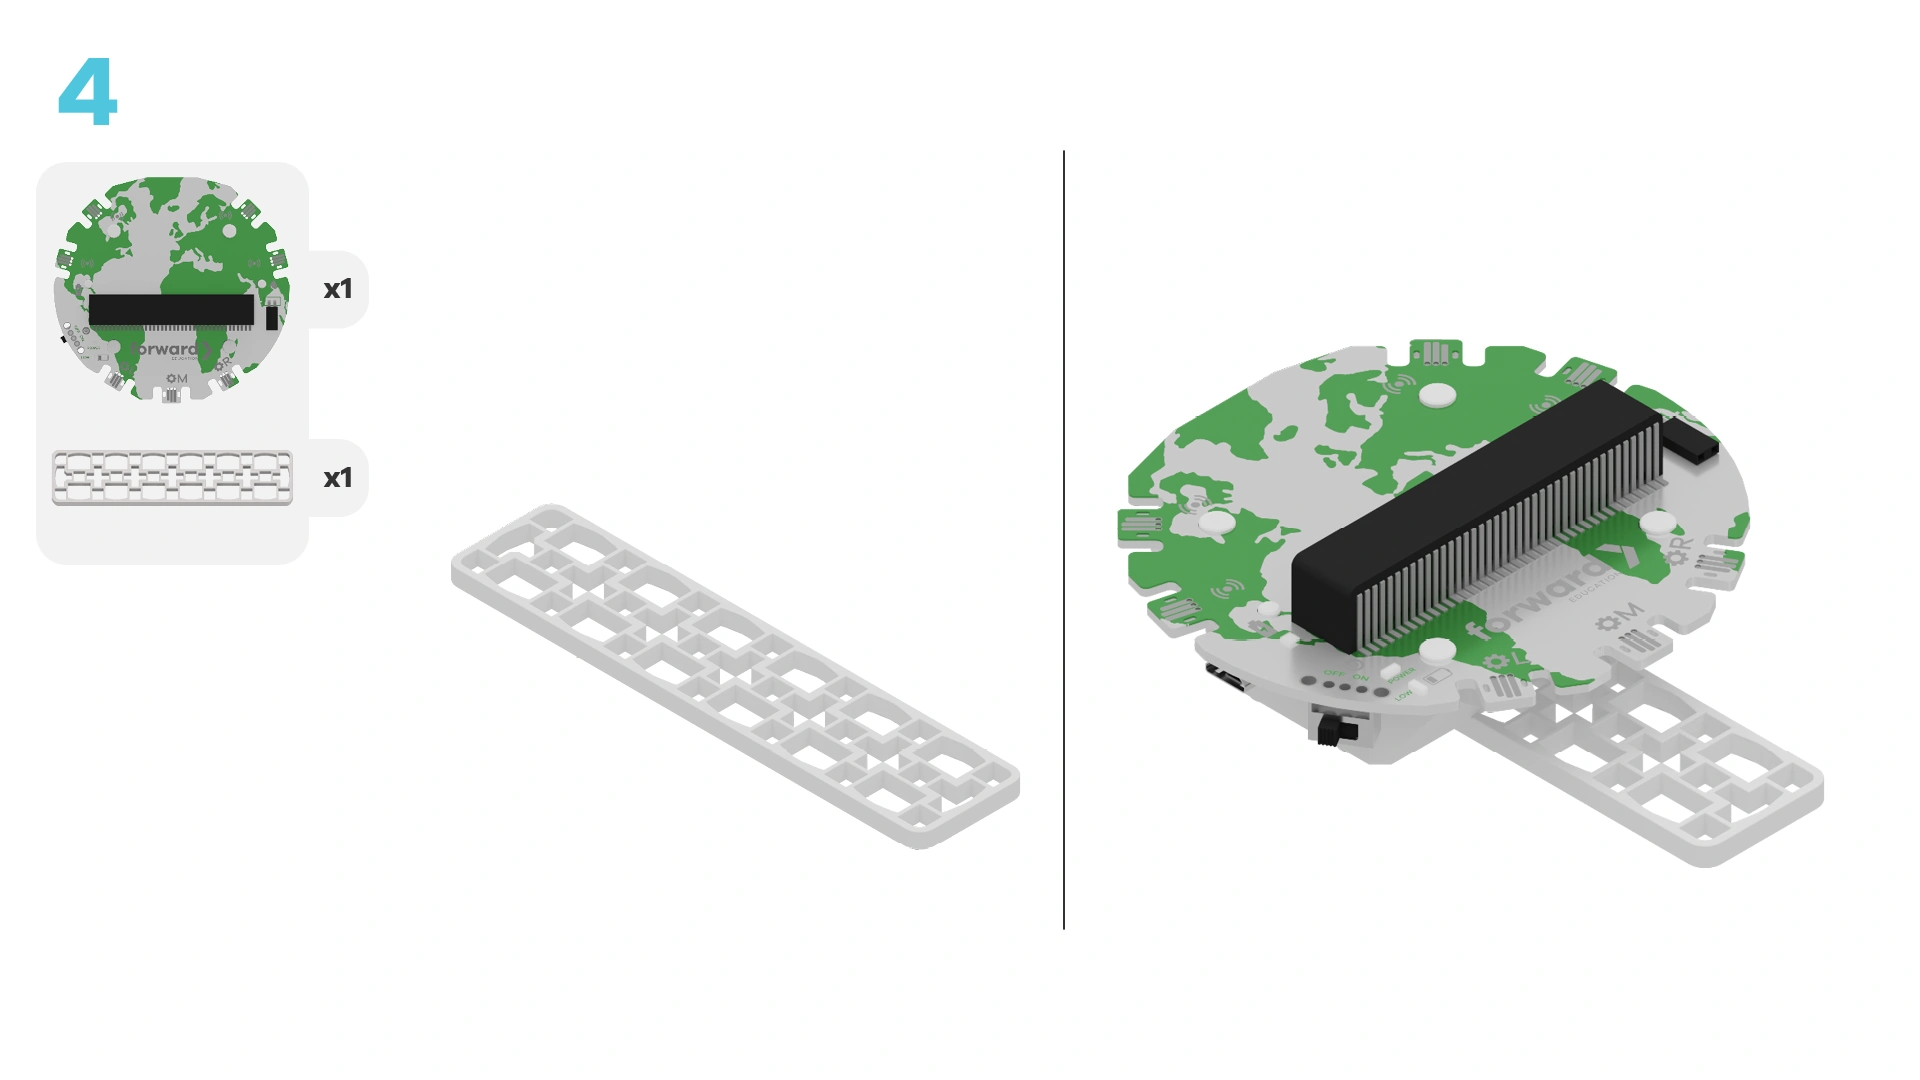
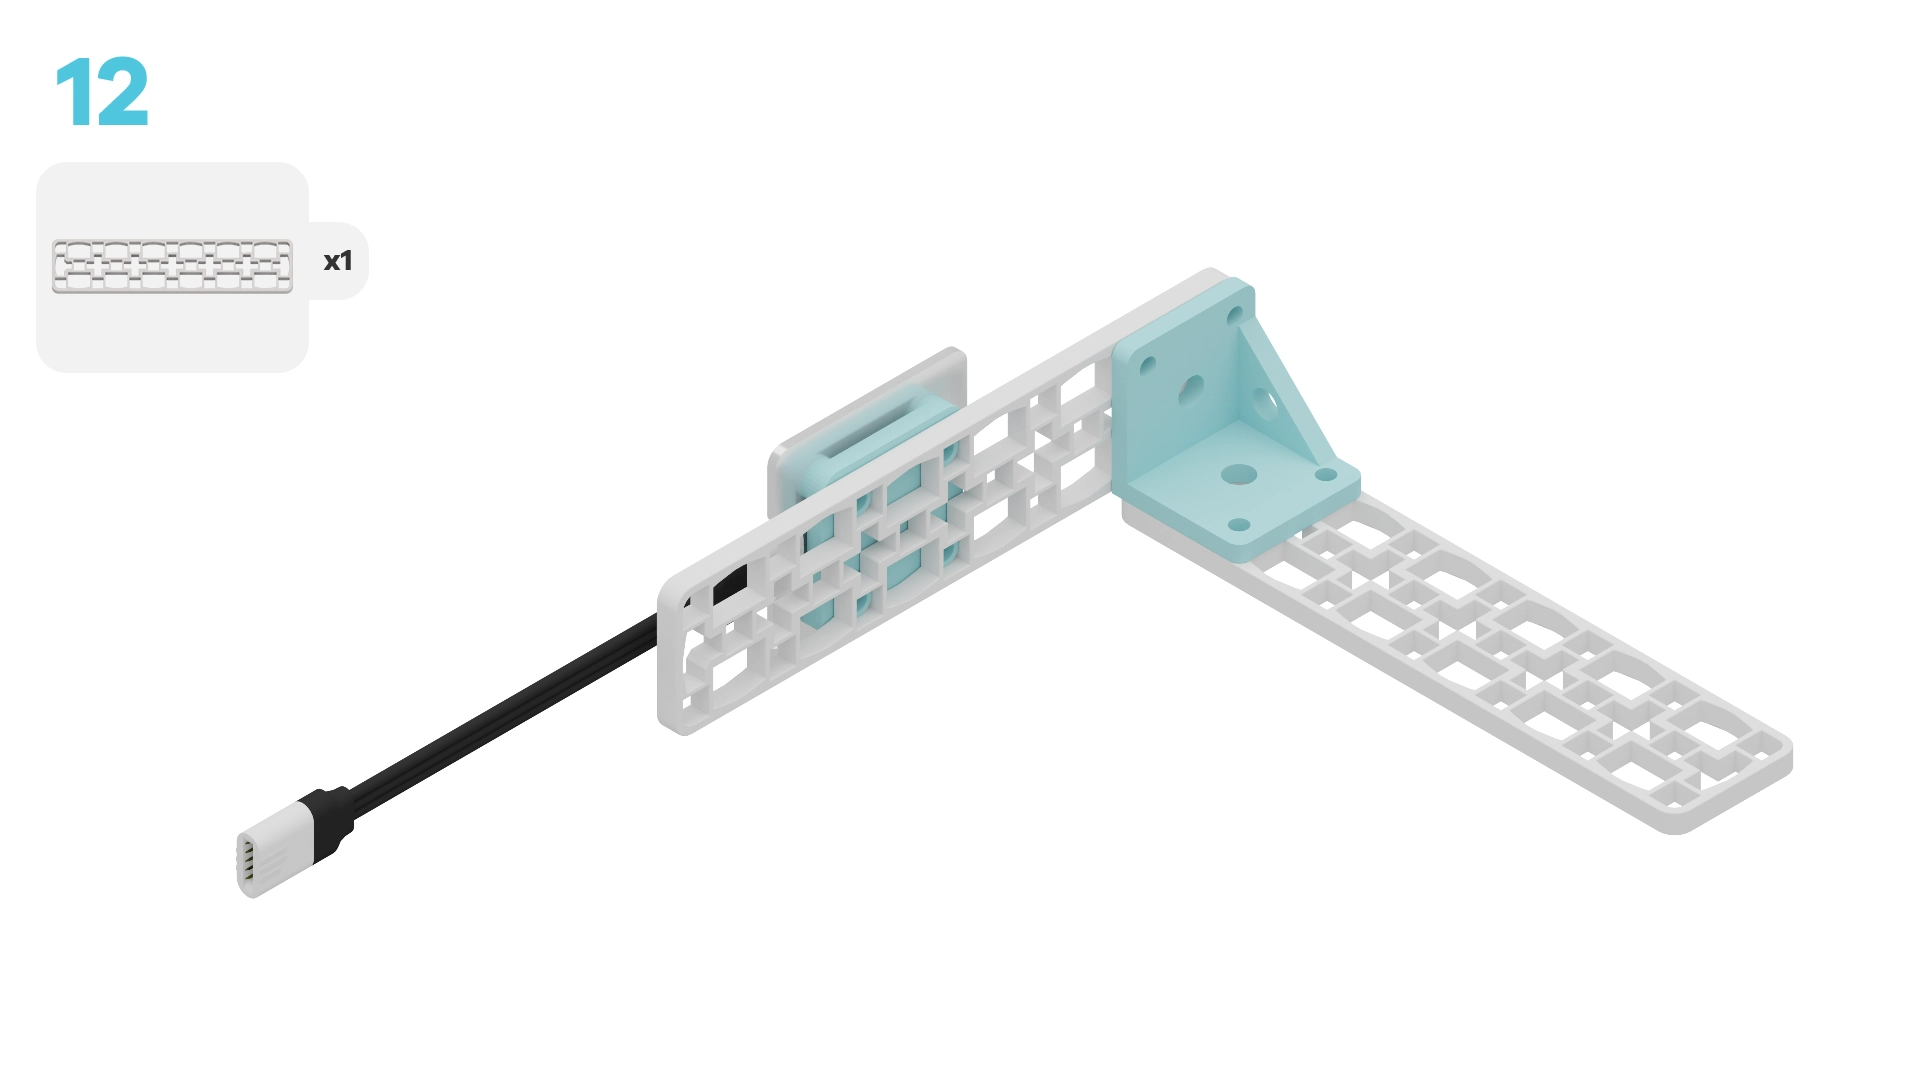
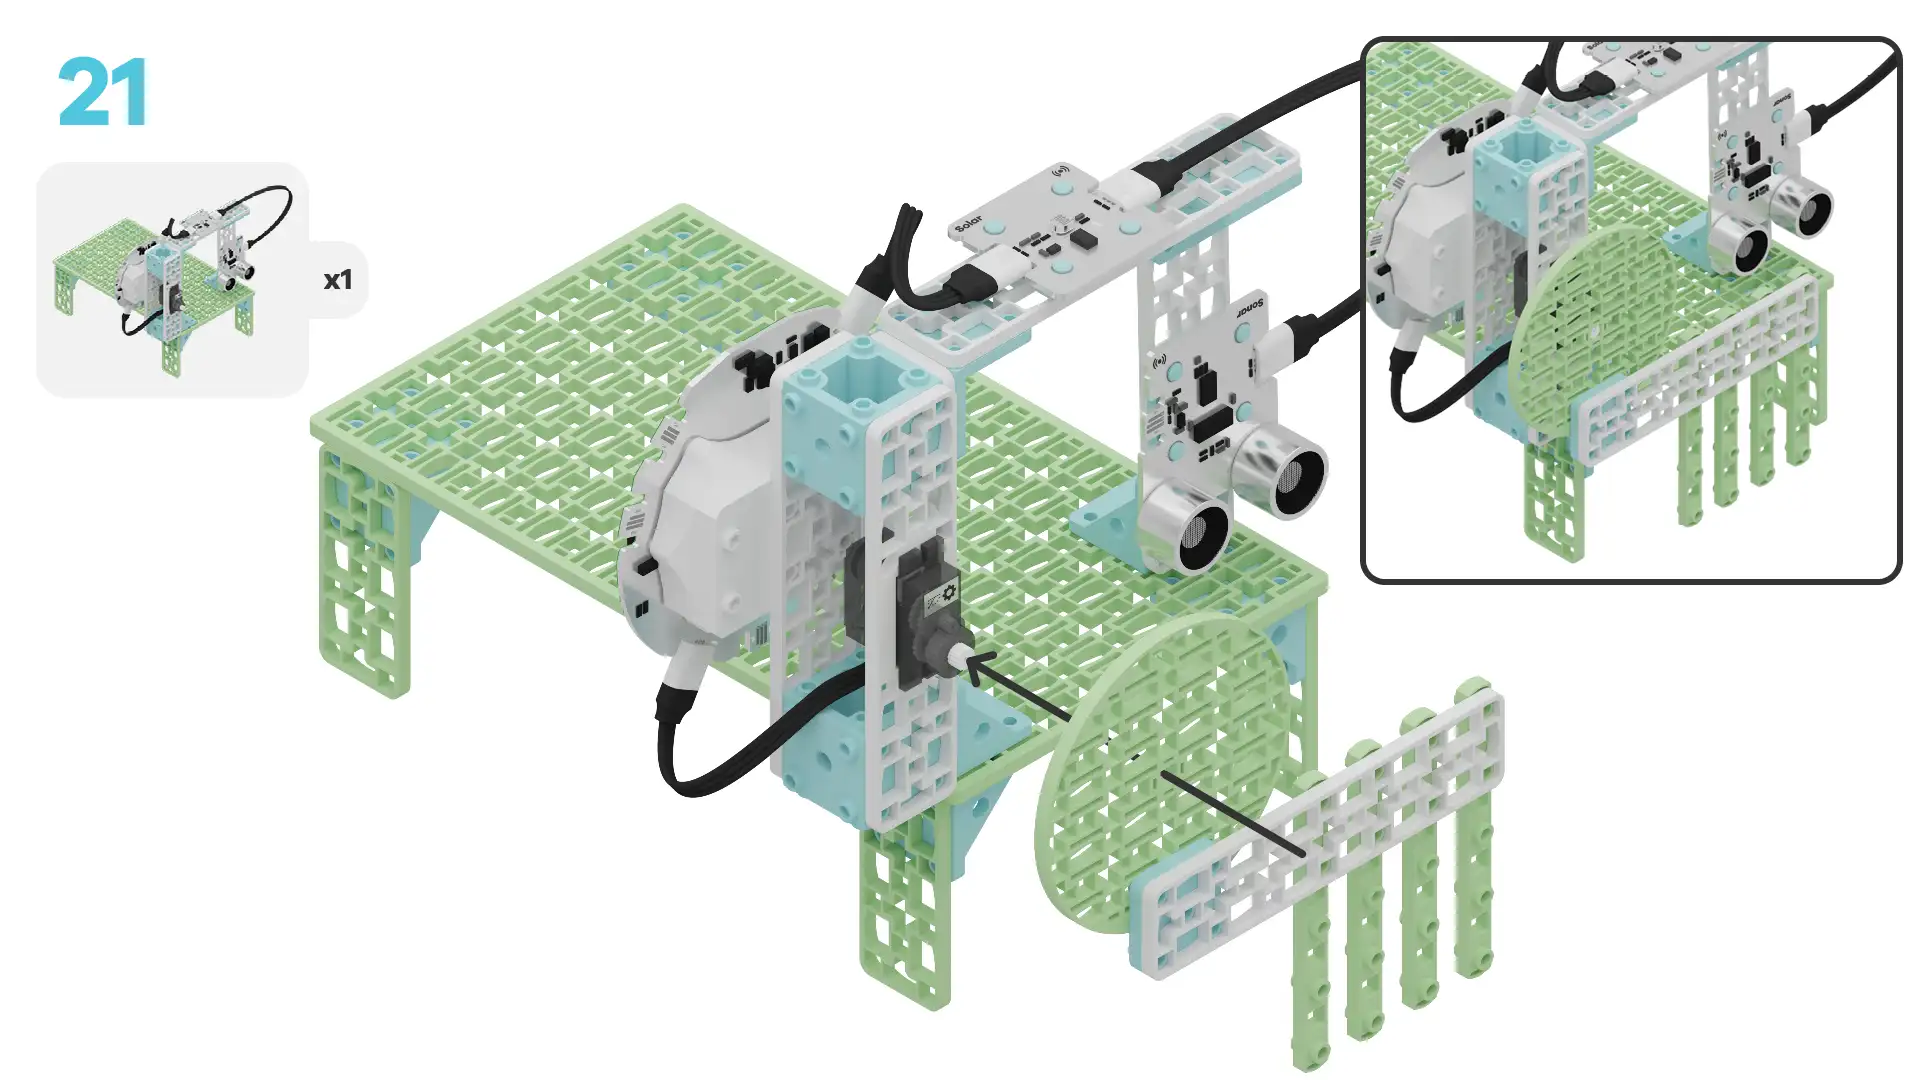
Let's build a wildlife crossing that has a bridge and a tunnel! We are going to do this in three parts:
- Build your crossing
- Add code to your crossing to bring it to life
- Use your crossing to learn how it works

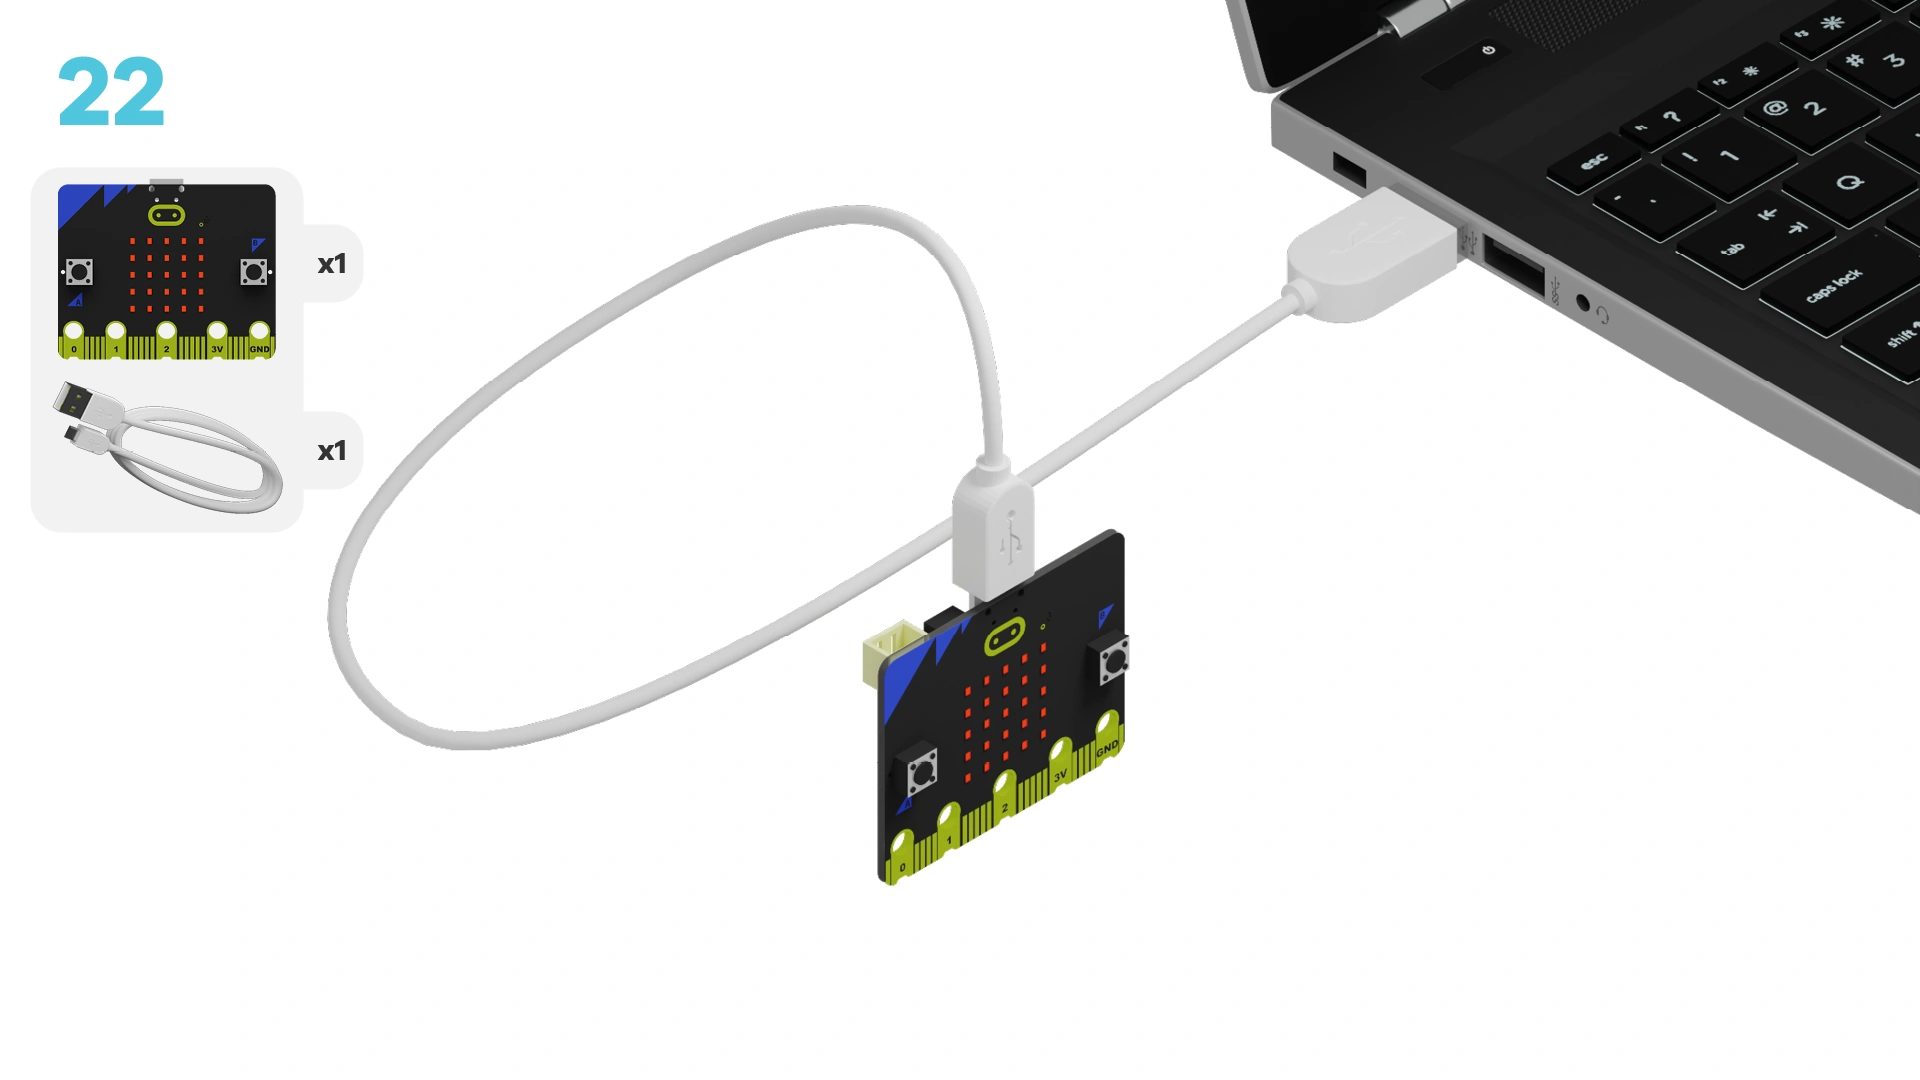
We need to connect our project to the computer to make it come to life with code!
The code will be the instructions that tell our micro:bit what to do.
Click the three dots beside the |Download| button, then click on Connect Device.
Next, follow the steps to pair your micro:bit.
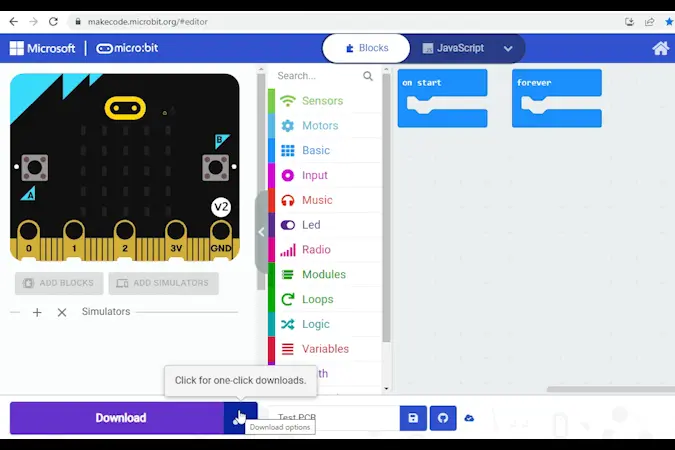
Next, click the |Download| button to download the code to your project.
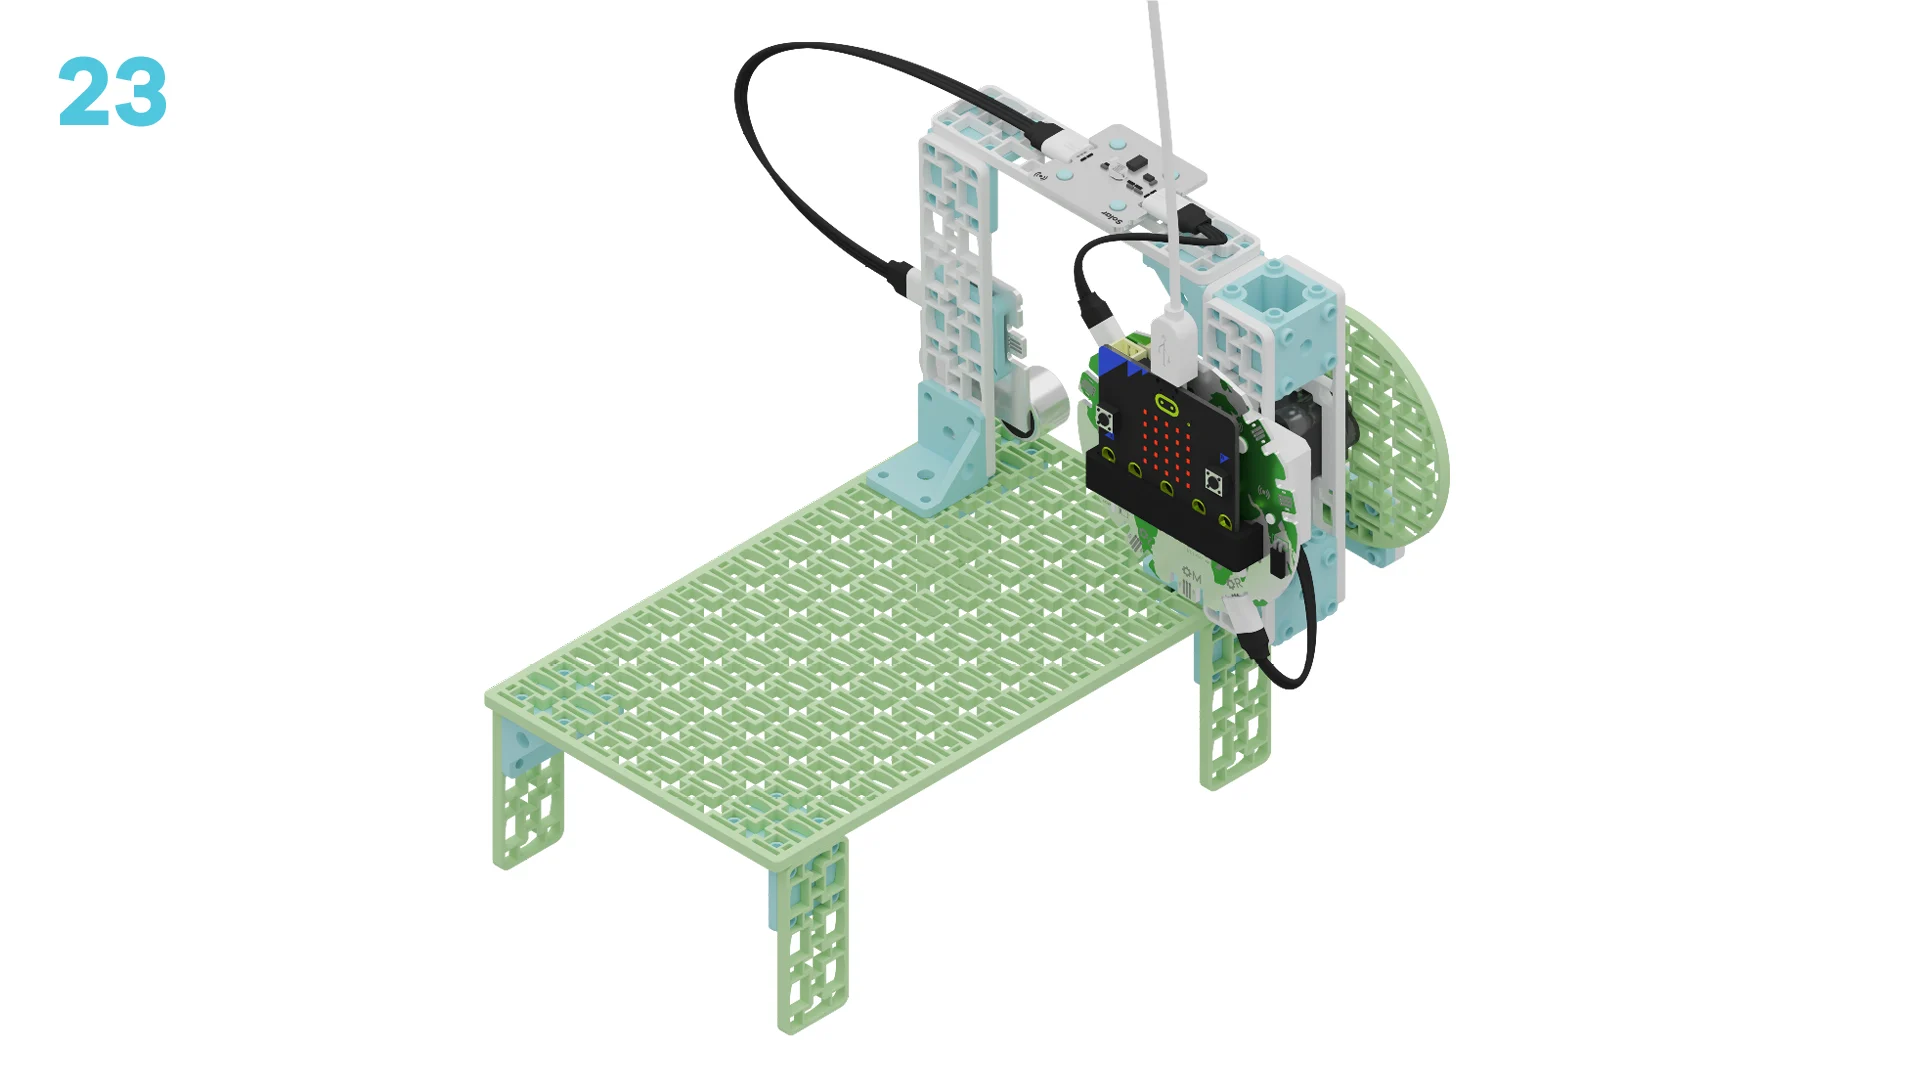
We are now ready to use our wildlife crossing!
Tutorial Tips
- Follow the steps at the top of the screen.
- When you are ready for more details, click 'Tell me more!'
- If you need help with the code, click the lightbulb!
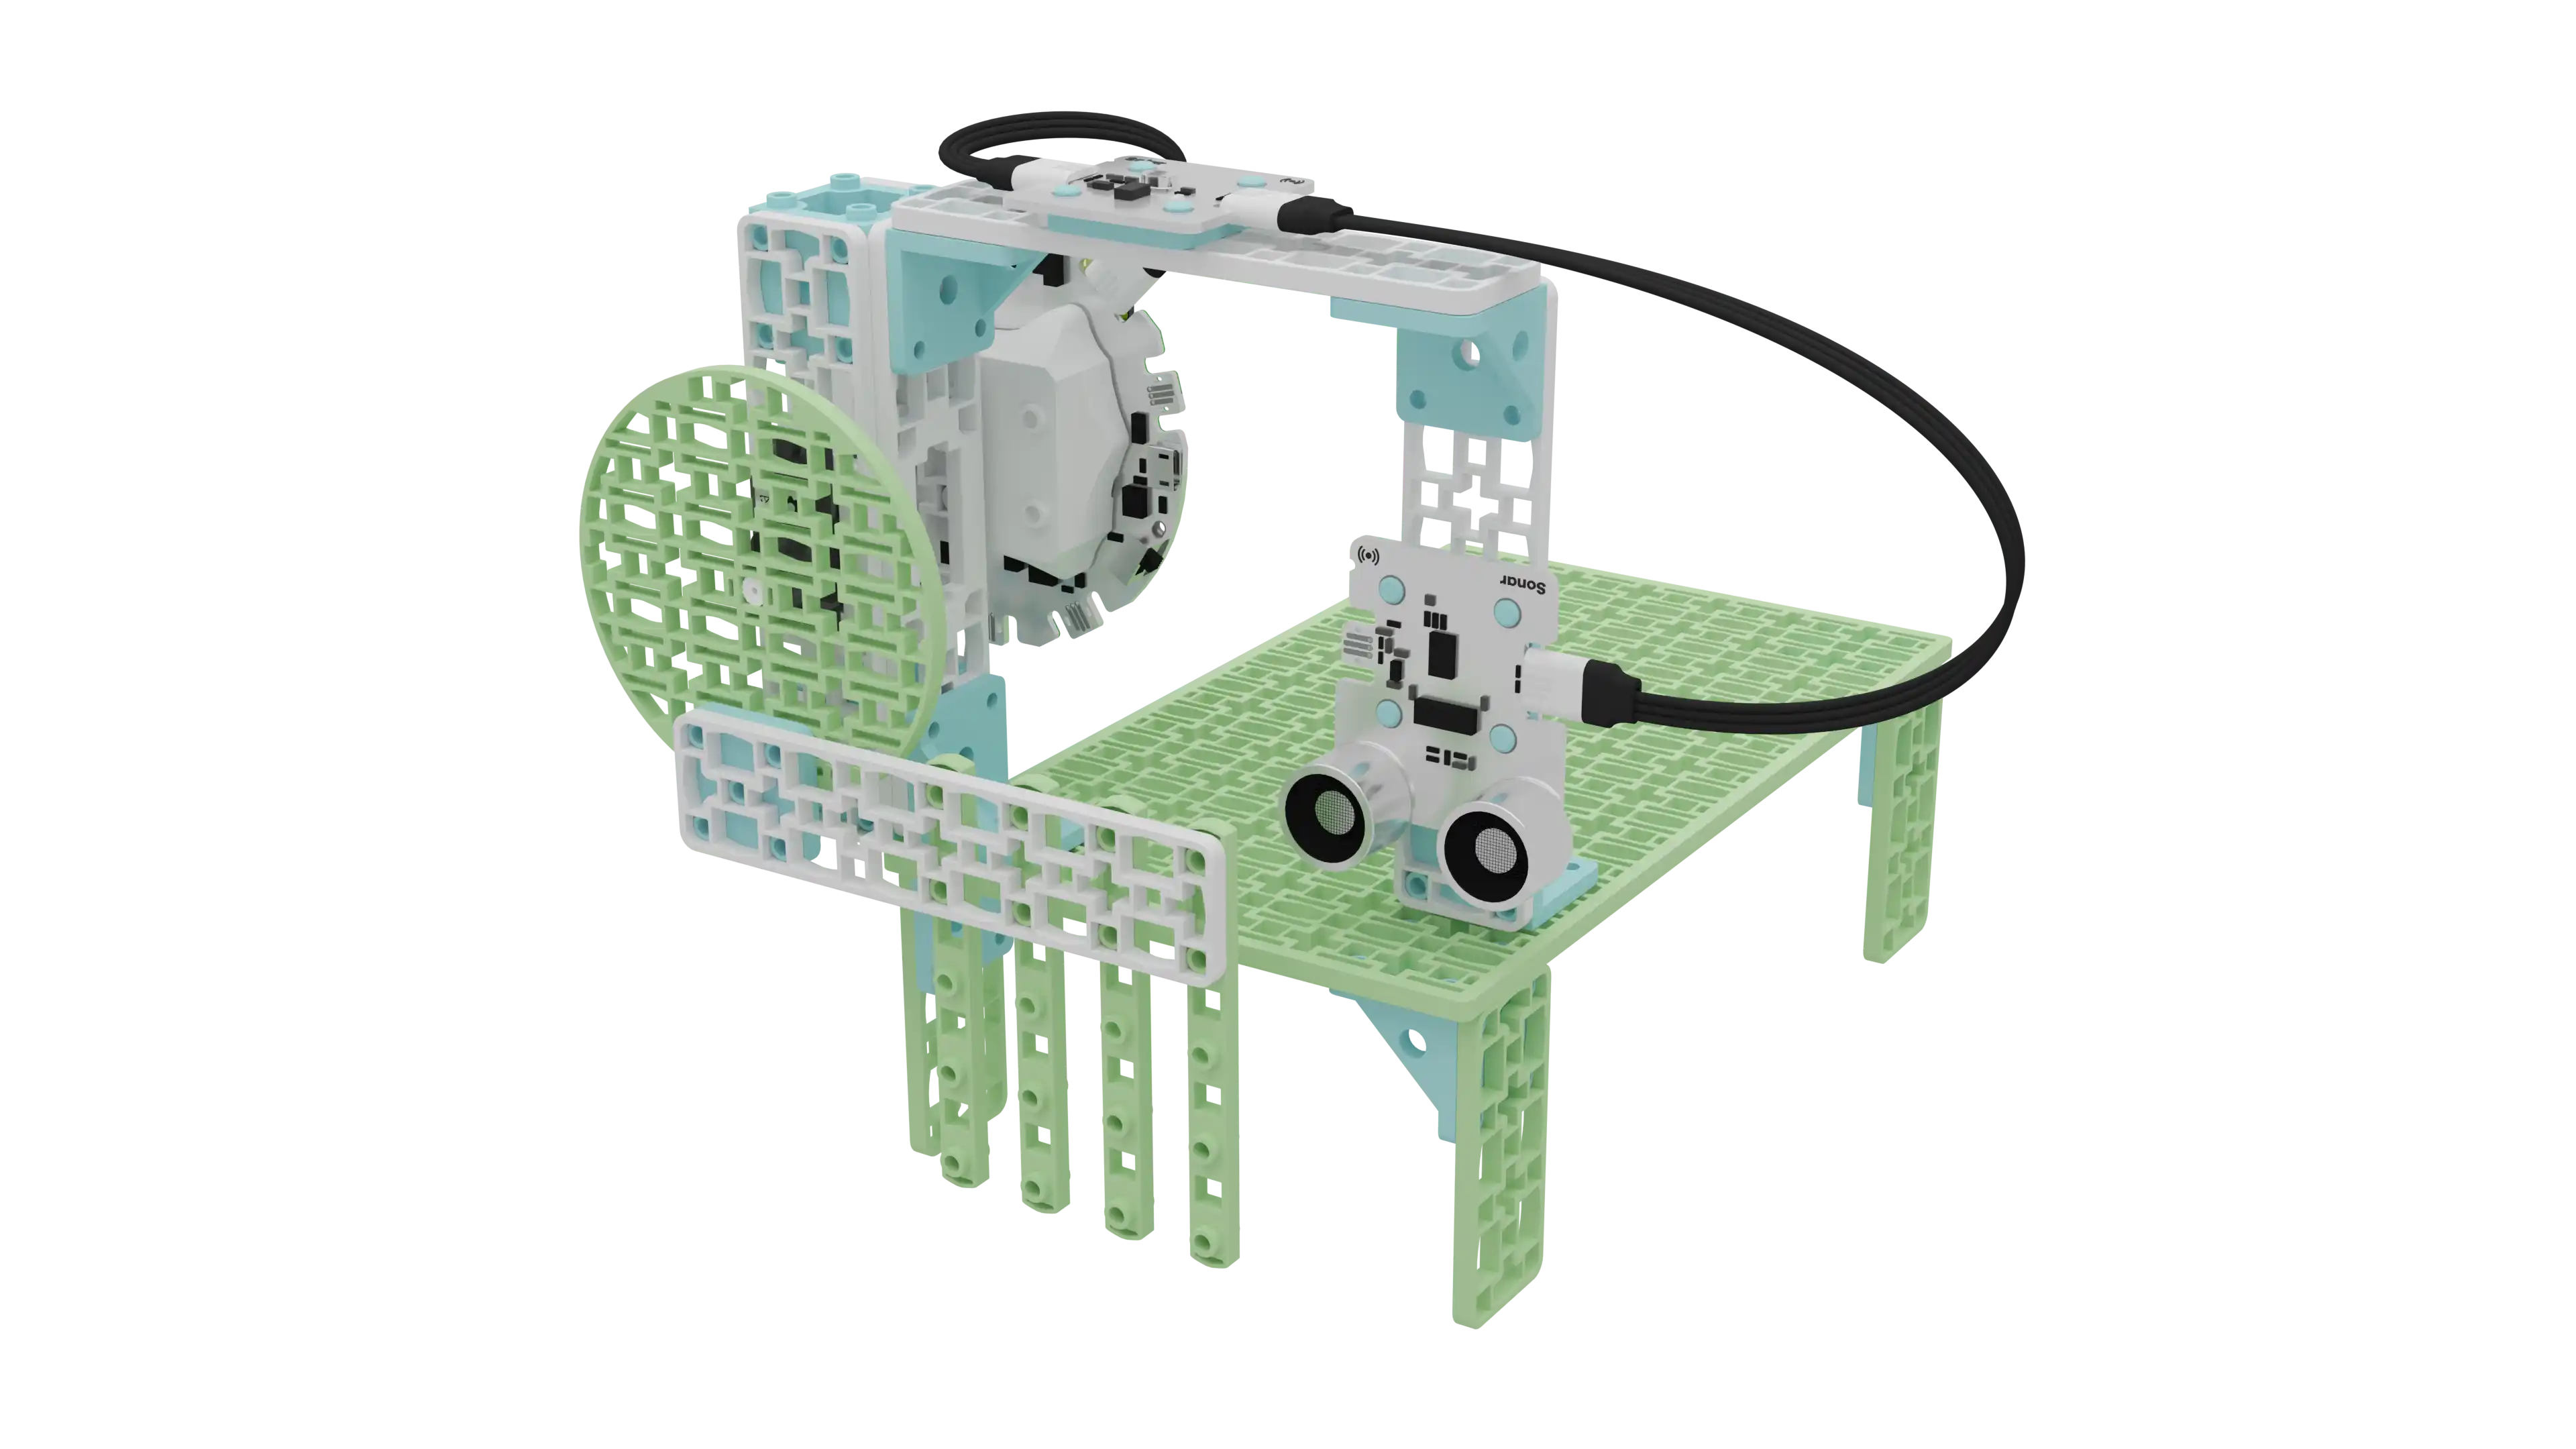
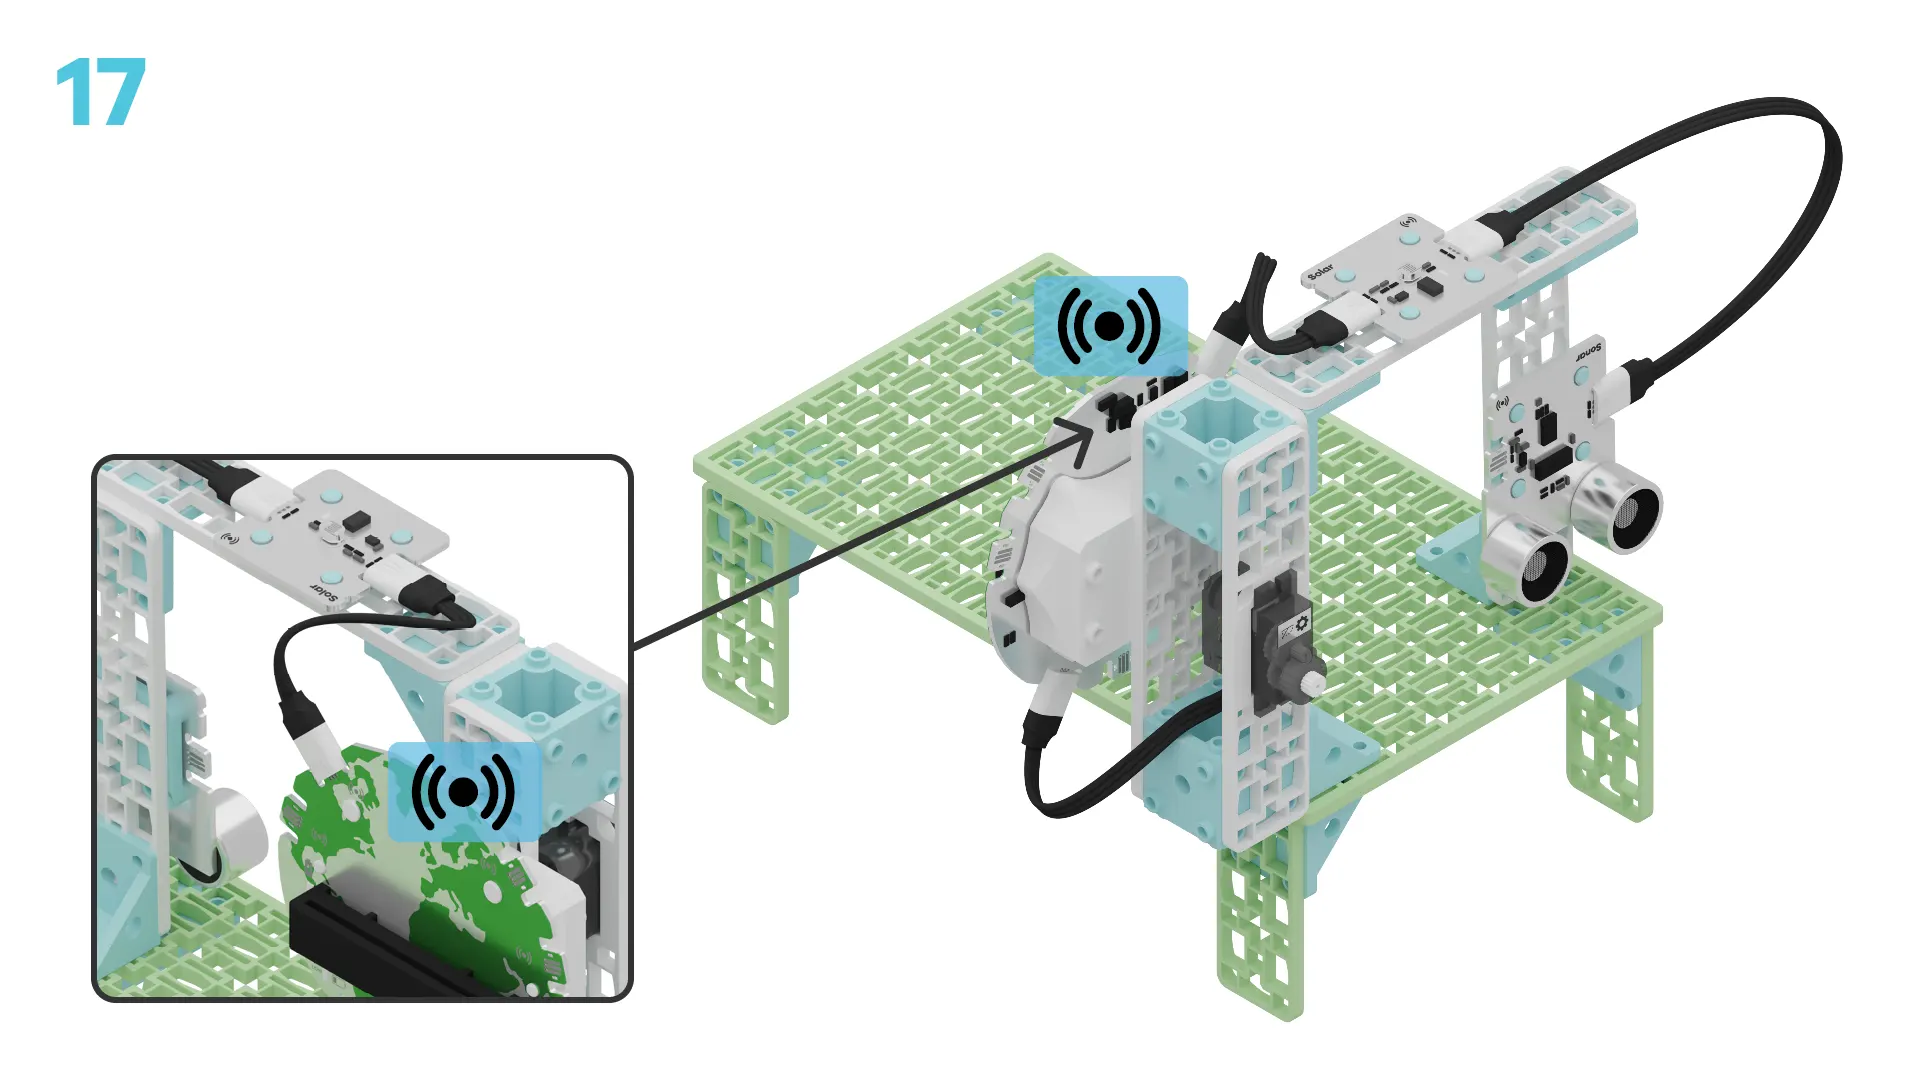
Take a close look at the wildlife crossing you just built. Can you name the different parts used to make it?
~hint Tell me more! This wildlife crossing uses:
- Building blocks to make the bridge and tunnel.
- Robotic parts to control the crossing with code.
- Motors to open and close the gate.
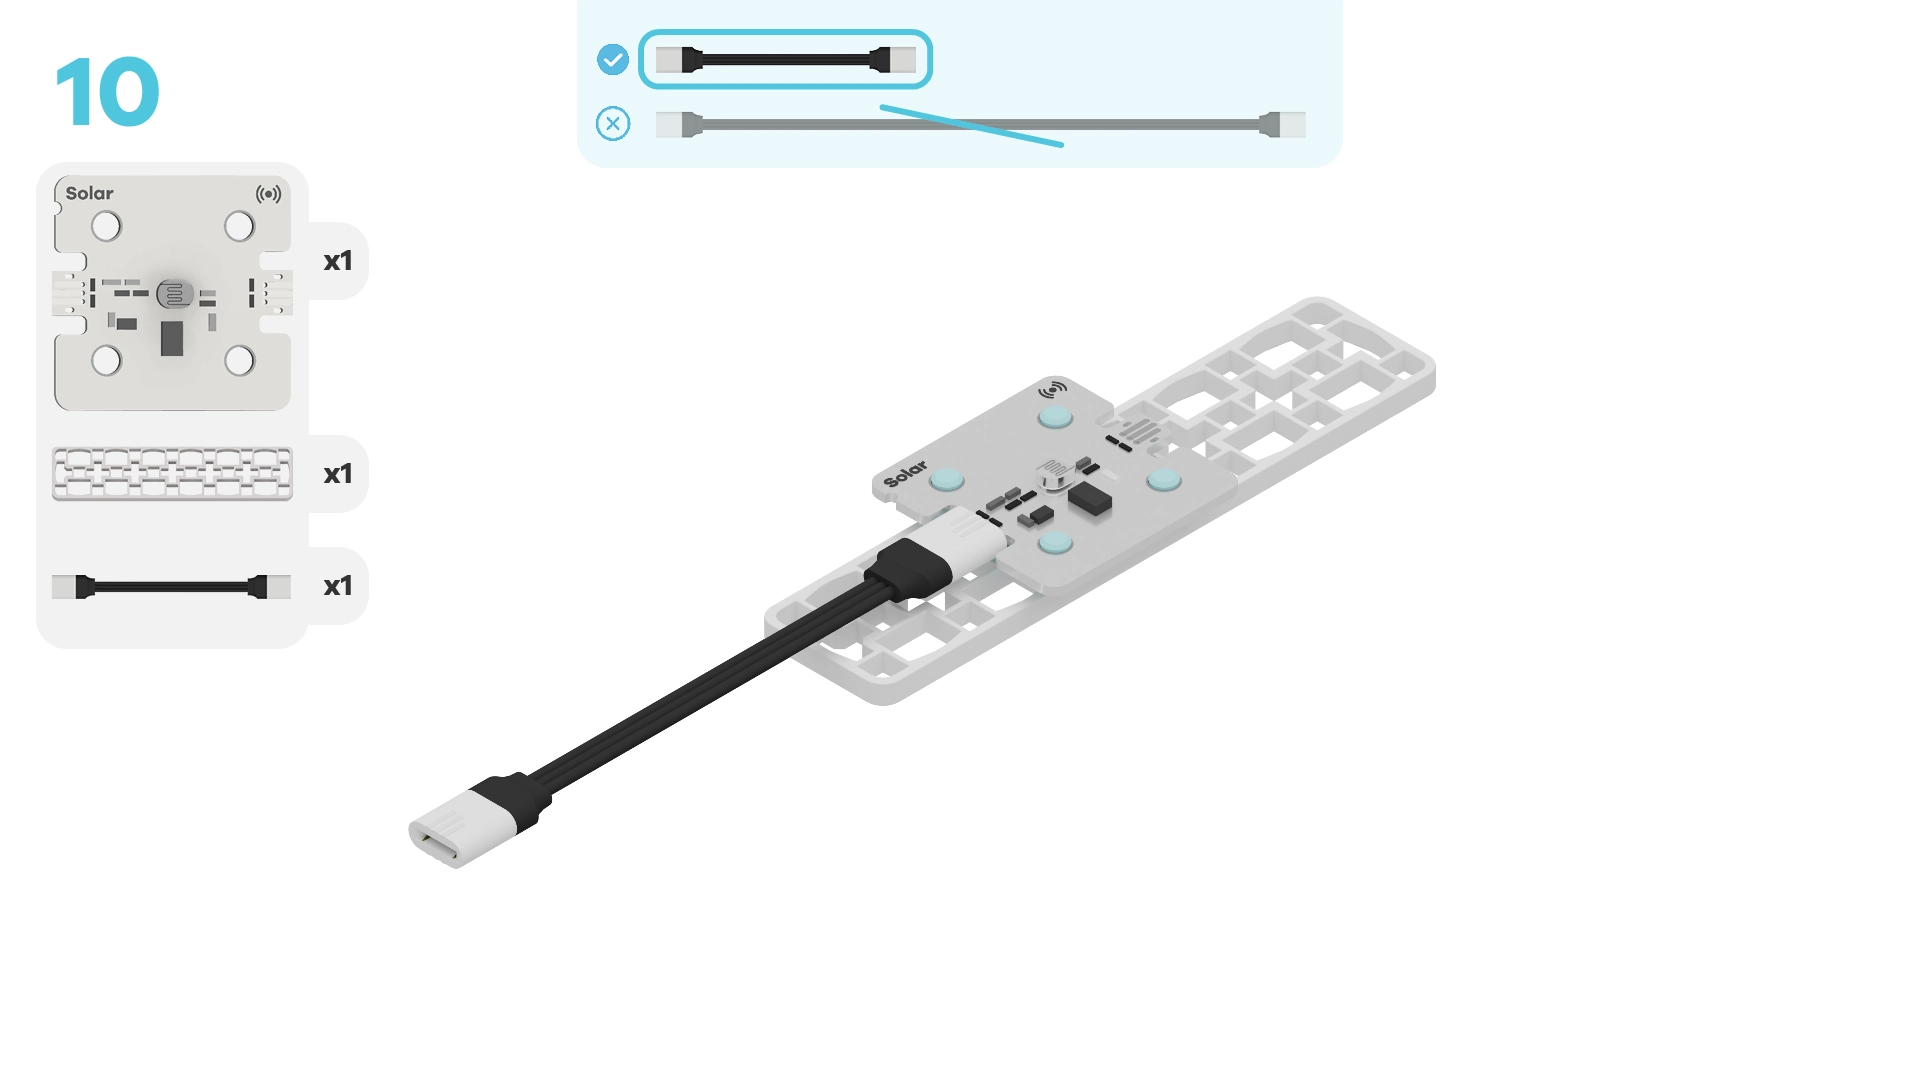
- Sensors to sense light and movement nearby. hint~
Let's explore how these parts work together to help animals cross safely!
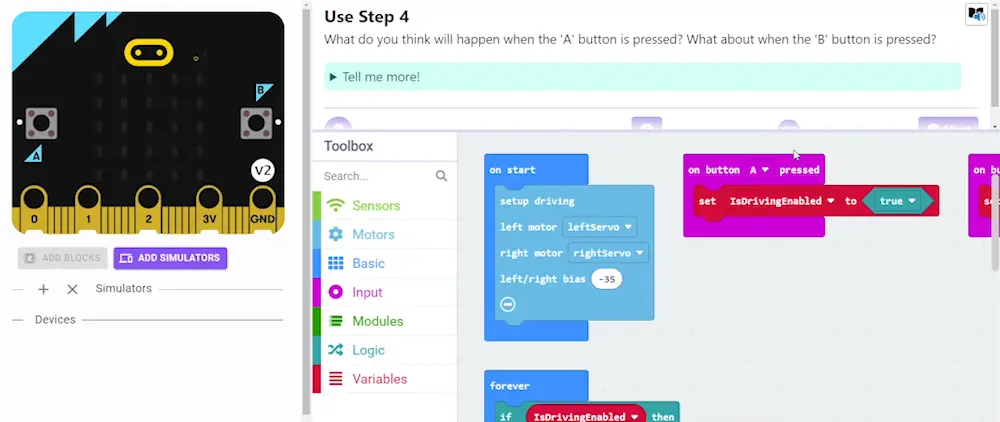
How do you think big animals use the crossing compared to small animals? Why do you think there is a gate?
~hint Tell me more!
- The building blocks create the bridge and tunnel, giving animals a safe way to go over or under the road.
- Big animals might choose to use the bridge because it's wide and open.
- Smaller animals might feel safer using the tunnel because it's more closed and hidden.
- The gate keeps small animals safe by stopping predators from following them into the tunnel. hint~
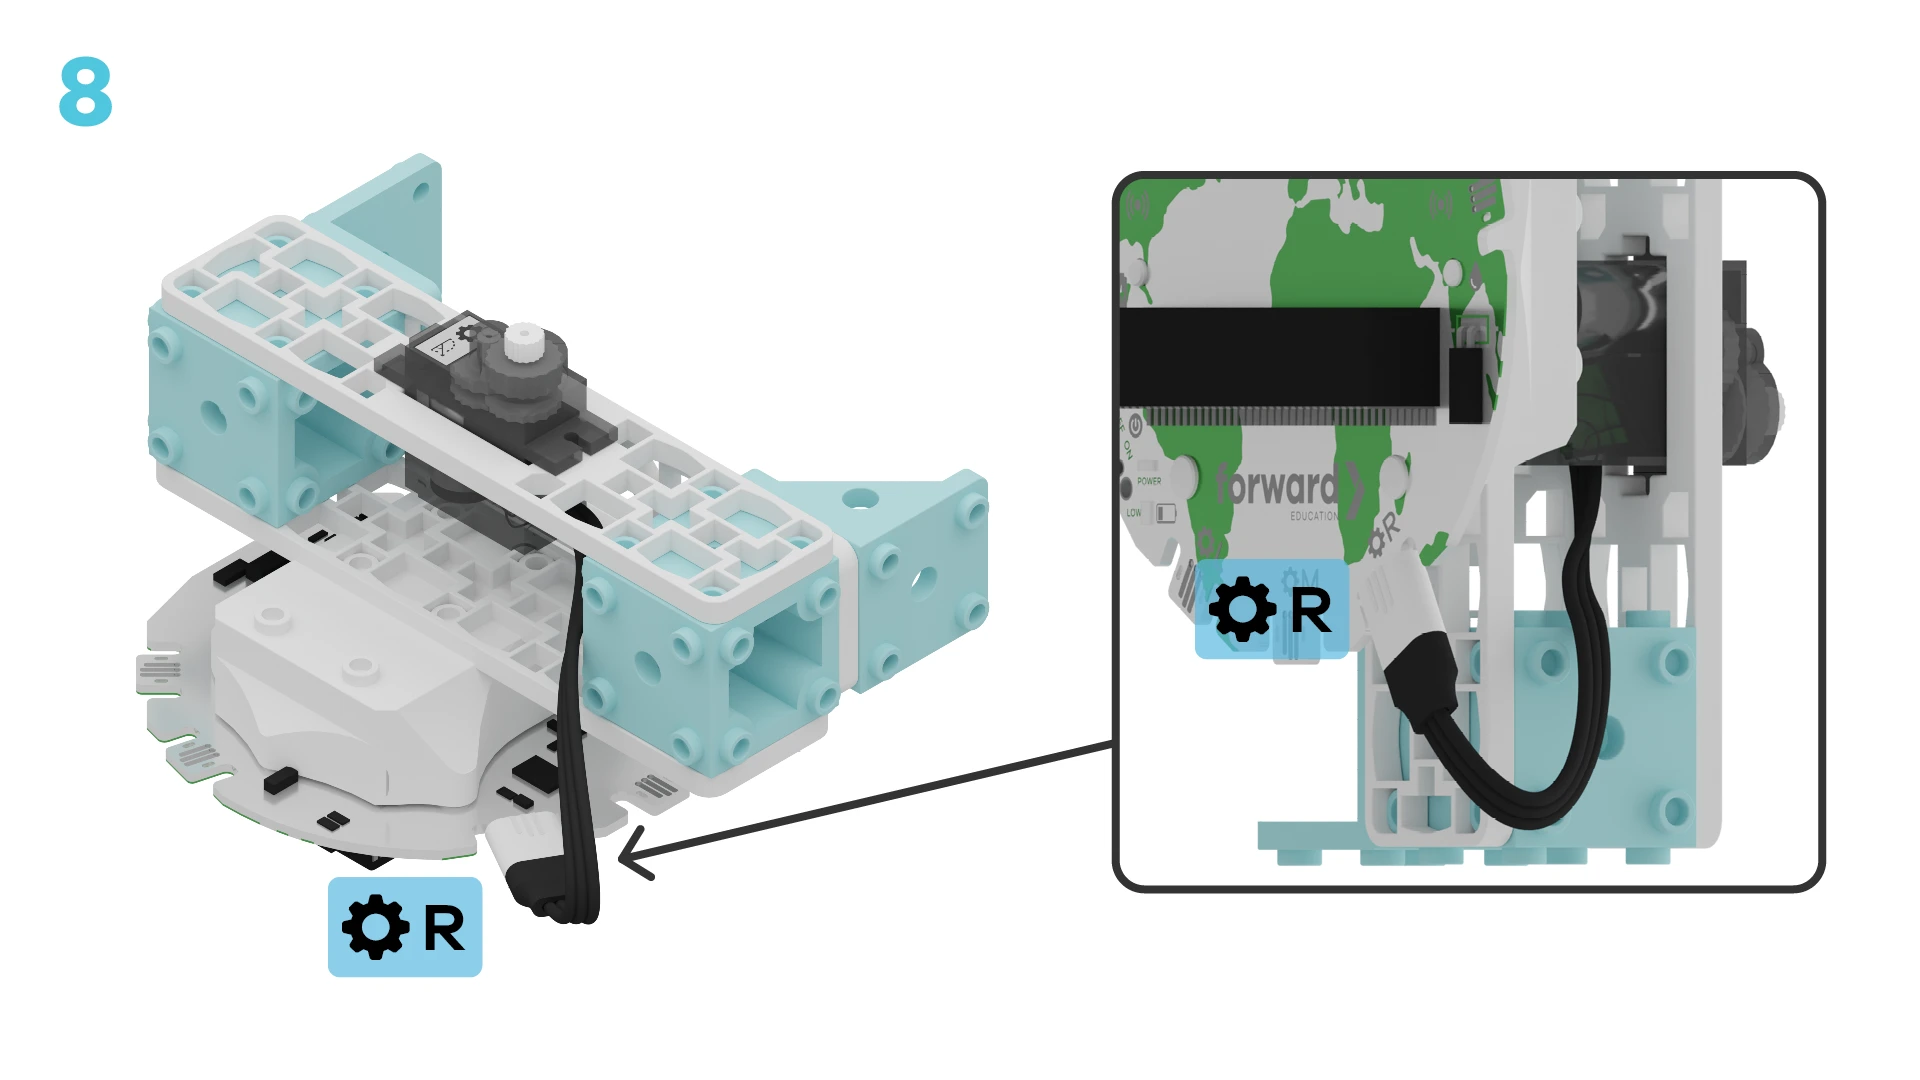
The gate is connected to a positional servo motor, which moves the gate to different angles (or positions!) Let’s unpack our code to see how it works.
How do you think we can raise and lower the gate? Try it now!
~hint Tell me more!
- Pressing A and B are separate events that make something else happen.
- When you press A, the servo motor moves the gate to 90°. The gate is opened.
- When you press B, the servo motor moves the gate to 0°. The gate is closed. hint~
input.onButtonPressed(Button.A, function () {
    fwdMotors.rightServo.fwdSetAngle(90)
})
input.onButtonPressed(Button.B, function () {
    fwdMotors.rightServo.fwdSetAngle(0)
})
We need a way to count how many animals use the crossing.
Take a look at the code. How do you think we can keep track of the number of animals?
~hint Tell me more!
- Each time an animal crosses, you can press A+B together to increase the animal count by 1. This number is stored in a variable.
- A variable is like a box that holds a number. Here, it will track the number of animals that have crossed. hint~
input.onButtonPressed(Button.AB, function () {
    animalCount += 1
})
Let’s test what happens when you press A+B several times in a row. What do you think will show up on the micro:bit’s LEDs?
Try it now! Were you right?
~hint Tell me more!
- Each time you press A+B, you should see the number on the micro:bit’s display increase by 1.
- The micro:bit always shows the number inside the variable on the LED screen. This is because the
||basic:show number||block is in a||basic:forever||loop. hint~
basic.forever(function () {
    basic.showNumber(animalCount)
})
You've completed the activity!
Think about the following questions:
- Why do you think scientists would want to count the number of animals that use the crossing?
- How could sensors be used to automatically track animals when they cross?
In the next step, you can click the |Done| button to finish the tutorial.