A web application that allows users to search, view, and compare the different programs and courses in a university to your course schedule. This app is currently still in development with sample data from GCU's academic catalog from 2022.
Click for demonstration \/
- Search and View Academic Program Information
- Search and View Academic Course Information
- Create a schedule of your Course history
- Compare your schedule against different Academic Programs
- Admin: Import new programs and courses through import pages
- Java
- Spring Framework Boot
- Spring Boot Security
- Spring Boot Thymeleaf
- MySQL
Why the technologies were used can be found here along with additional development information.
- MySQL Server
- Gradle version prior to 8.0
- Clone the repository:
git clone https://github.com/charlier999/GraduationRequirementViewer
- Create MySQL Database
- Open Create Gradview Database.sql in a text editor.
- On line 243, under the create users table, is an insert command to instert a user. Change the password of the administrator user, {YOUR PASSWORD HERE}, to the password you wish to use.
- Run the Create Gradview Database.sql script on your MySQL database.
- Build Application
Run the below command in the cloned repository directory.
./gradlew build
- Run Application
Run the below command in the cloned repository directory.
./gradlew bootRun
Now when you navigate to http://localhost:8080 you will see home page for the site.
Additional Information can be found here.
THe hompage of the requirement viewer provides links to the different areas of the website.
- Home - Takes you to the Home page of the site.
- Classes - Takes you to a list of courses.
- Program Requirements - Takes you to a list of degree programs.
- Your Program Status - Takes you to the page to add you courses to a schedule and then compare them against degree programs.
- Login - Where the administrator signs into thier accout.
- Click "Classes" in the navigation bar to be take to class home.
- Click "Classes" in the navigation bar to be take to class home.
- CLick "View ALl" button at the bottom of the small list of classes. You are then taken to a search results page containing all classes available to view.
- Click "Classes" in the navigation bar to be take to class home.
- Select "number" in the search drop down menu.
- Then enter your query into the search bar. % is a whild card. (ex. CST% returns anything starting with CST).
- Then click submit. You are then taken to the search results of your query.
- Click "Classes" in the navigation bar to be take to class home.
- Select "name" in the search drop down menu.
- Then enter your query into the search bar. % is a whild card. (ex. Introduction% returns anything starting with Introduction).
- Then click submit. You are then taken to the search results of your query.
- Click "Classes" in the navigation bar to be take to class home. a. Conduct a search in the search bar. b. Click "View ALl Button"
- Click one of the class number links. You are then taken to a class details page containing details about the class you selected.
- Click "Program Requirements" in the navigation bar to be taken to program home.
- Click "Program Requirements" in the navigation bar to be taken to program home.
- CLick "View ALl" button at the bottom of the small list of programs. You are then taken to a search results page containing all programs available to view.
- Click "Program Requirements" in the navigation bar to be taken to program home.
- Enter your word or set of letters into the search bar at the top of the page.
- Click submit. You are then taken to a results page containing the results of your search.
- Click "Program Requirements" in the navigation bar to be taken to program home. a. Conduct a search in the search bar. b. Click "View ALl Button"
- Click one of the program name links. You are then taken to a program details page containing details about the program you selected.
- Click "Your Program Status" in the navigation bar to be taken to the schedule home.
- If you already have a portion of you course history still on your web browser, your schedule will be displayed to you. If not, a message saying to import your course history will be displayed instead.
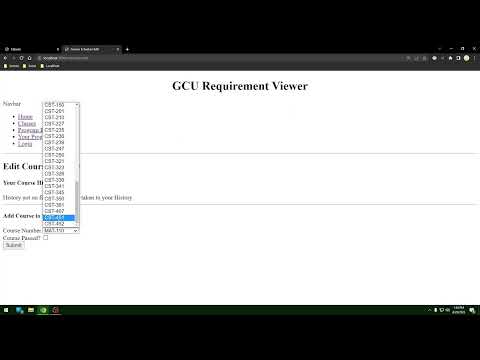
- Click "Add/Edit Course History" link and you will be taken to the edit course history page.
- On the top of the page, is your current course history. The bottom of the page contains a fourm for adding your next course to your course history. Using the dropdown menu, select the course you wish to add to your history.
- Then check off the checkbox underneth signifying wether you have passed that course or not.
- Then click submit.
- Repeat for each course you wish to add to your history.
- Click "Your Program Status" in the navigation bar to be taken to the schedule home.
- If you already have a portion of you course history still on your web browser, your schedule will be displayed to you. If not, a message saying to import your course history will be displayed instead complete the "Adding Your Course History" guide before continuing.
- Select the program from the dropdown menu to compare against your history.
- Click login link in navigation bar.
- Enter in admin credentials that you defined when running the Create Gradview Database.sql.
- Click Submit.
- Login to the admin account.
- Click "Import" link in the navigation bar.
- CLick link to "Import Program" under the page title.
- Select a program to import into the application from the dropdown box.
- Click Submit.
- A link to the imported program and logs from importing are then displayed to you.
- Click "Logout" in the navigation bar.