-
Notifications
You must be signed in to change notification settings - Fork 108
Scripting the Varian DICOM DB Daemon with ESAPI
Author: Wayne Keranen Disclaimer: I’m an employee of Varian Medical Systems. The views in this post are my own, and do not necessarily represent the views of Varian.
Varian’s DICOM connectivity solutions since version 8.9 provide access to the majority of the DICOM-RT information that is stored in the Aria database. This is not well known, however, given that the connectivity is explained in the code of DICOM Conformance Statements.
The purpose of this post is to help researchers extract standard DICOM radiotherapy data programmatically from the Varian system. This article demonstrates how one can use the Eclipse Scripting API (ESAPI) together with the open-source package DCMTK to script Varian’s DB Daemon to extract an RT Plan, its associated RT Structure Set and CT Image Series, and the calculated dose for the RT Plan.
The system set up to demonstrate Varian’s DICOM connectivity is shown below in Figure 1. The VMS DB Daemon is configured so it can be remotely controlled by the DCMTK package to send DICOM objects via C-MOVE to the VMS File Daemon. The VMS File Daemon then dumps those objects as DICOM files to a configured Windows location. This demonstration would not have required the VMS File Daemon, but including it has the added bonus that it demonstrates how one could remotely control the VMS DB Daemon to send DICOM objects to any DICOM system; be it an RT PACS, or other software that supports DICOM networking operations.
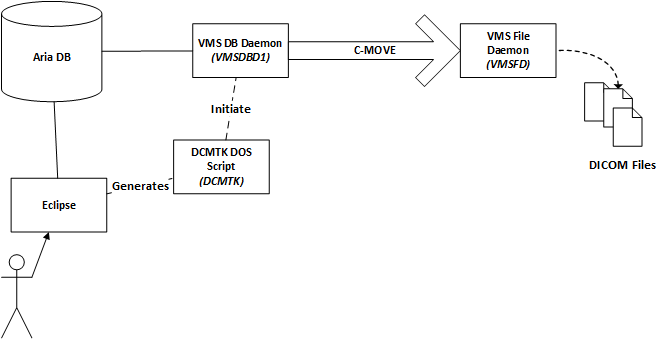
Figure 1 : Configured DICOM System Diagram
Configuring the System
- Install the DB Daemon Ask your local Varian service rep to install the Varian DICOM DB Daemon for you on a server you have access to, or the local workstation you are working on. The DB Daemon is normally set up on a server, but doesn’t have to be. The computer it runs on should be a Varian client computer that is connected to the Aria database. Once this has been installed, you should see the menu items show below in Figure 2 available on the computer it was installed on.

Figure 2: Varian DICOM Assets Installed
-
Install DCMTK Download and install DCMTK. The install for Windows 7 seems to consist of unpacking a zip file to a directory. For this article DCMTK was unpacked to C:\variandeveloper\tools\dcmtk-3.6.0-win32-i386.
-
Configure the DB Daemon The Varian DB Daemon must know of and trust all of the players involved in the DICOM transaction. Here we configure the AE Titles (Application Entity Titles: DICOM jargon) used in the system. These AE Titles are completely arbitrary and could be any string, but they must match in the correct ways in all of the configuration here or the system will not work. For this article, AE Titles are configured as shown in Table 1.
Software AE Title DICOM DB Daemon “VMSDBD1” DCMTK “DCMTK” VMS File Daemon “VMSFD” Table 1: Configured DICOM AE Titles
Note: This configuration was done with version 13 of the Varian DICOM Daemon Service Configuration Wizard. When configuring earlier versions, the dialogs may not look exactly the same.
To start, click the “DB Daemon Configuration” as shown in the menu in Figure 2 above. The dialog shown below appears.
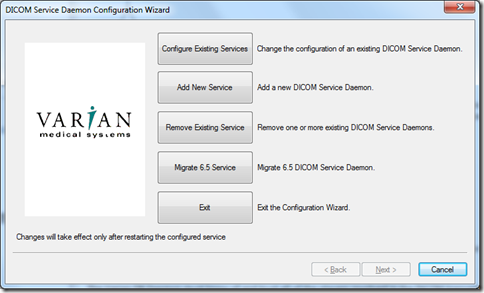
Figure 3: DICOM DB Daemon Config Step 1
Click the “Add New Service” button.
Fill in the AE Title and Port as shown in Figure 4, then click Next.
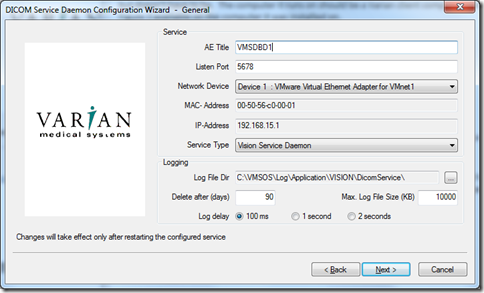
Figure 4: DICOM DB Daemon Config Step 2
Configure as shown in Figure 5, then click next.
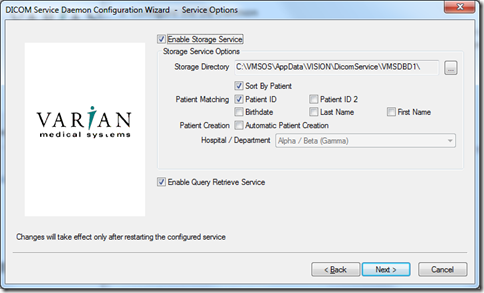
Figure 5: DICOM DB Daemon Config Step 3
In the screen that follows, click the Add button to add the AE title information for DCMTK as shown in Figure 6 below. The port is arbitrary but it needs to match throughout the system.
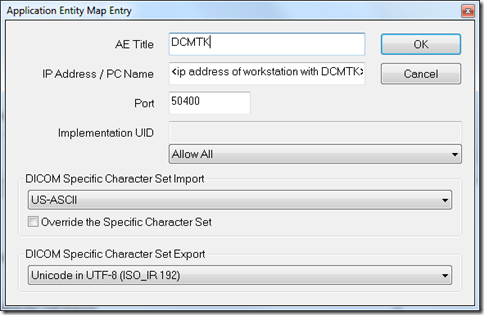
Figure 6: DICOM DB Daemon Config Step 4
Click the Add button again to add the AE title information for VMS File Daemon as shown in Figure 7 below. The port is arbitrary but it needs to match throughout the system.
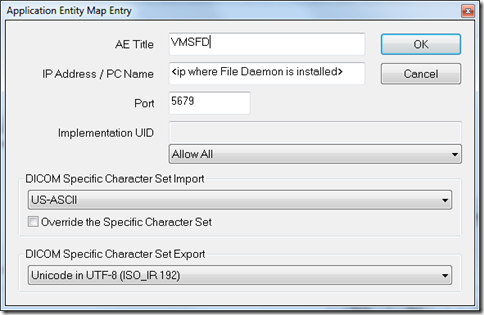
Figure 7: DICOM DB Daemon Config Step 5
When done configuring AE titles (Figure 8) click Next. In this article, the DB Daemon, the File Daemon, and the DCMTK package are all installed on the same computer so the IP addresses are all the same. This is not the usual case, normally the daemons are installed on a server.
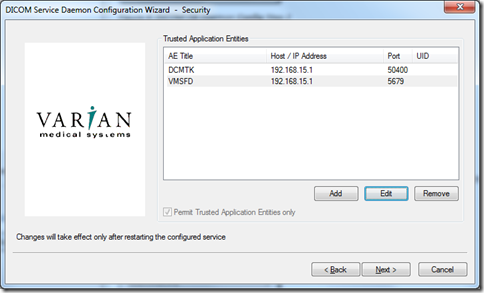
Figure 8: Done Configuring Trusted AE Titles
Configure the service control aspects as you wish and click Finish. The VMS DB Daemon should start running as a service.
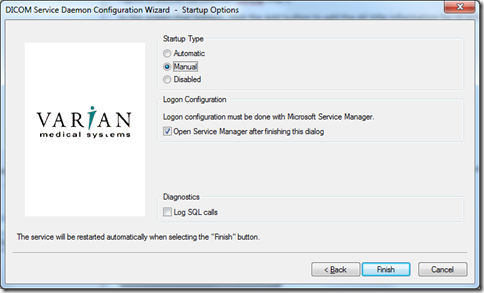
Figure 9: Service control options
- Configure the File Daemon The Varian File Daemon must also know of and trust all of the players involved in the DICOM transaction. From Table 1 we will use the AE Title of “VMSFD”.
To start, click the “File Daemon Configuration” as shown in the menu in Figure 2 above. The dialog shown in Figure 3 above appears. Click the “Add New Service” button, then fill in the AE Title and port as shown below in Figure 10. Both the AE Title and port are arbitrary, but must match the values given in Figure 7 above, and the port must be a tcp/ip network port that’s not already in use in your system.
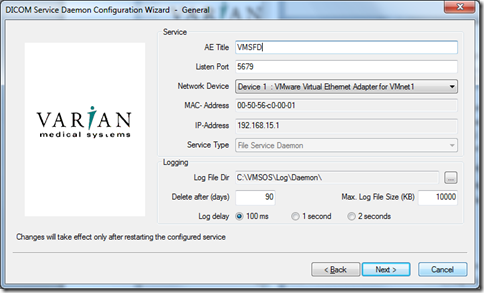
Figure 10: File Daemon Config Step 2
Configure the directory where DICOM files will be dumped, then click Next.
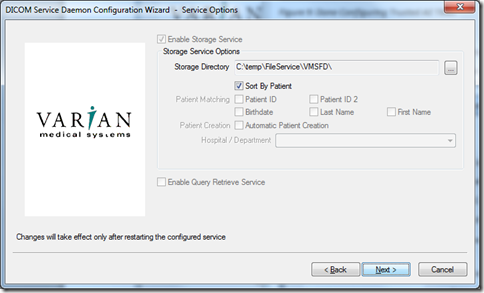
Figure 10: File Daemon Config Step 3
In the screen that follows, click the Add button to add the AE title information for DCMTK as shown in Figure 6 above. Use the same exact information used to configure the DB Daemon.
Click the Add button again to add the AE Title information for the DB Daemon as shown in Figure 11 below.
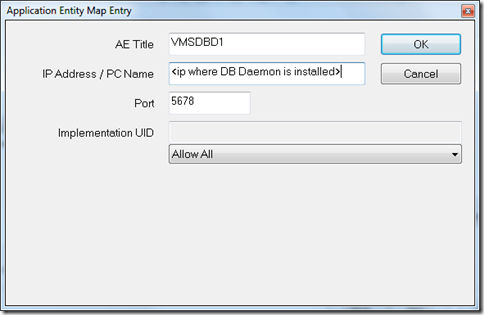
Figure 11: File Daemon Config Step 5
When done configuring AE titles (Figure 12) click Next. In this article, the DB Daemon, the File Daemon, and the DCMTK package are all installed on the same computer so the IP addresses are all the same. This is not the usual case, normally the daemons are installed on a server.
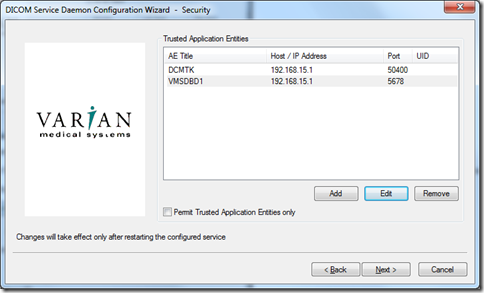
Figure 12: Done Configuring Trusted AE Titles for File Daemon
Configure the service control aspects as you wish and click Finish. The VMS File Daemon should start running as a service.
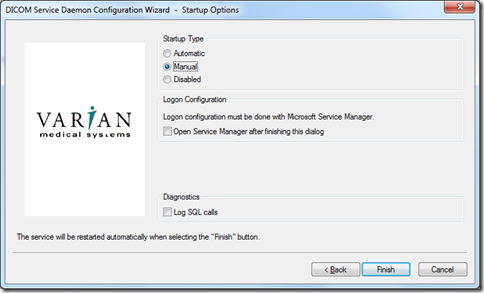
Figure 13: Service control options
Open the windows service manager (Administrative Services/Services menu item in Windows 7) and verify that both services are installed and running.

Figure 14: DICOM Daemons are installed and running as Windows Services
Scripting Eclipse to Script DICOM DICOM Query / Retrieve network operations could be used to find the DICOM UIDs necessary to move the package of Plan, Structure Set, CT Image, and Dose files. Building the right query can be quite challenging for the DICOM novice however, so we simplify that step here by using the Eclipse Scripting API to get the DICOM UIDs needed.
Download GetDicomCollection.cs from this site here, tweak the parameters in file GetDicomCollection.cs to match your configured environment.
public const string DCMTK_BIN_PATH= @"C:\variandeveloper\tools\dcmtk-3.6.0-win32-i386\bin"; // path to DCMTK binaries
public const string AET = @"DCMTK";                 // local AE title
public const string AEC = @"VMSDBD1";               // AE title of VMS DB Daemon
public const string AEM = @"VMSFD";                 // AE title of VMS File Daemon
public const string IP_PORT = @" 192.168.15.1 5678";// IP address of server hosting the DB Daemon, port daemon is listening to
public const string CMD_FILE_FMT = @"{0}\move-{1}({2})-{3}.cmd";
When done editing; save, compile, etc.
Check to be sure your DICOM DB Daemon and DICOM File Daemon are running (Figure 14).
Run Eclipse, load a case that has a plan, structure set, CT data, and dose. Choose menu item Tools/Scripts, then choose the GetDicomCollection.cs script and run it.
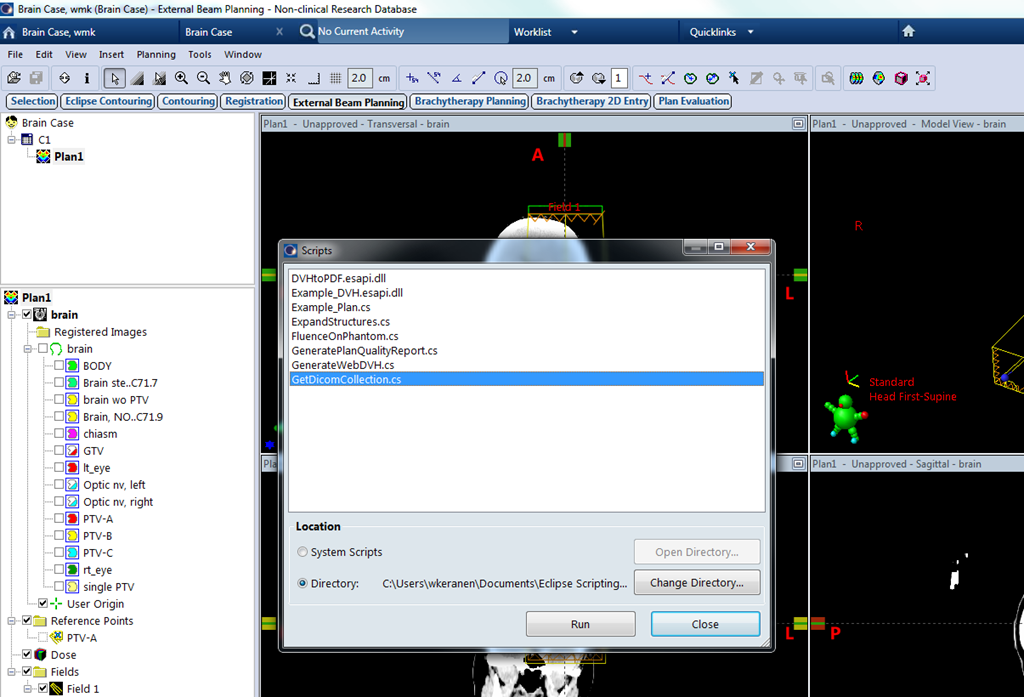
Figure 15: Running the Script
While processing, you’ll stare at a blank DOS command prompt for a minute or so since the standard output has been redirected to a log file. When done, Notepad is shown with the results of from standard out, and the following prompt is displayed. There is no standard error log in this case since all DICOM C-MOVE operations completed successfully.
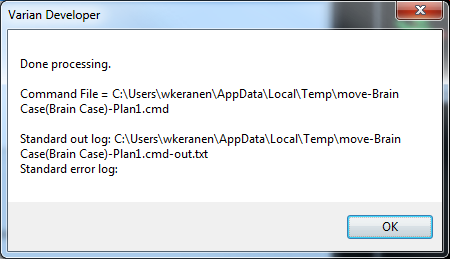
Figure 16: A successful run
The extracted DICOM files are now sitting in the directory configured as the output directory for the VMS File Daemon, + <patient id> . The extracted files end up in the directory C:\Temp\FileService\VMSFD\Brain Case for this example.
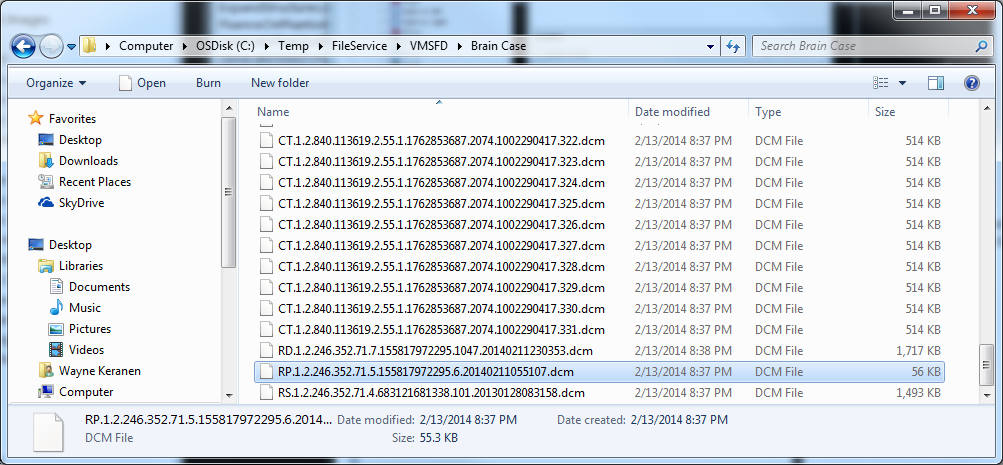
Figure 17: The extracted DICOM files.
Summary Varian’s DICOM connectivity solutions provide scriptable access to all of the DICOM data in the Aria database. This article demonstrates one approach that can be used to semi-automatically extract DICOM data from Aria with a combination of Eclipse scripting and DB Daemon scripting. Variants of this approach will prove useful to researchers who need to gain programmatic access to the large amounts of radiotherapy DICOM data stored in their Aria databases.