-
Notifications
You must be signed in to change notification settings - Fork 0
/
Copy pathindex.qmd
251 lines (165 loc) · 13.6 KB
/
index.qmd
1
2
3
4
5
6
7
8
9
10
11
12
13
14
15
16
17
18
19
20
21
22
23
24
25
26
27
28
29
30
31
32
33
34
35
36
37
38
39
40
41
42
43
44
45
46
47
48
49
50
51
52
53
54
55
56
57
58
59
60
61
62
63
64
65
66
67
68
69
70
71
72
73
74
75
76
77
78
79
80
81
82
83
84
85
86
87
88
89
90
91
92
93
94
95
96
97
98
99
100
101
102
103
104
105
106
107
108
109
110
111
112
113
114
115
116
117
118
119
120
121
122
123
124
125
126
127
128
129
130
131
132
133
134
135
136
137
138
139
140
141
142
143
144
145
146
147
148
149
150
151
152
153
154
155
156
157
158
159
160
161
162
163
164
165
166
167
168
169
170
171
172
173
174
175
176
177
178
179
180
181
182
183
184
185
186
187
188
189
190
191
192
193
194
195
196
197
198
199
200
201
202
203
204
205
206
207
208
209
210
211
212
213
214
215
216
217
218
219
220
221
222
223
224
225
226
227
228
229
230
231
232
233
234
235
236
237
238
239
240
241
242
243
244
245
246
247
248
249
250
251
---
title: Virtual Environments
subtitle: Introduction to Virtual Environments with R and Python at the Urban Institute
date: "`r format(Sys.time(), '%d %B, %Y')`"
format:
html:
toc: true
theme: www/urbn.scss
number-sections: true
editor: visual
execute:
echo: true
eval: false
---
This guide is intended to help R and Python users at the Urban Institute start using virtual environments. This guide assumes familiarity with Git and GitHub (see [this guide](https://ui-research.github.io/urbngit/) if you are not familiar with these tools) and is focused on helping folks start using virtual environments without having to meaningfully modify their existing workflows.
## Why should I use a virtual environment?
Virtual environments promote reproducibility by letting you let you specify project-specific versions of packages. They accomplish this by making it easy to take a snapshot of the version of packages used in a project and restore that snapshot on other computers. They also make it easy to switch between snapshots on a single computer as you switch between projects.
To make this more concrete, here's a few situations when setting up a virtual environment can save you several hours (or even days!) of frustration:
* You published an analysis based on 2021 data. A year later, you want to update the analysis with 2022 data, but your code no longer works because a function in a package was updated.
* Your coworker is running into errors running your code because of differences in package versions between your computers.
* You need to use Python 2.7 for a legacy project, while using Python 3.7 for all other projects.
* You want to use a new library that has known compatibility issues with Python 3.8 on Windows computers, so you want to use Python 3.7 for just one specific project.
* You got a new computer and don't want to spend hours remembering which R packages to install through endless `Error in library(<>): there is no package called ‘<>’` errors.
* Your code takes a long time to run locally, so you want to leverage powerful [virtual computers in the cloud](http://tech-tools.urban.org/ec2-submission/) – or scale to use tens, hundreds, or thousands of computers simultaneously – but you first need to install the relevant packages on the virtual machine(s).
Importantly, virtual environments are just one piece of reproducible research workflows – they are NOT replacements for other important components of reproducibility like version control, directory management, or data provenance.
## When should I use a virtual environment?
Ideally, always. You'll be more likely to regret NOT setting up a virtual environment for a project down the line than to regret spending a few minutes doing so for a project that didn't necessarily require one. Getting into the habit of using virtual environments for smaller projects will also help you develop confidence when using them for larger projects with more collaborators and complex dependencies.
While the best time to set up a virtual environment for a project is at the very beginning (right after initializing your GitHub repository), the second best time is right now – whether you're halfway through writing your code, ready to publish your results, or have already published your analysis.
## Which environment manager should I use?
For R projects, we recommend using `renv`. For Python projects, we recommend using `conda`. These are by no means the only environment managers for R and Python, but we've found these to be the most reliable and user-friendly for the majority of use cases at Urban.
:::{.callout-tip collapse="true" appearance="simple"}
### Alternatives for R
Within the R community, `renv`, developed and [maintained by RStudio](https://github.com/rstudio/renv/), is the de facto virtual environment manager. Older resources might reference `packrat`, which has been [soft-deprecated](https://github.com/rstudio/packrat#note) and is now superseded by `renv`. [According to the developers](https://cran.r-project.org/web/packages/renv/vignettes/renv.html) of `renv`,
> The goal is for `renv` to be a robust, stable replacement for the Packrat package, with fewer surprises and better default behaviors.
If you're using R alongside Python, it may make sense to use `conda` as your environment manager. Documentation for using R with the Anaconda distribution and `conda` environment manager is available [here](https://docs.anaconda.com/anaconda/user-guide/tasks/using-r-language/). Alternatively, you can use Python with `renv`, as documented [here](https://rstudio.github.io/renv/articles/python.html).
:::
:::{.callout-tip collapse="true" appearance="simple"}
### Alternatives for Python
There is a plethora of virtual environment managers in Python, with a few of the most common being `virtualenv`, `pipenv`, `poetry`, and `conda`.
For data science and research use cases, `conda` is a popular option for several reasons. First, `conda` is both an environment manager and a package manager. As a result, `conda` helps install packages and manage dependencies, whereas other tools rely on `pip` for package management. Unlike other managers, `conda` also has native support for programming languages beyond Python (including R). Lastly, `conda` is extensible, letting you install packages from `pip`, for example, and offering [Miniconda](https://docs.conda.io/en/latest/miniconda.html) as a lighter-weight alternative or [Mambda](https://mamba.readthedocs.io/en/latest/index.html) as an even faster "drop-in replacement" for `conda`.
If you're using R and Python, `conda` or `renv` are good options given their emphasis on interoperability. Documentation for using R with `conda` is available [here](https://docs.anaconda.com/anaconda/user-guide/tasks/using-r-language/), and documentation for using Python with `renv` is available [here](https://rstudio.github.io/renv/articles/python.html).
:::
## How do I set up a virtual environment?
### The big idea
::: {.panel-tabset}
#### Overall
[]{fig-align="center"}
#### R
[]{fig-align="center"}
#### Python
[]{fig-align="center"}
:::
### Workflow and commands
::: {.panel-tabset}
### R
To set up a virtual environment for an R project, we recommend using `renv`. To install `renv`, use the standard syntax to install R packages from CRAN: `install.packages("renv")`.
:::{.callout-note}
## Where do I run these commands?
All commands below should be run from RStudio within your project's directory.
:::
1. **Initialize** a new project-specific environment:
```{.r}
renv::init()
```
2. **Install packages** using your usual workflow:
```{.r}
install.packages("ggplot2") # install from CRAN
renv::install("tidyverse/dplyr") # install from GitHub
```
Note that `renv` can install packages from a [variety of sources](https://rstudio.github.io/renv/articles/renv.html#package-sources) including CRAN, GitHub, and Bioconductor.
3. **Save** a snapshot of the environment to a file called `renv.lock`:
```{.r}
renv::snapshot()
```
4. **Share** the snapshot of the environment by sending three files to GitHub: `renv.lock`, `.Rprofile`, and `renv/activate.R`.
Note that running the `renv::init()` command in the first step automatically updates your `.gitignore` file (if relevant) to tell Git which `renv` files to track.
5. **Restore** the snapshot of the environment on another computer:
```{.r}
renv::restore()
```
6. **Repeat** the process. As you and your collaborators install, update, and remove packages, repeat steps 3-5 to save and load the state of your project to the `renv.lock` file across computers.
### Python
To set up a virtual environment for a Python project, we recommend using `conda`, which is built into the [Anaconda distribution](https://www.anaconda.com/products/distribution) through Anaconda or [Miniconda](https://docs.conda.io/en/latest/miniconda.html). If you haven't already installed Anaconda, see [this guide](https://github.com/UI-Research/python-resources/blob/main/notebooks/anaconda-installation.ipynb) from a previous Python Users Group session. You can verify that `conda` is installed and running on your computer with `conda --version`. If you get an error, see the Anaconda [troubleshooting guide](https://conda.io/projects/conda/en/latest/user-guide/troubleshooting.html).
:::{.callout-note}
## Where do I run these commands?
All commands below should be run from the Anaconda Prompt or a terminal window (e.g. within RStudio or VS Code) from the root of your project's directory.
:::
1. **Initialize** a new environment (optionally specifying a version of Python and/or a list of packages) using one of the options below. You should replace `my_env` with a descriptive name specific to your project.
```{.python}
conda create --name my_env # create empty environment
conda create --name my_env python==3.7 # create environment with specific Python version
conda create --name my_env python==3.7 pandas numpy # create environment with packages installed
```
It's best practice to specify packages when initializing the environment to let `conda` help manage dependencies most effectively.
2. **Activate** the environment, again replacing `my_env` with the name of your environment:
```{.python}
conda activate my_env
```
3. **Install packages** using your usual workflow (optionally specifying the package version) for any packages that you did not include when initializing the environment in the first step:
```{.python}
conda install pandas # install default version of pandas
conda install pandas=0.24.1 # install specific version of pandas
```
It's best practice to specify the version number associated with a package to ensure that changes in packages over time don't affect the reproducibility of your code.
4. **Save** a snapshot of the environment to a file called `environment.yml`.
```{.python}
conda env export --from-history > environment.yml
```
The `from-history` flag is necessary to make your environment file work across platforms.
Alternatively, you can manually create the `environment.yml` file in the root of your project directory, where it would follow this structure:
```{.python}
name: my_env
dependencies:
- python=3.7
- pandas=0.24
- numpy=1.21
```
If you installed packages using `pip`, the `environment.yml` file would follow this structure:
```{.python}
name: my_env
dependencies:
- python=3.7
- pandas=0.24
- numpy=1.21
- pip=19.1
- pip:
- awscli==1.16
- kaggle==1.5
```
Note that packages installed using `pip` use `==` to specify the version number, while packages installed from `conda` use `=`.
5. **Share** the snapshot by sending the `environment.yml` file to GitHub.
6. **Restore** and activate the snapshot of the environment on another computer:
```{.python}
conda env create
conda activate my_env
```
The `conda env create` syntax assumes you have a file called `environment.yml` in your working directory. While you could give this file a different name, we recommend sticking with the convention of naming the file `environment.yml` and placing it in the root of your project's directory.
7. **Repeat** the process. As you and your collaborators install, update, and remove packages, repeat steps 4-6 to save and load the state of your project to the `environment.yml` file across computers.
:::
## Additional resources
::: {.panel-tabset}
### R
The 10-minute talk from rstudio::conf(2022) called [You should be using renv](https://www.rstudio.com/conference/2022/talks/you-should-use-renv/) from E. David Aja is a great overview of the motivation for using the tool. We also recommend the official [Introduction to renv](https://rstudio.github.io/renv/articles/renv.html#package-sources) and [Collaborating with renv](https://rstudio.github.io/renv/articles/collaborating.html) vignettes.
### Python
We recommend keeping the official `conda` [cheat sheet](https://docs.conda.io/projects/conda/en/4.6.0/_downloads/52a95608c49671267e40c689e0bc00ca/conda-cheatsheet.pdf) handy.
In addition to the commands included above, a few other commonly used `conda` commands include:
* `conda deactivate` deactivates the current environment
* `conda list` lists all packages in the current environment
* `conda env list` lists all environments (with the current active environment asterisked)
* `conda env remove -n my_env` deletes the `my_env` environment
The official [documentation](https://docs.conda.io/projects/conda/en/latest/user-guide/tasks/manage-environments.html) and [this guide](https://carpentries-incubator.github.io/introduction-to-conda-for-data-scientists/04-sharing-environments/index.html) from the Carpentries are also helpful resources.
:::
## Getting help
Adding a new tool to your workflow can be hard, but we're here to help! Feel free to email Erika Tyagi (etyagi@urban.org) or drop a message in the **#reproducible-research** Slack channel with any questions or if you run into issues.
## Obligatory xkcd comic
I couldn't pick just one, so here's three:
::: {.panel-tabset}
### Dependency
[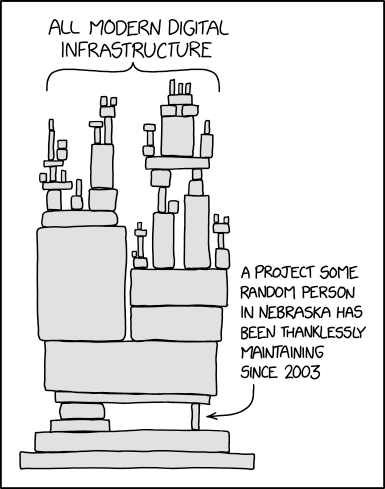](https://xkcd.com/2347/){fig-align="center"}
### Python Environment
[](https://xkcd.com/1987/){fig-align="center"}
### Workflow
[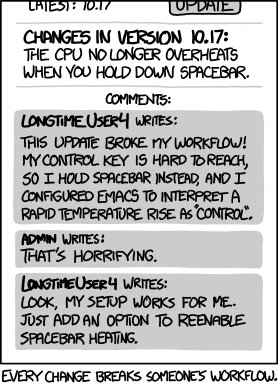](https://xkcd.com/1172/){fig-align="center"}
:::
---