Este es un badge electronico que hemos creado para nuestros amigos de OpenHack Guatemala 2019, en este repositorio encontraras todos los archivos necesarios para conocer el badge, ahora saca el maximo pontencial de tu badge.
Install SAMD soport
You must install the boards SAMD of Arduino(vertions 1.6.11 o posterior)
In the menú bar selec tools --> boards --> Board Manager --> Arduino SAMD Boards 32 bit M0.
In the search bar write "SAMD" en then you can see the boards, do clic in install and wait to finish to installe.
To add board support for our products, start Arduino and open the Preferences window (File > Preferences). Now copy and paste the following URL into the 'Additional Boards Manager URLs' input field:
https://electroniccats.github.io/Arduino_Boards_Index/package_electroniccats_index.json
-
If there is already an URL from another manufacturer in that field, click the button at the right end of the field. This will open an editing window allowing you to paste the above URL onto a new line.
-
Press the "OK" button.
-
Open the "boards manager" that is in tools --> Board --> board manager.
-
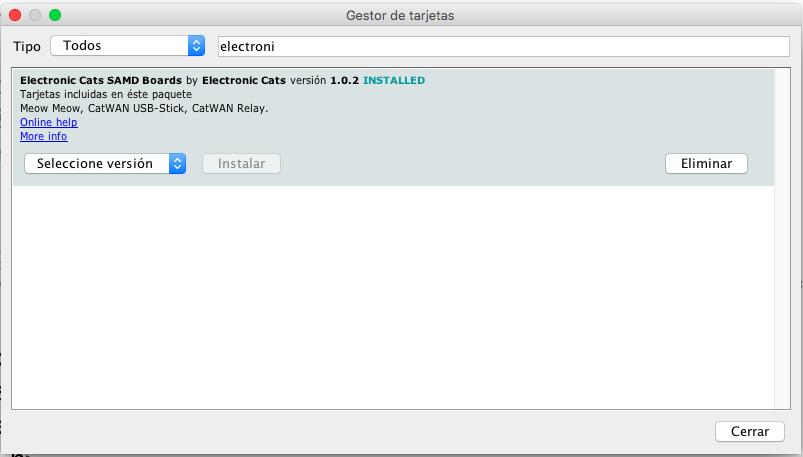
Now write "Electronic Cats" (without quotes) in the search bar.
-
Click in install, jus wait to finish to install and only close the window.
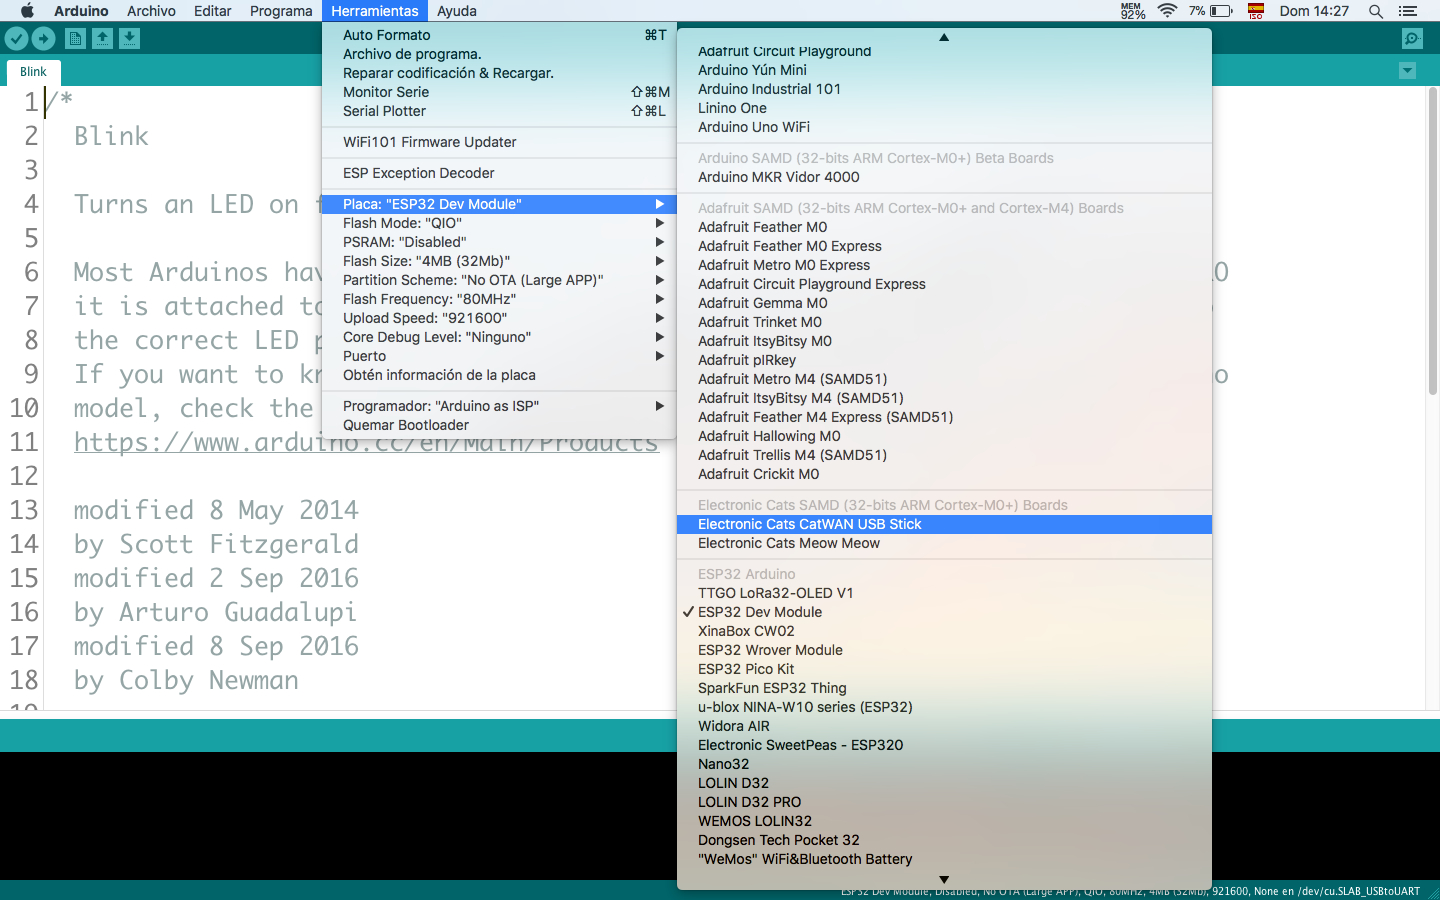
- In tools --> Boards, scroll to down in the board´s list you can see the Electronic Cat´s boards.
- Close Boards Manager, then click Tools->Board->samd11 generic.
- Select the MCU with the now visible Tools->Microcontroller menu (if present).
- If you do not already have the bootloader or blink sketch installed, see SAM-BA USB CDC Bootloader below.
- Plug in the board. The blink sketch should be running.
- Click Tools->Port and choose the COM port. Note that the board indicated may not match the chosen board*
- You can now upload your own sketch.
Currently, with Electronic Cats boards, USB PIDs are shared across boards (but they are different based on Tools->USB Config). This will result in Tools->Port showing "MattairTech Xeno Mini", for example, for all MattairTech boards.
- In the Arduino IDE (1.6.7 or above), open File->OpenFiles->Fw->Blink.
- Be sure the correct options are selected in the Tools menu (see Core Installation above).
- With the board plugged in, select the correct port from Tools->Port.
- Click the Upload button. After compiling, the sketch should be transferred to the board.
- Once the bootloader exits, the blink sketch should be running.
Designed by Electronic Cats.
Firmware released under an GNU AGPL v3.0 license. See the LICENSE file for more information.
Hardware released under an CERN Open Hardware Licence v1.2. See the LICENSE_HARDWARE file for more information.
Electronic Cats is a registered trademark, please do not use if you sell these PCBs.
OpenHack is a registered trademark, please do not use if you sell these PCBs.
22 Oct 2019


