This sample shows how to invoke IBM ODM from IBM RPA with Automation Anywhere through a simple Decision Bot.
- Before you begin
- Scenario
- Automating invoice creation with RPA
- Full automation with RPA and ODM
- One step further: decision governance
- Useful Links
All RPA bots and ODM Decision Service described in this sample can be downloaded from the assets/aa directory.
Here are the software you need to install in order to run the sample:
- IBM Robotic Process Automation with Automation Anywhere (IBM RPA) leverages ODM to make it possible to automate desktop tasks that involve human judgements that can be captured as ODM decisions.
- IBM Operational Decision Manager (ODM) provides a complete, easy-to-use system for automating day-to-day operational decisions and allows business people and IT staff to collaborate on business rules by using an interface and a language that are comfortable and intuitive for both.
- NodeJS 8.x or greater: needed to run the npm package below
- ODM Decision Forms: an open source npm package provided by the ODM development team, that generates a form on top of a Decision Service.
Go to invoicely.com and create an account
- Log in to Control Room
- Go to the Credential Manager tab
- Click Add Credential
- Name it invoicing
- Add the following attributes, with their corresponding values:
- email: email you used to create your Invoicely account.
- password: password for your account
Copy the content of the assets/aa directory to your Automation Anywhere client
document directory.
Typically, the .atmx and .csv files should end up in a directory of the form
C:\Users\Administrator\Documents\Automation Anywhere Files\Automation Anywhere\My Tasks\Invoicing
and the metabot in a C:\Users\Administrator\Documents\Automation Anywhere Files\Automation Anywhere\My MetaBots directory.
- Download CompleteInvoice.zip decision service
- Open Rule Designer
- Import the downloaded zip in your workspace with File > Import > Archive file
Bea works for Acme Retail, a small retailing company selling books, newspapers, computers, groceries and clothing.
Jack is a client of Acme Retail. Each week, he orders a list of goods to Bea, sending her a CSV file listing the quantity, category and unit price of each item she wants to order.

Bea uses invoicely.com to register invoices corresponding to Jack's orders.
Depending on the quantity and type of goods, Bea applies a tax rate and a discount to each row in the orders CSV and saves the result in her invoicely.com account.
Abu is an IT consultant working for Acme Retail. Bea asks him to automate the invoicing process as much as possible while letting her define discounts and taxes on order items.
We show here how Abu can leverage IBM RPA with Automation Anywhere to automate the reading and editing of invoices and IBM ODM to compute the discounts and taxes of each order item.
Our first step consists of recording an Automation Anywhere task that reads the CSV file, and, for each row, connects to invoicely.com and create the corresponding invoice.
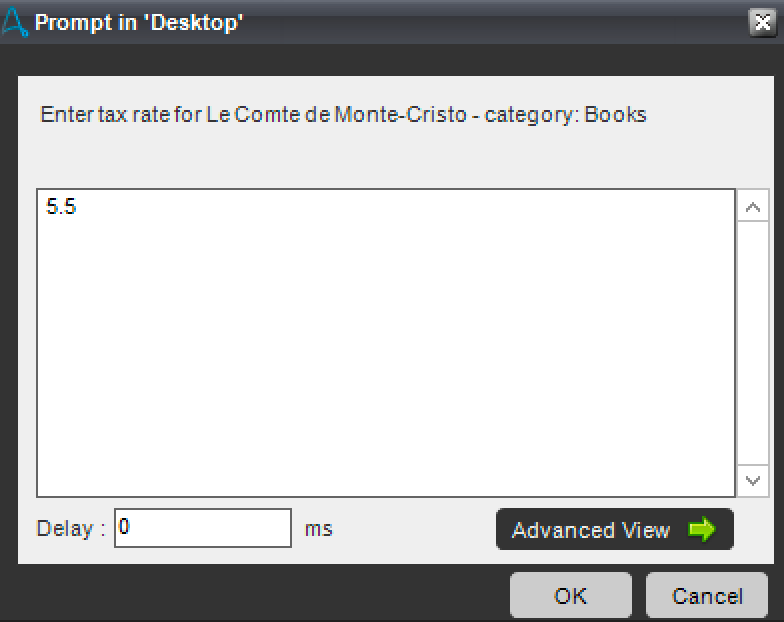
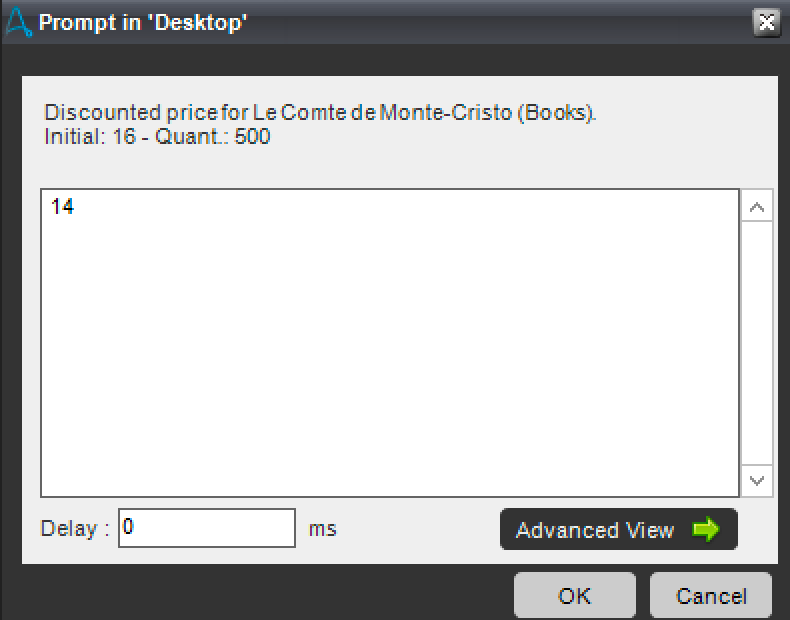
Since the tax rate and discounted price are not present in the CSV, the RPA task will prompt Bea during the process to let her enter those values.
Note: the RPA bots described in this section are provided in the assets directory. See instructions here.
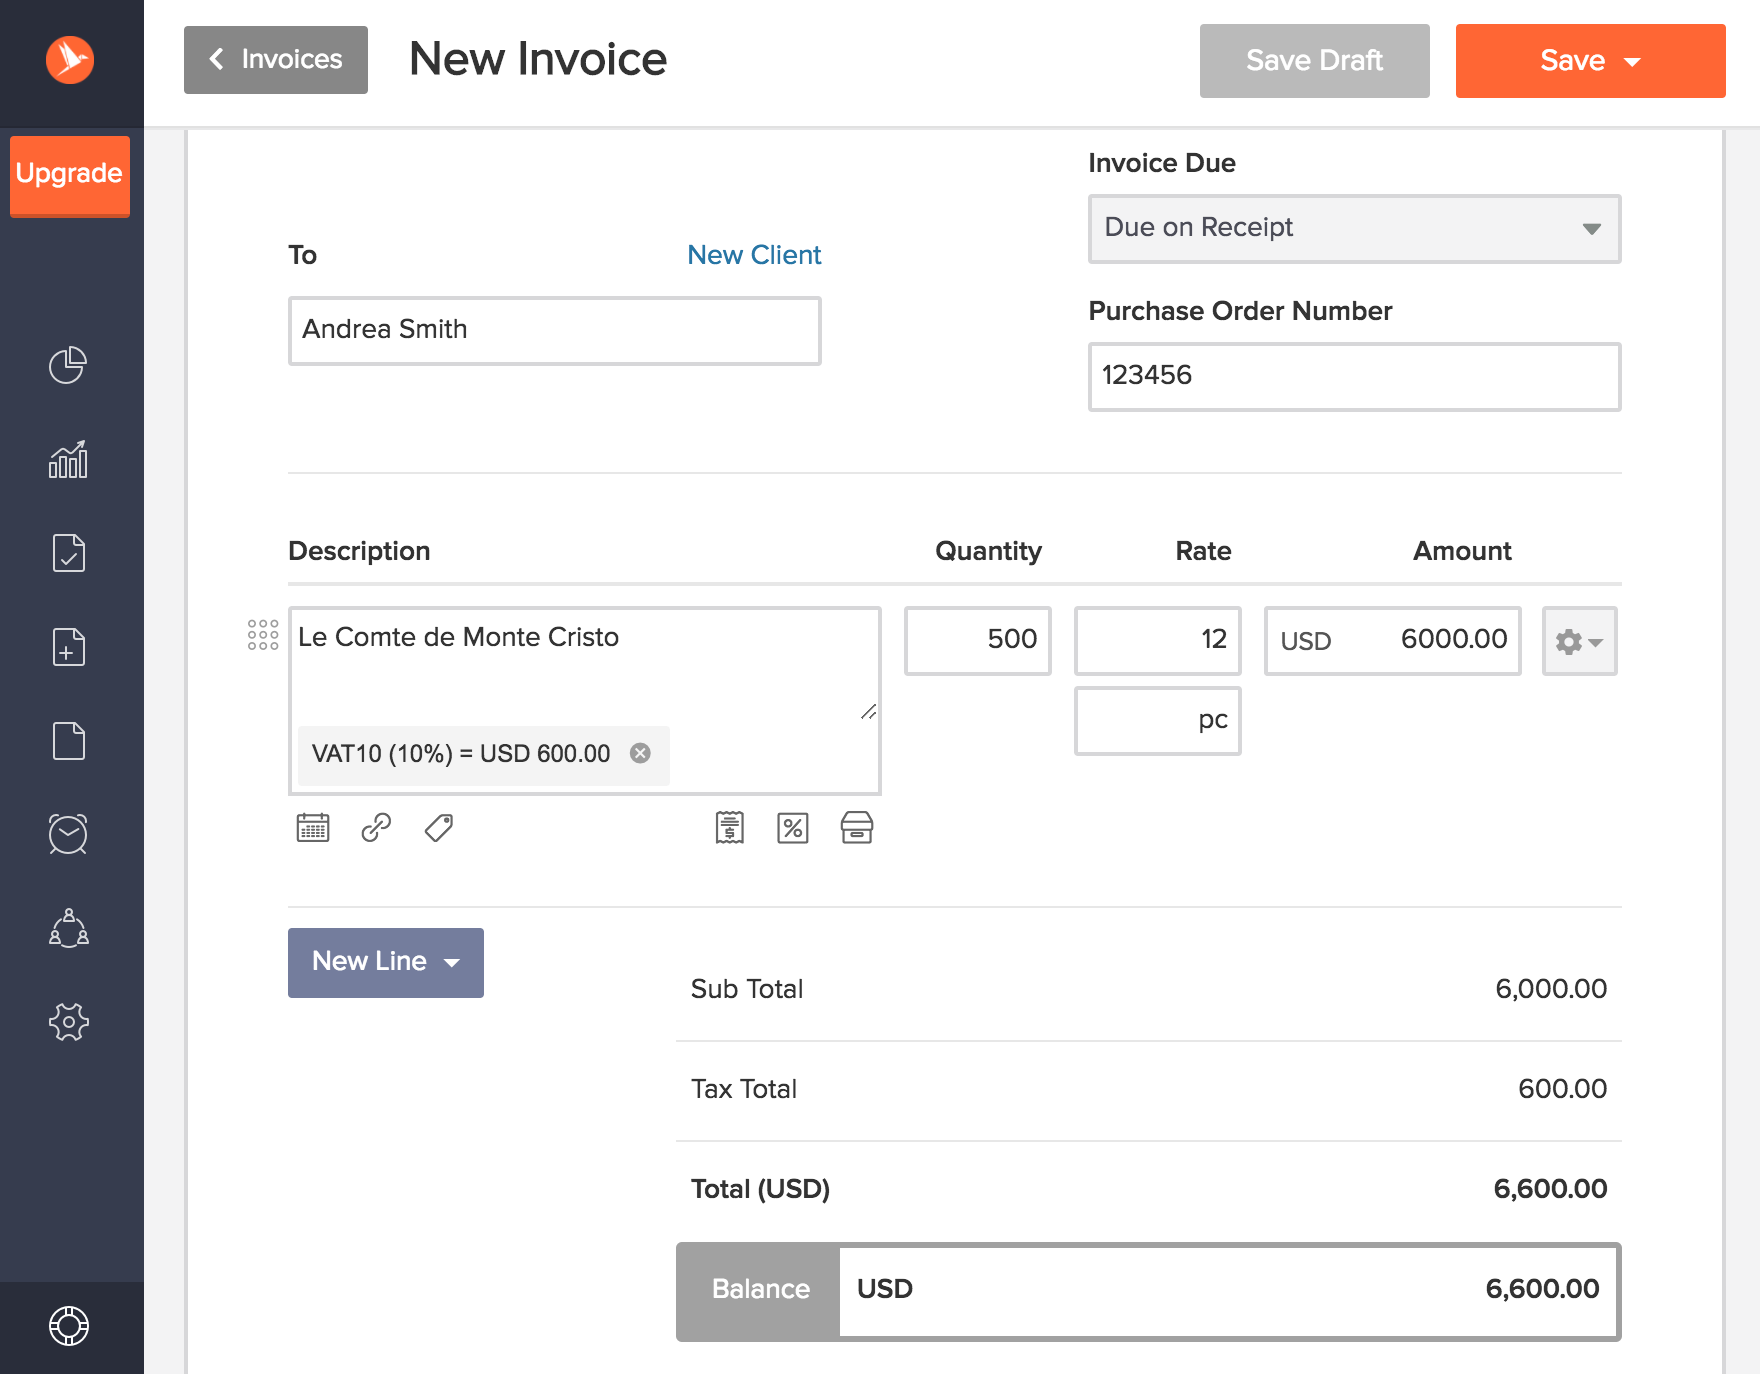
The Create Invoice.atmx task creates an invoice in Invoicely, given a unit price, a quantity, an order id, an item description, a tax rate, and a client first name and last name.
-
Login, create Invoice, set order ID, description and quantity

-
Set tax and unit price

Notice that the tax and unit price are not part of the orders CSV and their computation may not be straightforward, depending on the order items.
-
Set client information, save and logout


The Main.atmx task does the following:
- Opens orders CSV file
- For each row
-
Prompt the user with the tax rate and discounted price
-
Invoke the invoice creation task.
-
Here is the complete task:

From the Automation Anywhere Client, simply run %AA_INSTALL%\Automation Anywhere\My Tasks\Invoicing\Main.atmx
Automation would be complete if we can avoid asking Bea to manually enter the tax rate and discounted price for each order.
This is where IBM ODM will provide agility and enable the bot to handle more complex business logic than it could before in an easy to use format of decision tables or natural language rules.
Note: the RPA bots and decision service described in this section are provided in the assets directory. See instructions here.
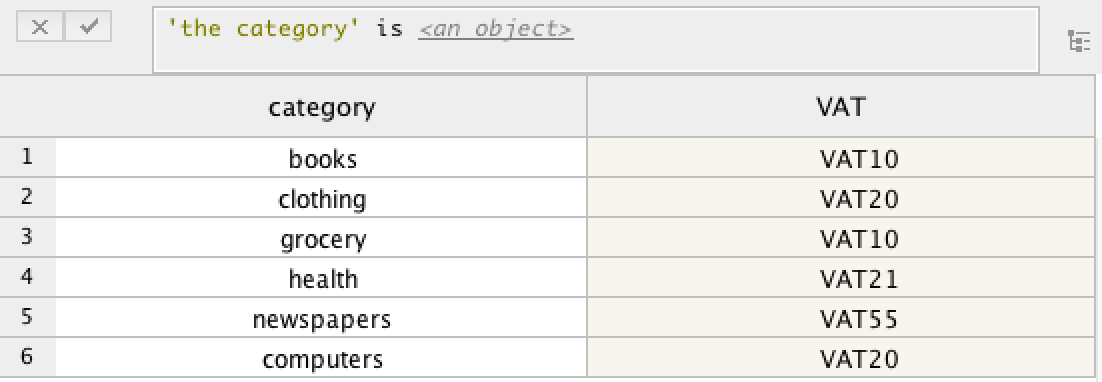
In ODM, we create a Decision Service that takes a category, price and quantity as input, and returns a discounted unit price and a tax rate and label.

This Decision Service is made of:
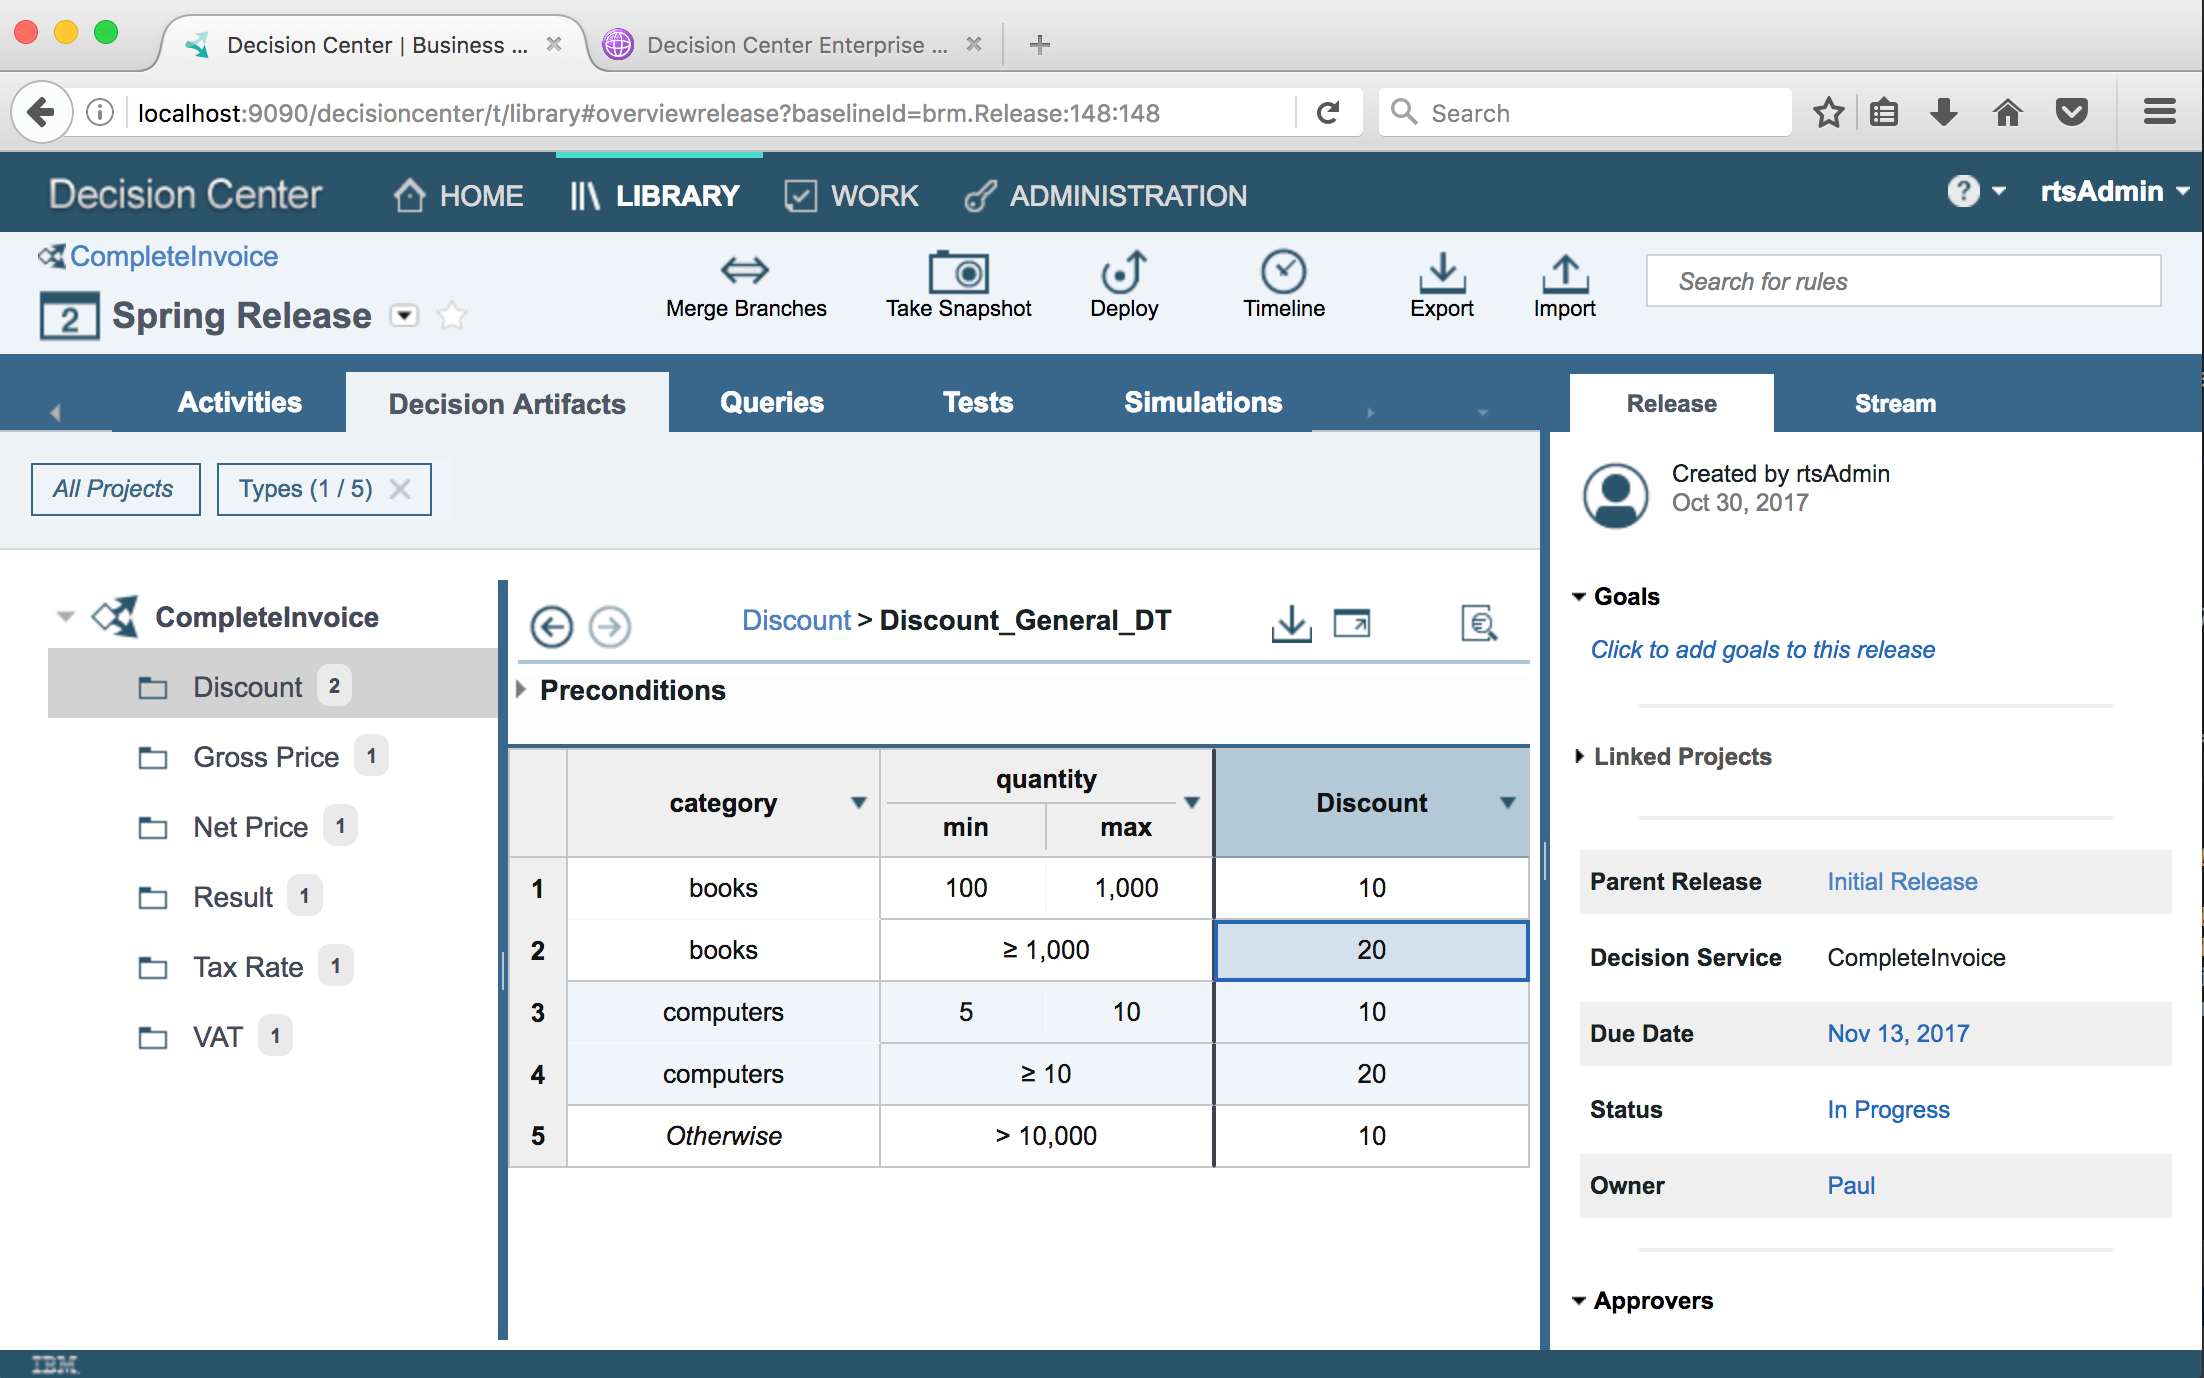
- A decision table that determines a VAT from the product category
- A decision table that determines a discount from the product quantity and category
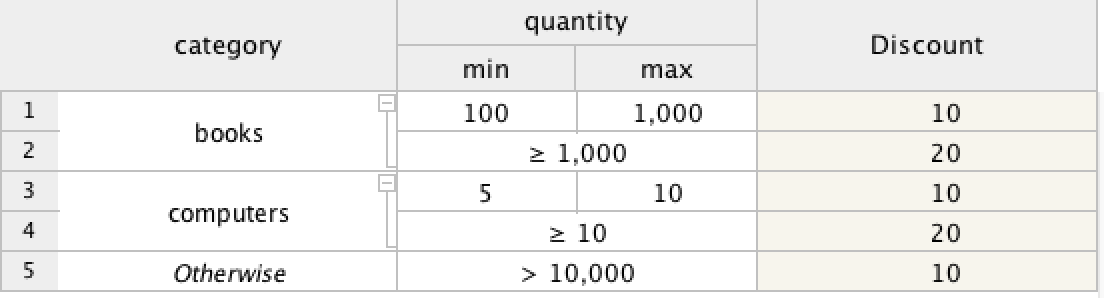
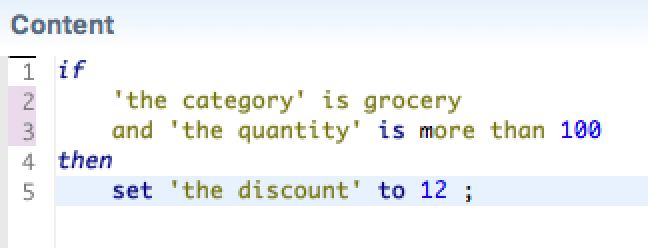
- A specific rule that sets a discount when the product category is 'grocery'
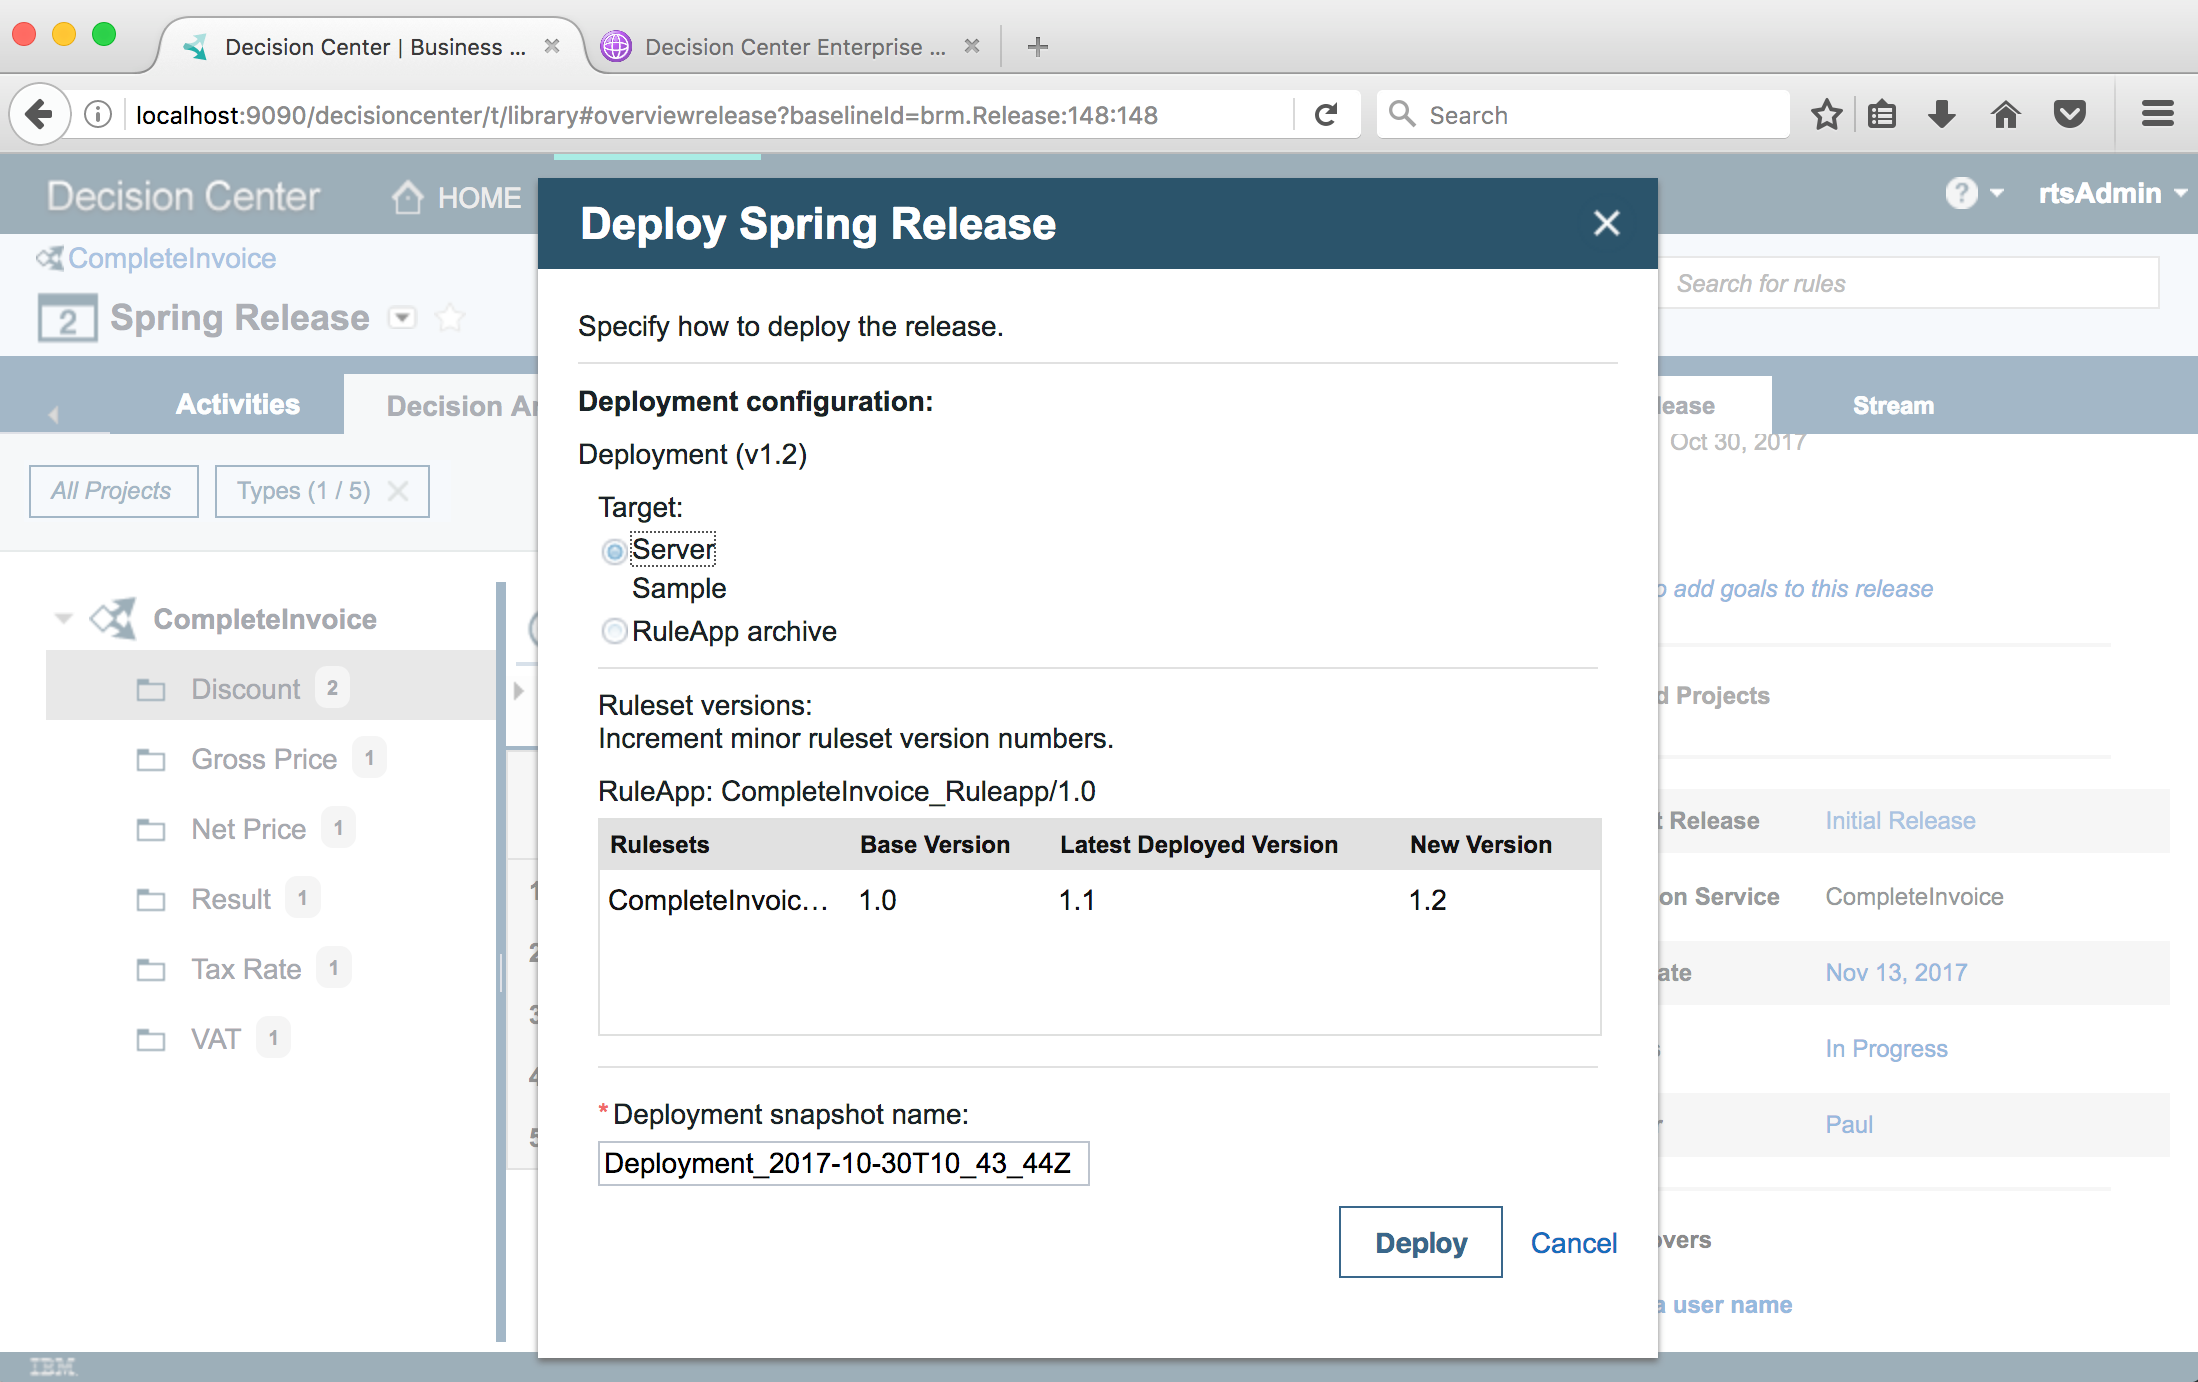
Once you have downloaded the decision service, open it in ODM Rule Designer, and deploy it to your local Rule Execution Server.
A Decision Form is an auto-generated form allowing to execute a Decision Service. Once this form is generated, we will write an RPA MetaBot to invoke it and get the tax and discounted price for each order.
You now need to install and run the odm-decision-forms npm package, which will provide you with a generated form to invoke the decision service.
Make sure you have NodeJS 8.x or greater installed:
node --versionInstall the odm-decision-forms npm package:
npm install -g odm-decision-formsRun the odm-decision-forms server:
odm-decision-forms --decisionservice http://localhost:9090/DecisionService --console http://localhost:9090/resNote: we assume that your ODM server is running at http://localhost:9090. You can change it to fit your installation.
Then open the following URL: http://localhost:3000/ruleapp/CompleteInvoice_Ruleapp/CompleteInvoice_Ruleset
Test the form by entering some input values and hit Run Decision. You should get the following result:

Tip: you can see the list of generated forms for each deployed ruleset at http://localhost:3000
We then create a MetaBot that will enter input data in the Decision Form, run the Decision Service, and get the results back as output parameters.

Finally, we can amend our main task calling ODM instead of prompting the user. The invocation of the MetaBot consists of mapping the task variables to/from input/output parameters of the MetaBot.

From the Automation Anywhere Client, simply run %AA_INSTALL%\Automation Anywhere\My Tasks\aa\Main with ODM metabot.atmx
You can see a live demo of the running bot here: https://youtu.be/Z9QIBERy3k8
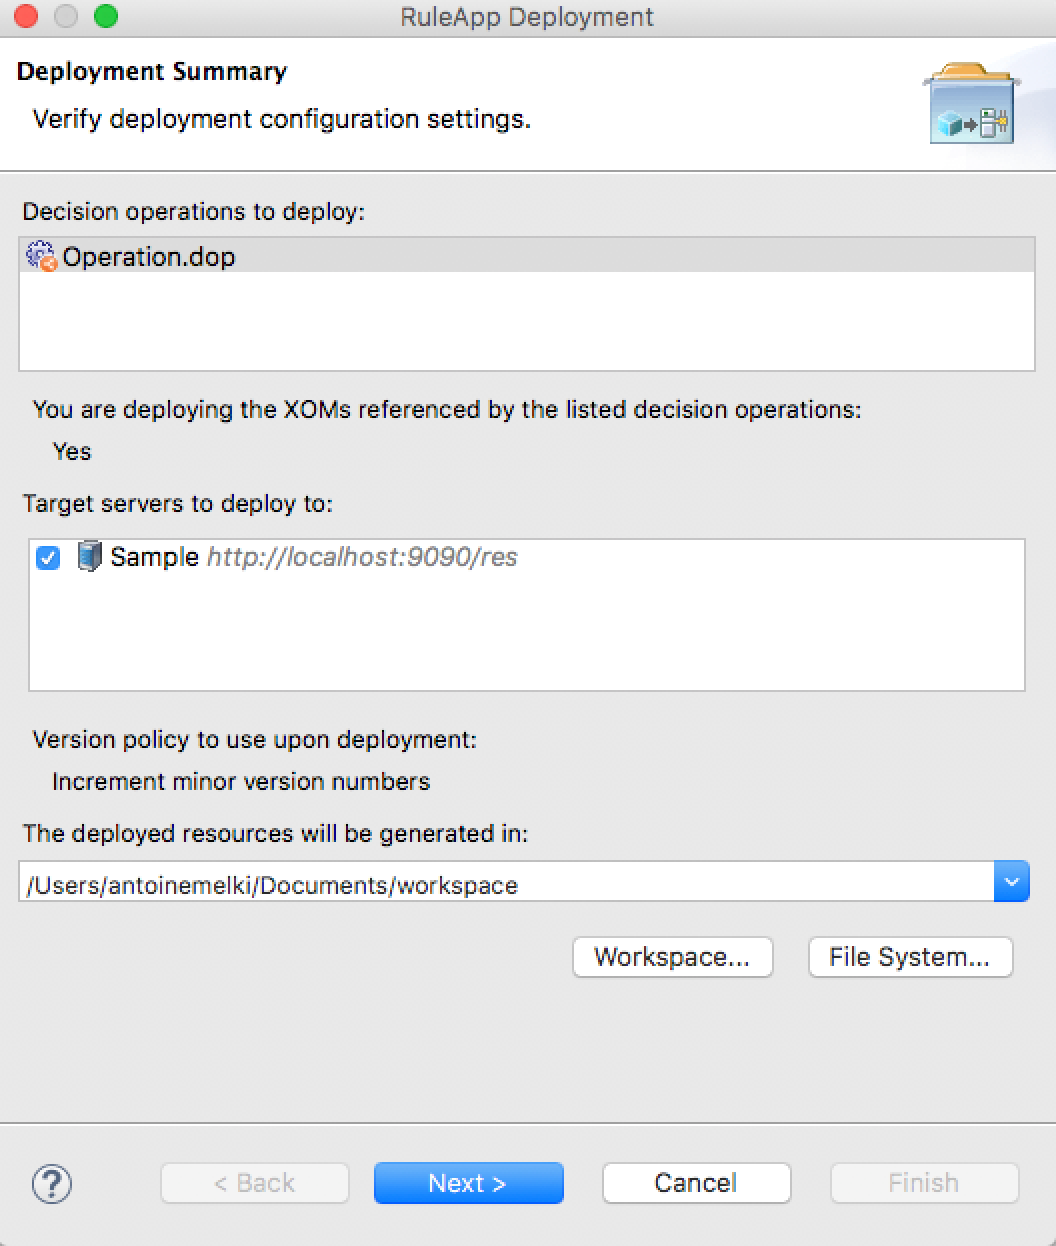
Once the RPA tasks are ready and the decision bot is functional, you may publish your Decision Service to ODM Decision Center in order to take advantage of its governance capabilities such as user permission, release management and testing.
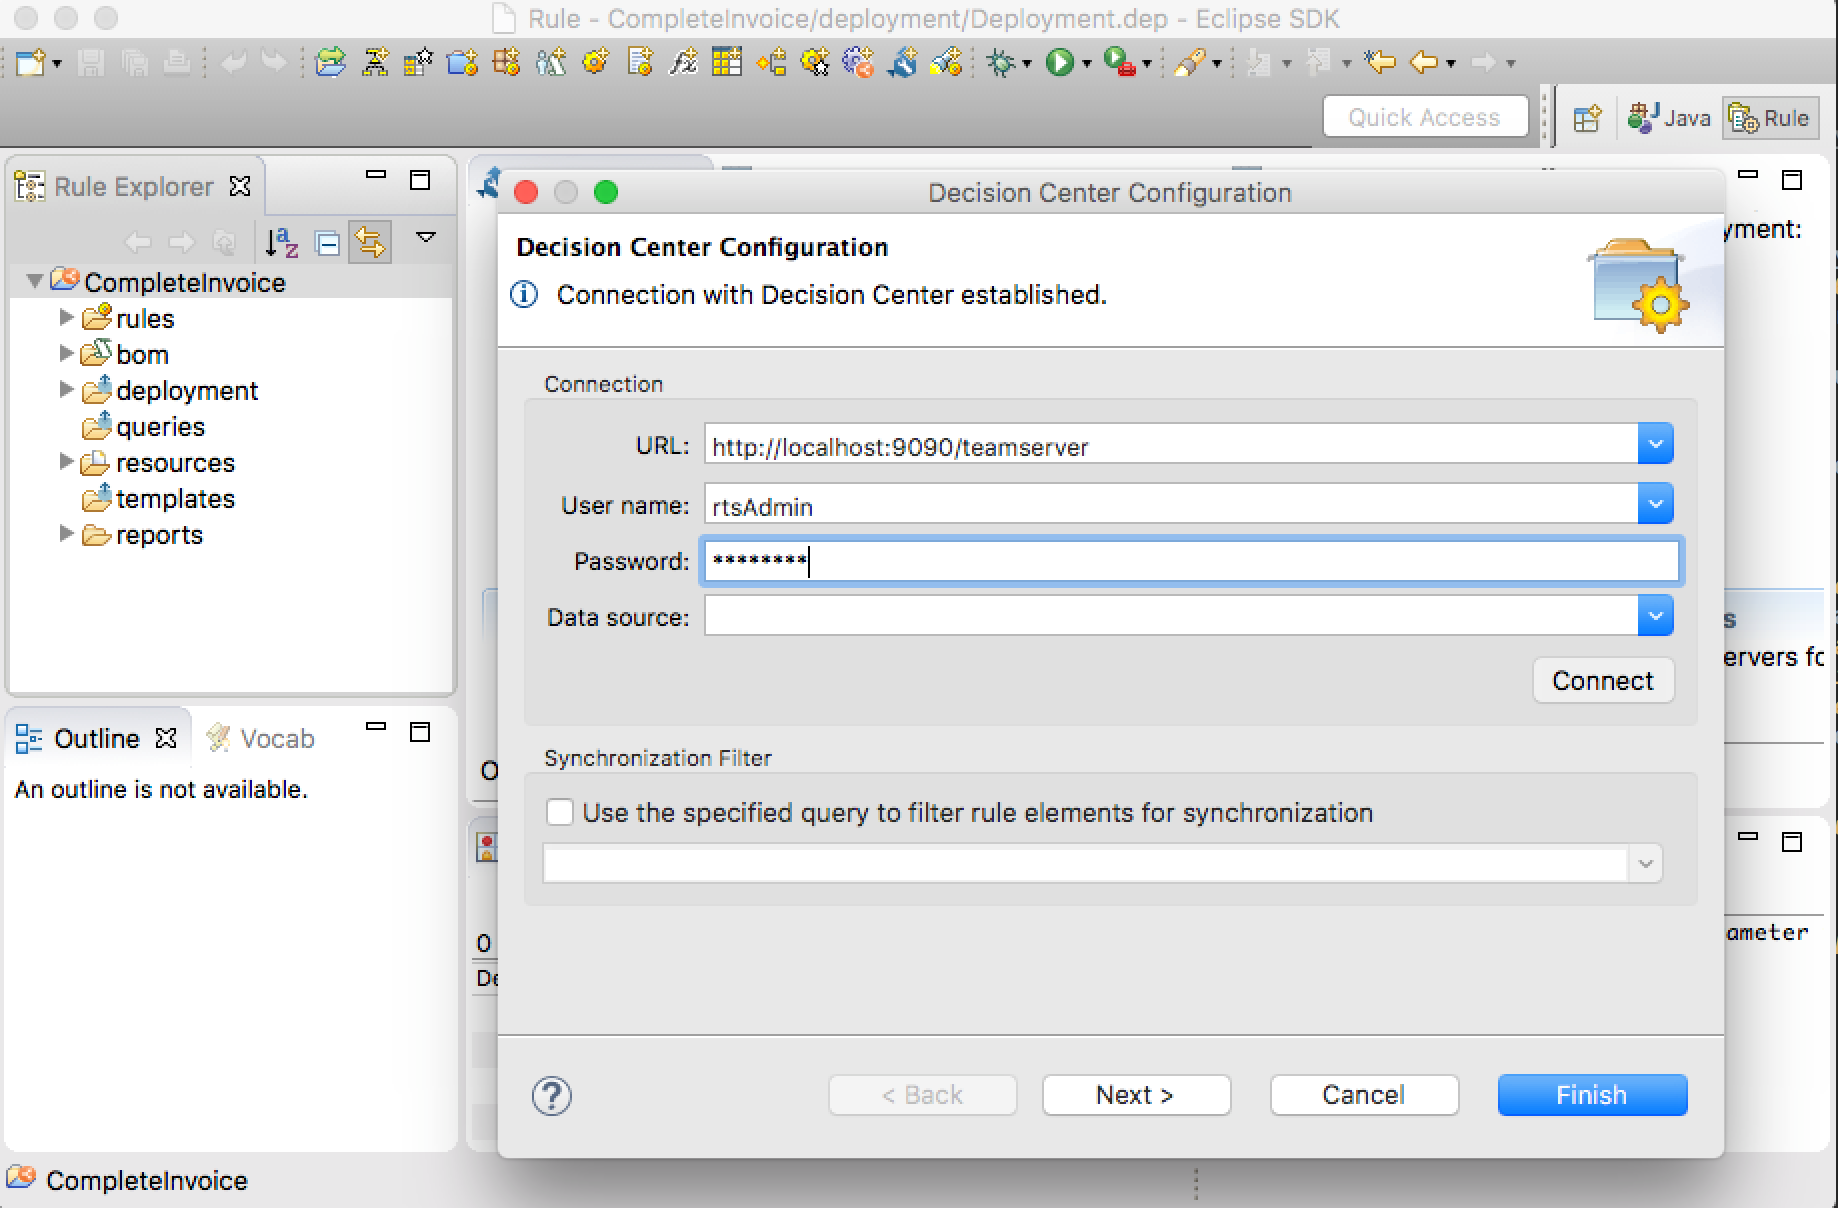
Should a discount or a tax need to be changed, Bea can simply connect to Decision Center and edit the corresponding rule or decision table.
Each time a new version of the Decision Service is ready, either Abu or Bea can redeploy it to Rule Execution Server without having to change anything to the RPA tasks.
This way, we have complete decoupling of the lifecycle and ownership of the decision logic from the RPA task authoring.
- IBM Robotic Process Automation with Automation Anywhere: main portal for IBM RPA with Automation Anywhere and IBM BPM / ODM integration scenarios.
- Using ODM to make a decision within an RPA activity: a sample describing how to invoke ODM from RPA through a 'JSON' metabot.
- Automation Anywhere and IBM ODM: a tutorial video from Neil Kolban (Salient Process) showing how to fill in an Excel spreadsheet from Automation Anywhere, requesting values from IBM ODM through a SOAP call
For issues relating to this sample, please use the GitHub issue tracker. We welcome contributions following our guidelines.
The source files found in this project are licensed under the Apache License 2.0.
© Copyright IBM Corporation 2017.