This file describes the usage of the OTA update module and capabilities of this application.
The OTA method used is through https using Wi-Fi
The firmware will be updated every 60 seconds. (Under test)
Clean the flash first
make erase_flash
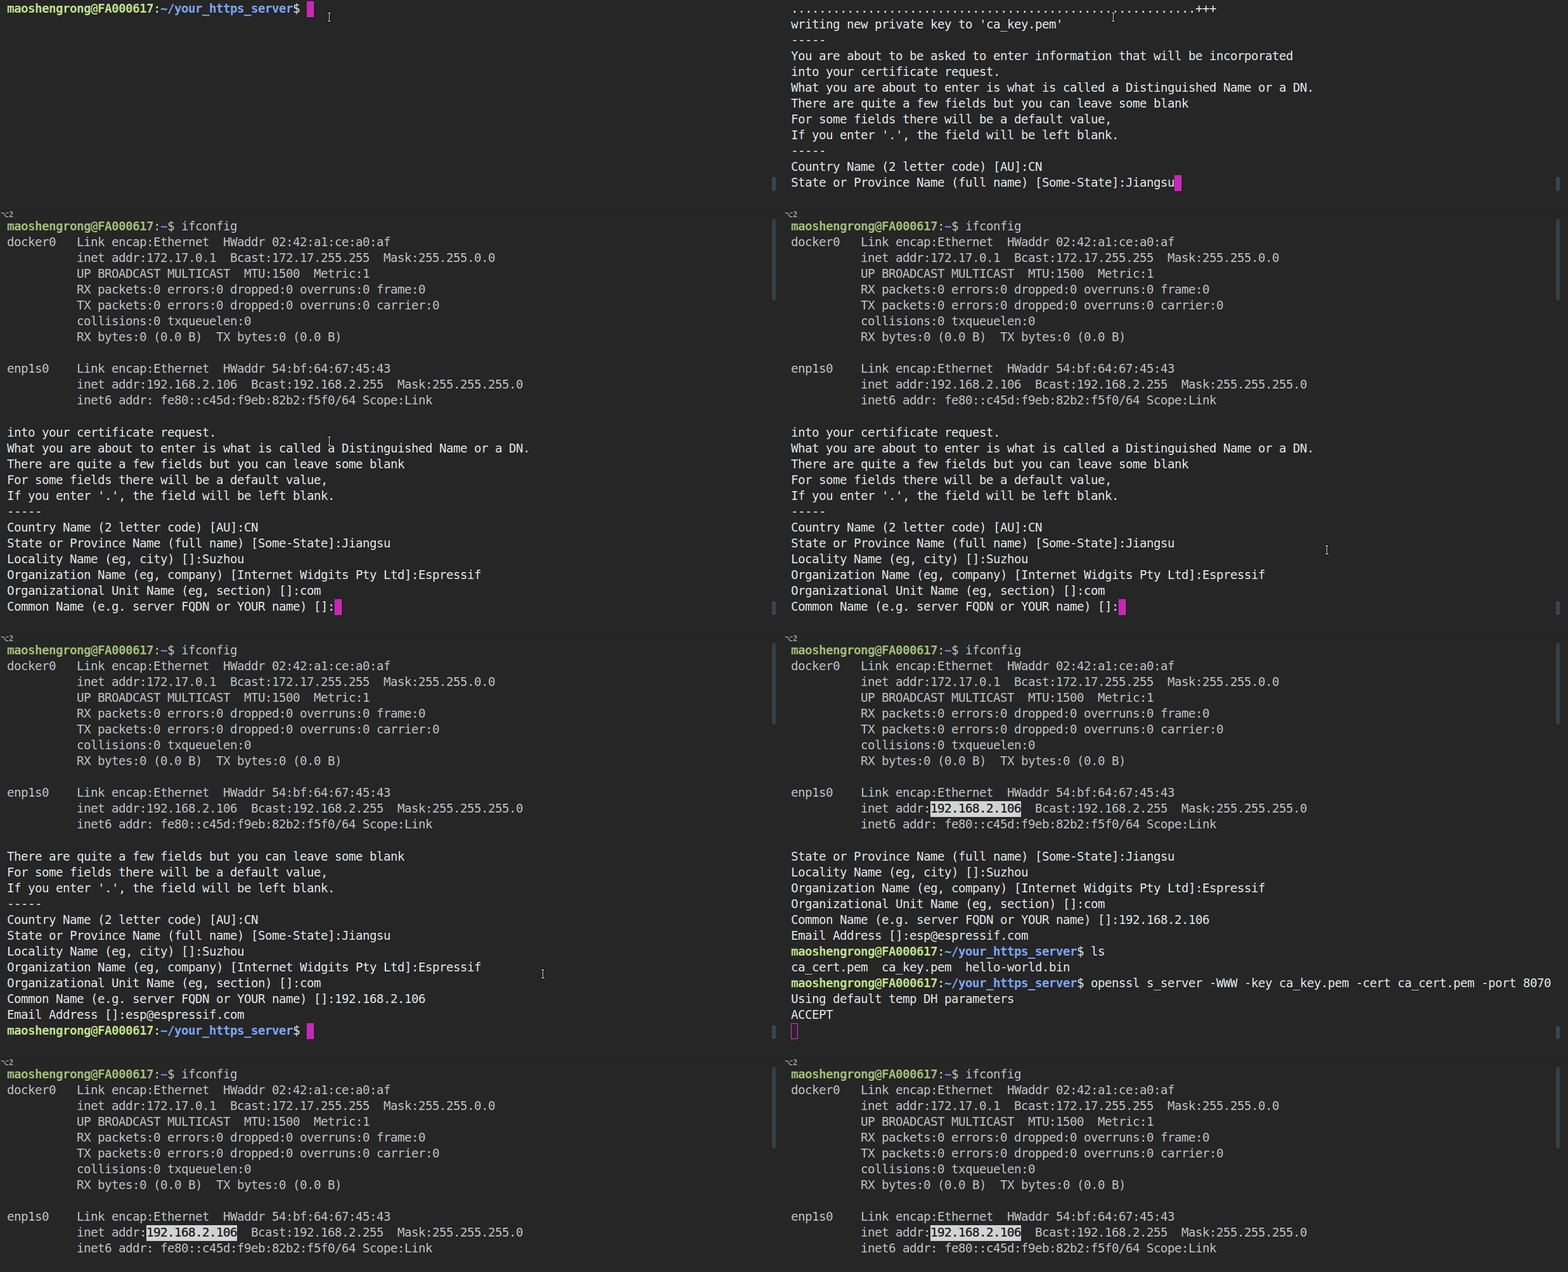
We need to create a self-signed certificate and run a simple HTTPS server as follows:
- Enter a directory where holds the root of the HTTPS server, e.g.
cd build. - To create a new self-signed certificate and key, you can simply run command
openssl req -x509 -newkey rsa:2048 -keyout ca_key.pem -out ca_cert.pem -days 365 -nodes.- When prompted for the
Common Name (CN), enter the name of the server that the ESP32 will connect to. Regarding this it is probably the IP address. The HTTPS client will make sure that theCNmatches the address given in the HTTPS URL.
- When prompted for the
- To start the HTTPS server, you can simply run command
openssl s_server -WWW -key ca_key.pem -cert ca_cert.pem -port 8070. - In the same directory, there should be the firmware (e.g. hello-world.bin) that ESP32 will download later. It can be any other ESP-IDF application as well, as long as you also update the
Firmware Upgrade URLin the menuconfig. The only difference is that when flashed via serial the binary is flashed to the "factory" app partition, and an OTA update flashes to an OTA app partition. - Notes: If you have any firewall software running that will block incoming access to port 8070, configure it to allow access while running the example.
Before you flash , make sure to copy the generated (inside build fonder) certificate to server_certs directory inside OTA directory so that it can be flashed into ESP32 together with the firmware, e.g. cp ca_cert.pem ../server_certs/.
- In the
menuconfigmark theOTA configundercustom configuration submenu - Then set up Wi-Fi SSID and password
- Also set the corresponding server address
https://<host-ip-address>:<host-port>/<firmware-image-filename>e.g.https://192.168.2.106:8070/hello-world.bin - The firmware image (.bin file) should be locate in the build folder
FILE:hello-world.bin
ACCEPTAfter create the certificates, you can create a container using the Dockerfile located in the server_certs files, then:
-
To create the container you can use
sudo docker build -t ota-server . -
Then run it
docker run -p 8070:8070 --name ota-server -it ota-server, if everything goes OK you shoud see a message like:ACCEPT -
Finally you can go into the container terminal usign
sudo docker exec -it ota-server bashand executesource update.shto update the .bin files, by download them for a github repo for example.

